To help my thought process of coming up with a present for my niece, I was looking through various piles of cut-offs and special bits of wood I’ve accumulated over the years. While sometimes there’s a specific idea forming first, they often emerge from seeing that one piece of wood, my brain taking a liking to it in the moment and starting to turn it into some sort of design.
This time it was a rather thin, small leftover of Padauk, a quite intensely red, exotic wood I’ve used in a few projects before. I was given a slim plank or two as a freebie by a generous employee at a local carpentry shop back when I bought walnut for my first proper project. That was many years ago and while the business has closed down since, my appreciation for such a gift still endures to this day, happy to have it at hand and turn it into something precious for someone.
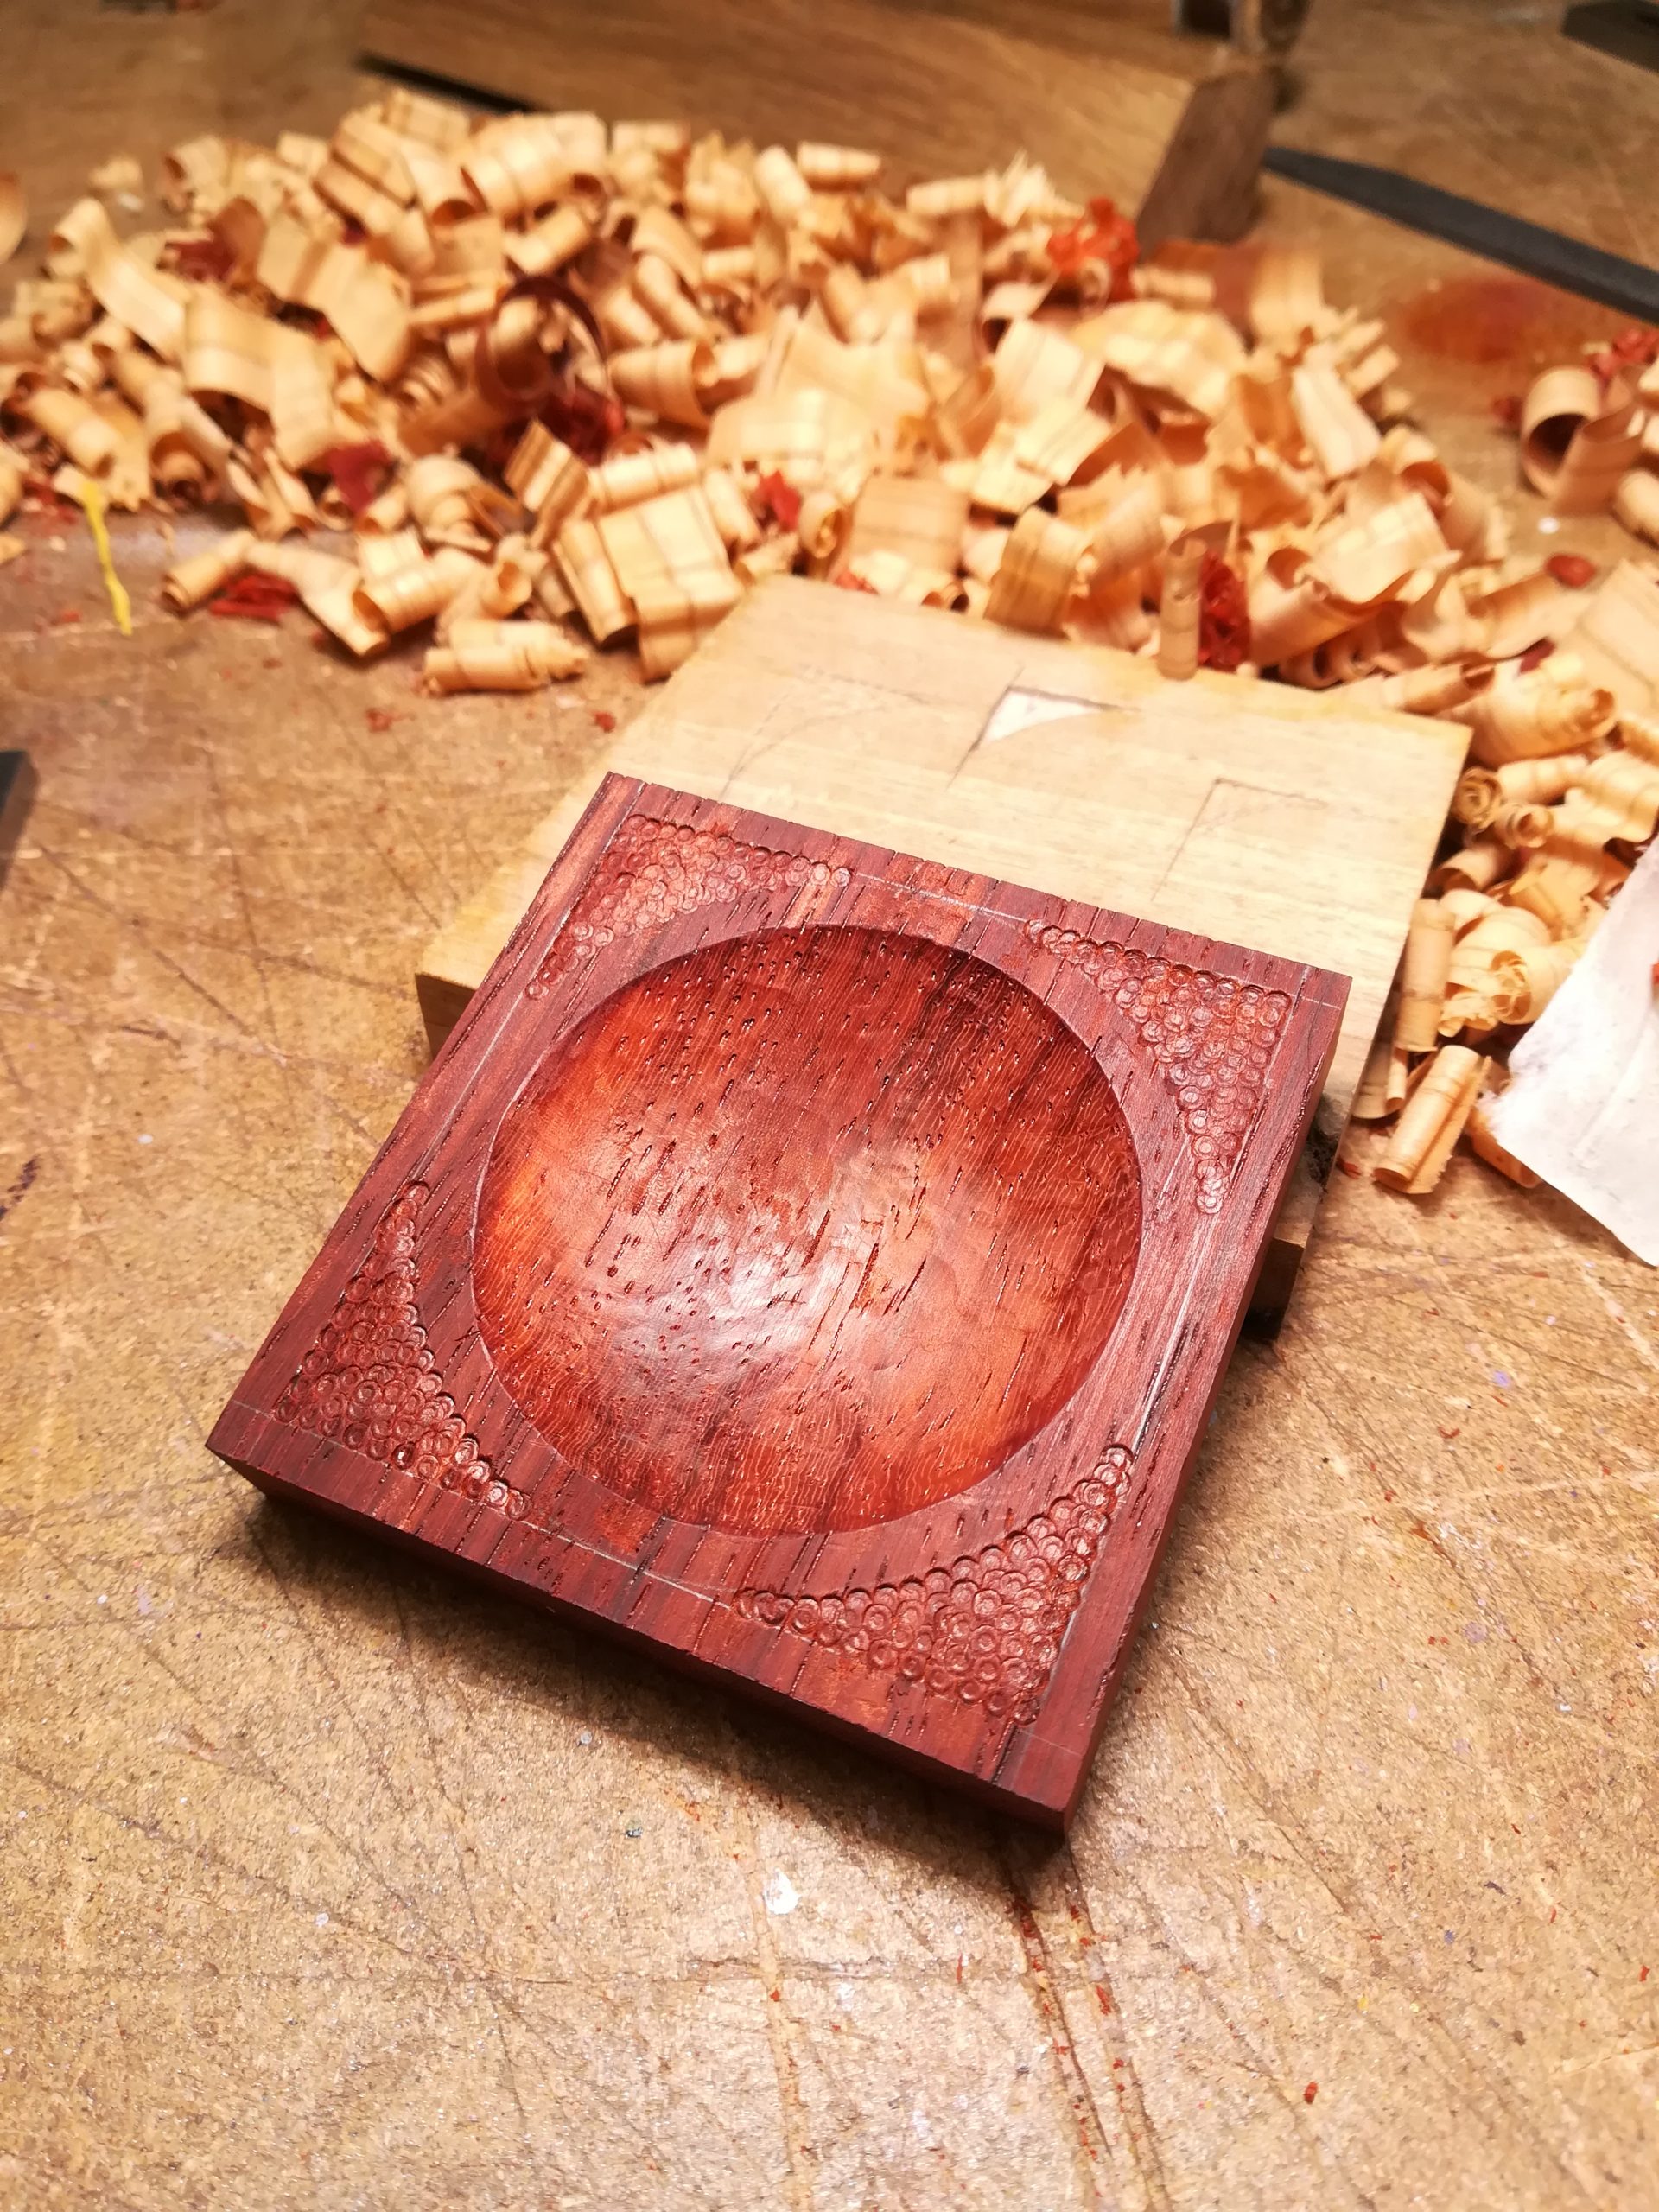
With the material chosen, I decided upon a shallow bowl and so I grabbed my dividers to mark a circle which I’d then carve out with my favourite gouge.
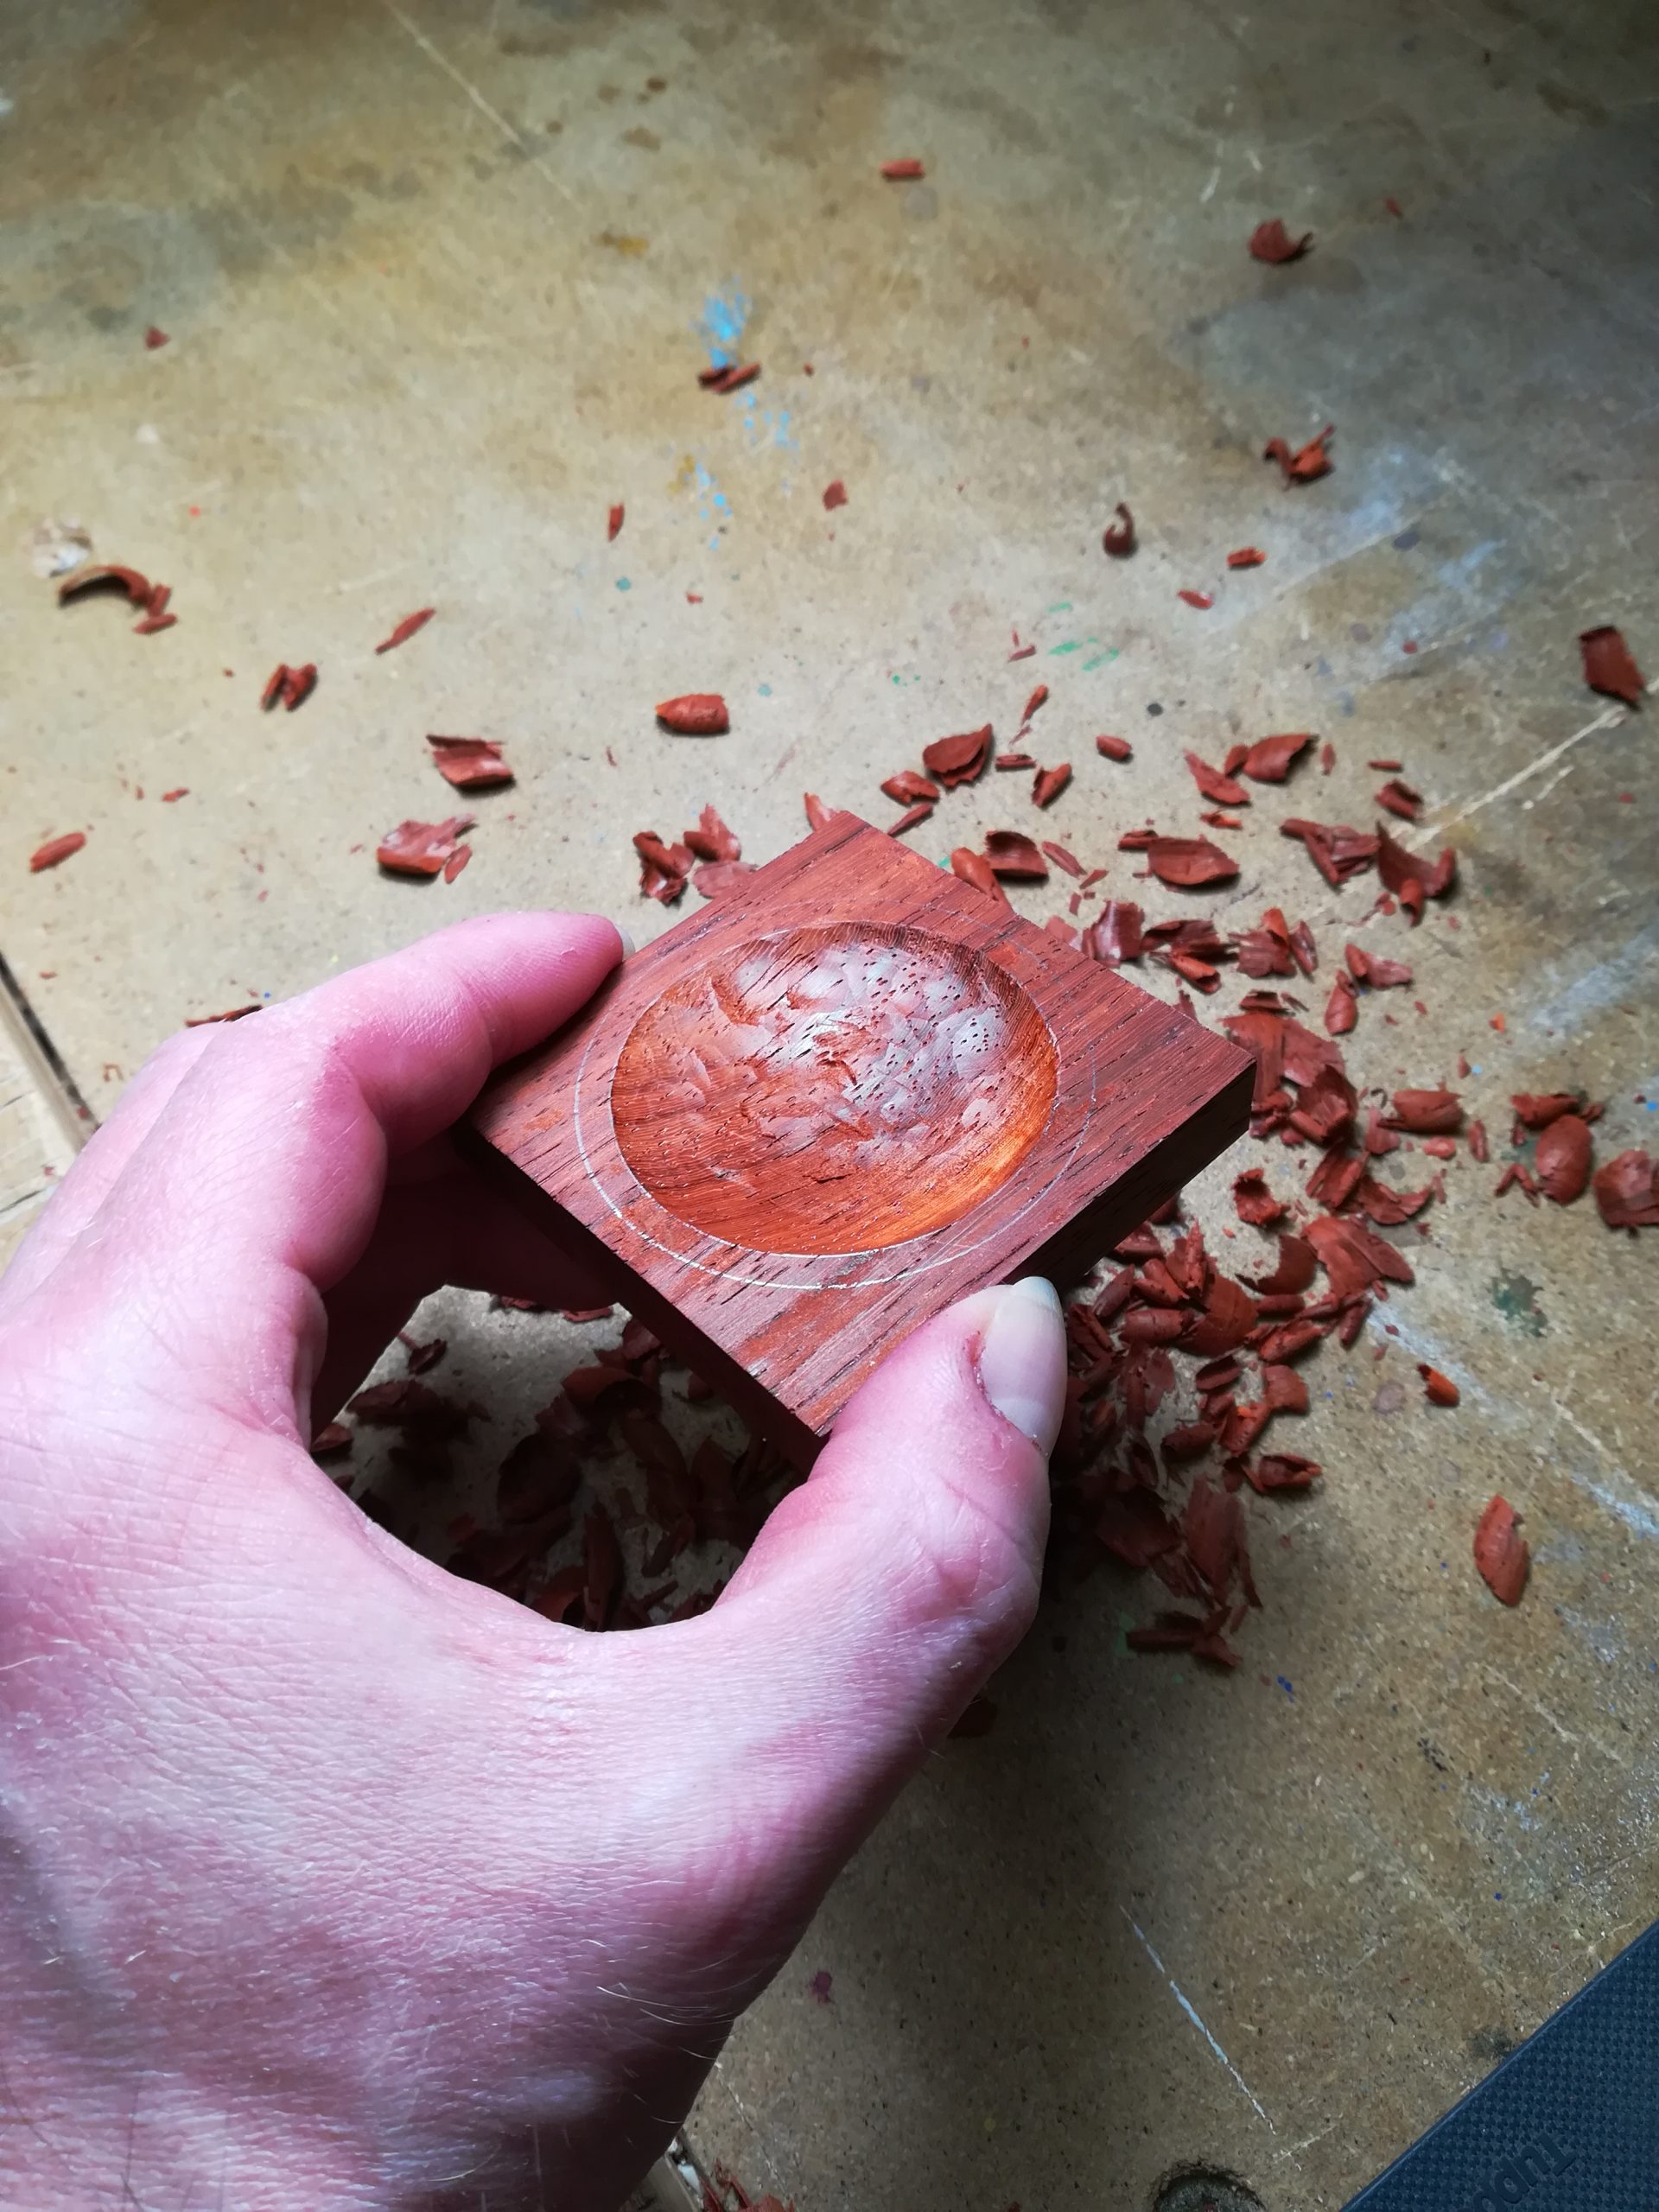
There’s something about working with a gouge I really enjoy. That curved pushing, slicing motion, ideally resulting in a perfectly smooth little dimple. Unless of course you’re going against the grain in some form and it isn’t smooth at all and at worst getting you some mean tear out. In which case you try to do the same cut from another angle if possible or lighter, slower and with more of a slicing motion.
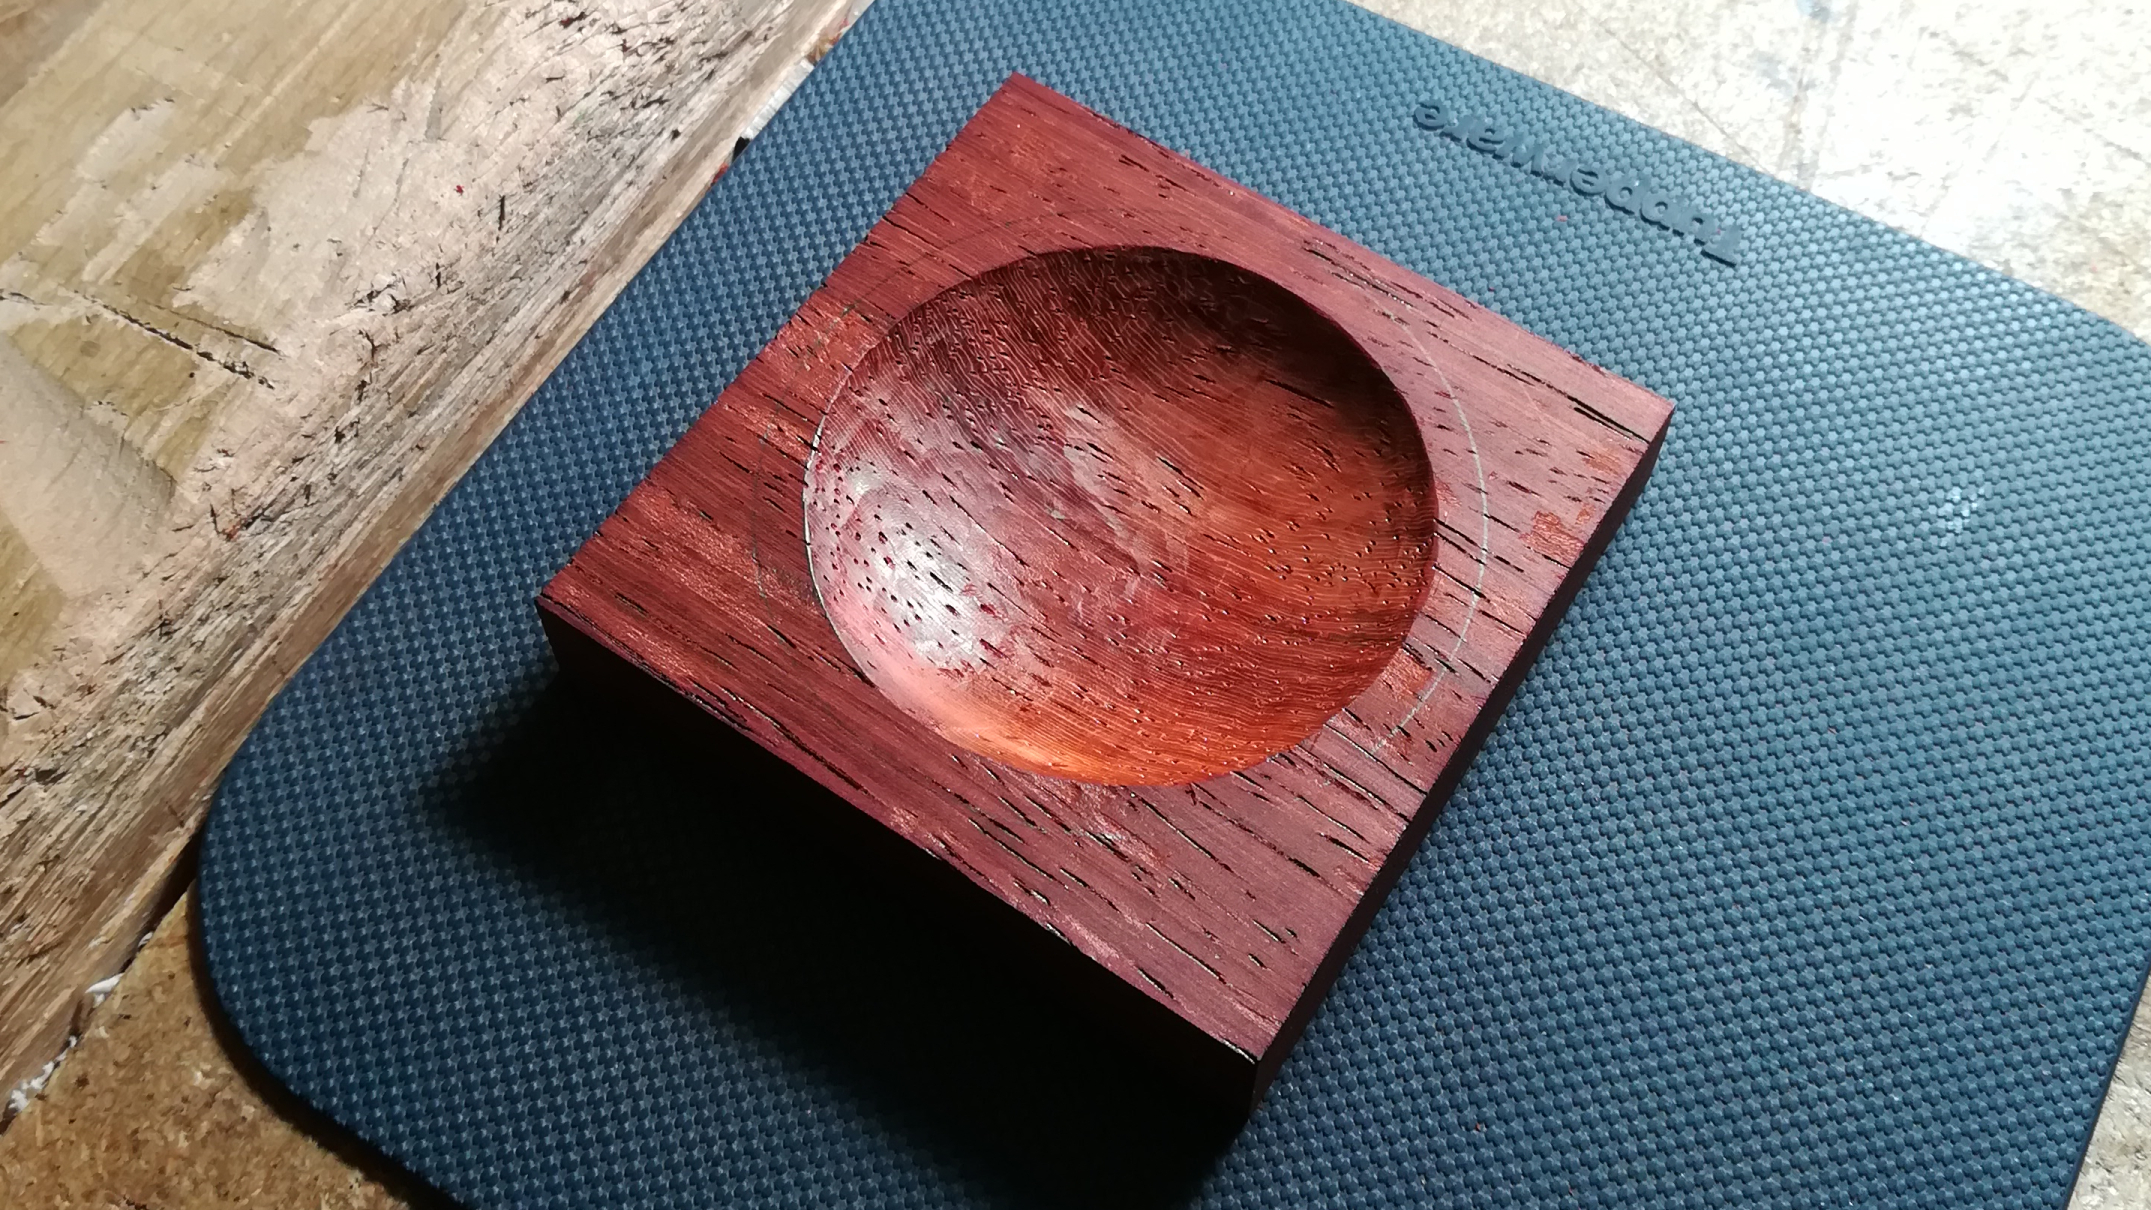
After roughing out the big form, I continue with smaller cuts to get an evenly textured look and ensure the circle’s edge is as nicely round as it can be. Since I usually don’t do any sanding (No fun at all and it rips wood fibres rather than cutting them cleanly, as a sharp edged tool does.), I inspect the piece for any tear out or unwanted surface marks and try to get rid of those with the most gentle and light cuts I can. Padauk is quite prone to tearing out in spots even when not going against the grain, so it can be a challenge to achieve my desired quality. That, along with the irritation its sawdust causes on my skin makes for a wood I highly appreciate for its beauty, but which has me curse myself a little anytime I work with it. (A lot of exotic woods are rather oily and contain irritants or sensitizers. Which as far as I know is due to adapting to certain climates and fauna, from a need to be more resistant and durable.)
Despite the strong colour, a small piece of square wood with a bowl cut out isn’t quite that fancy, so it was time for something extra and one of my favourite things: legs!
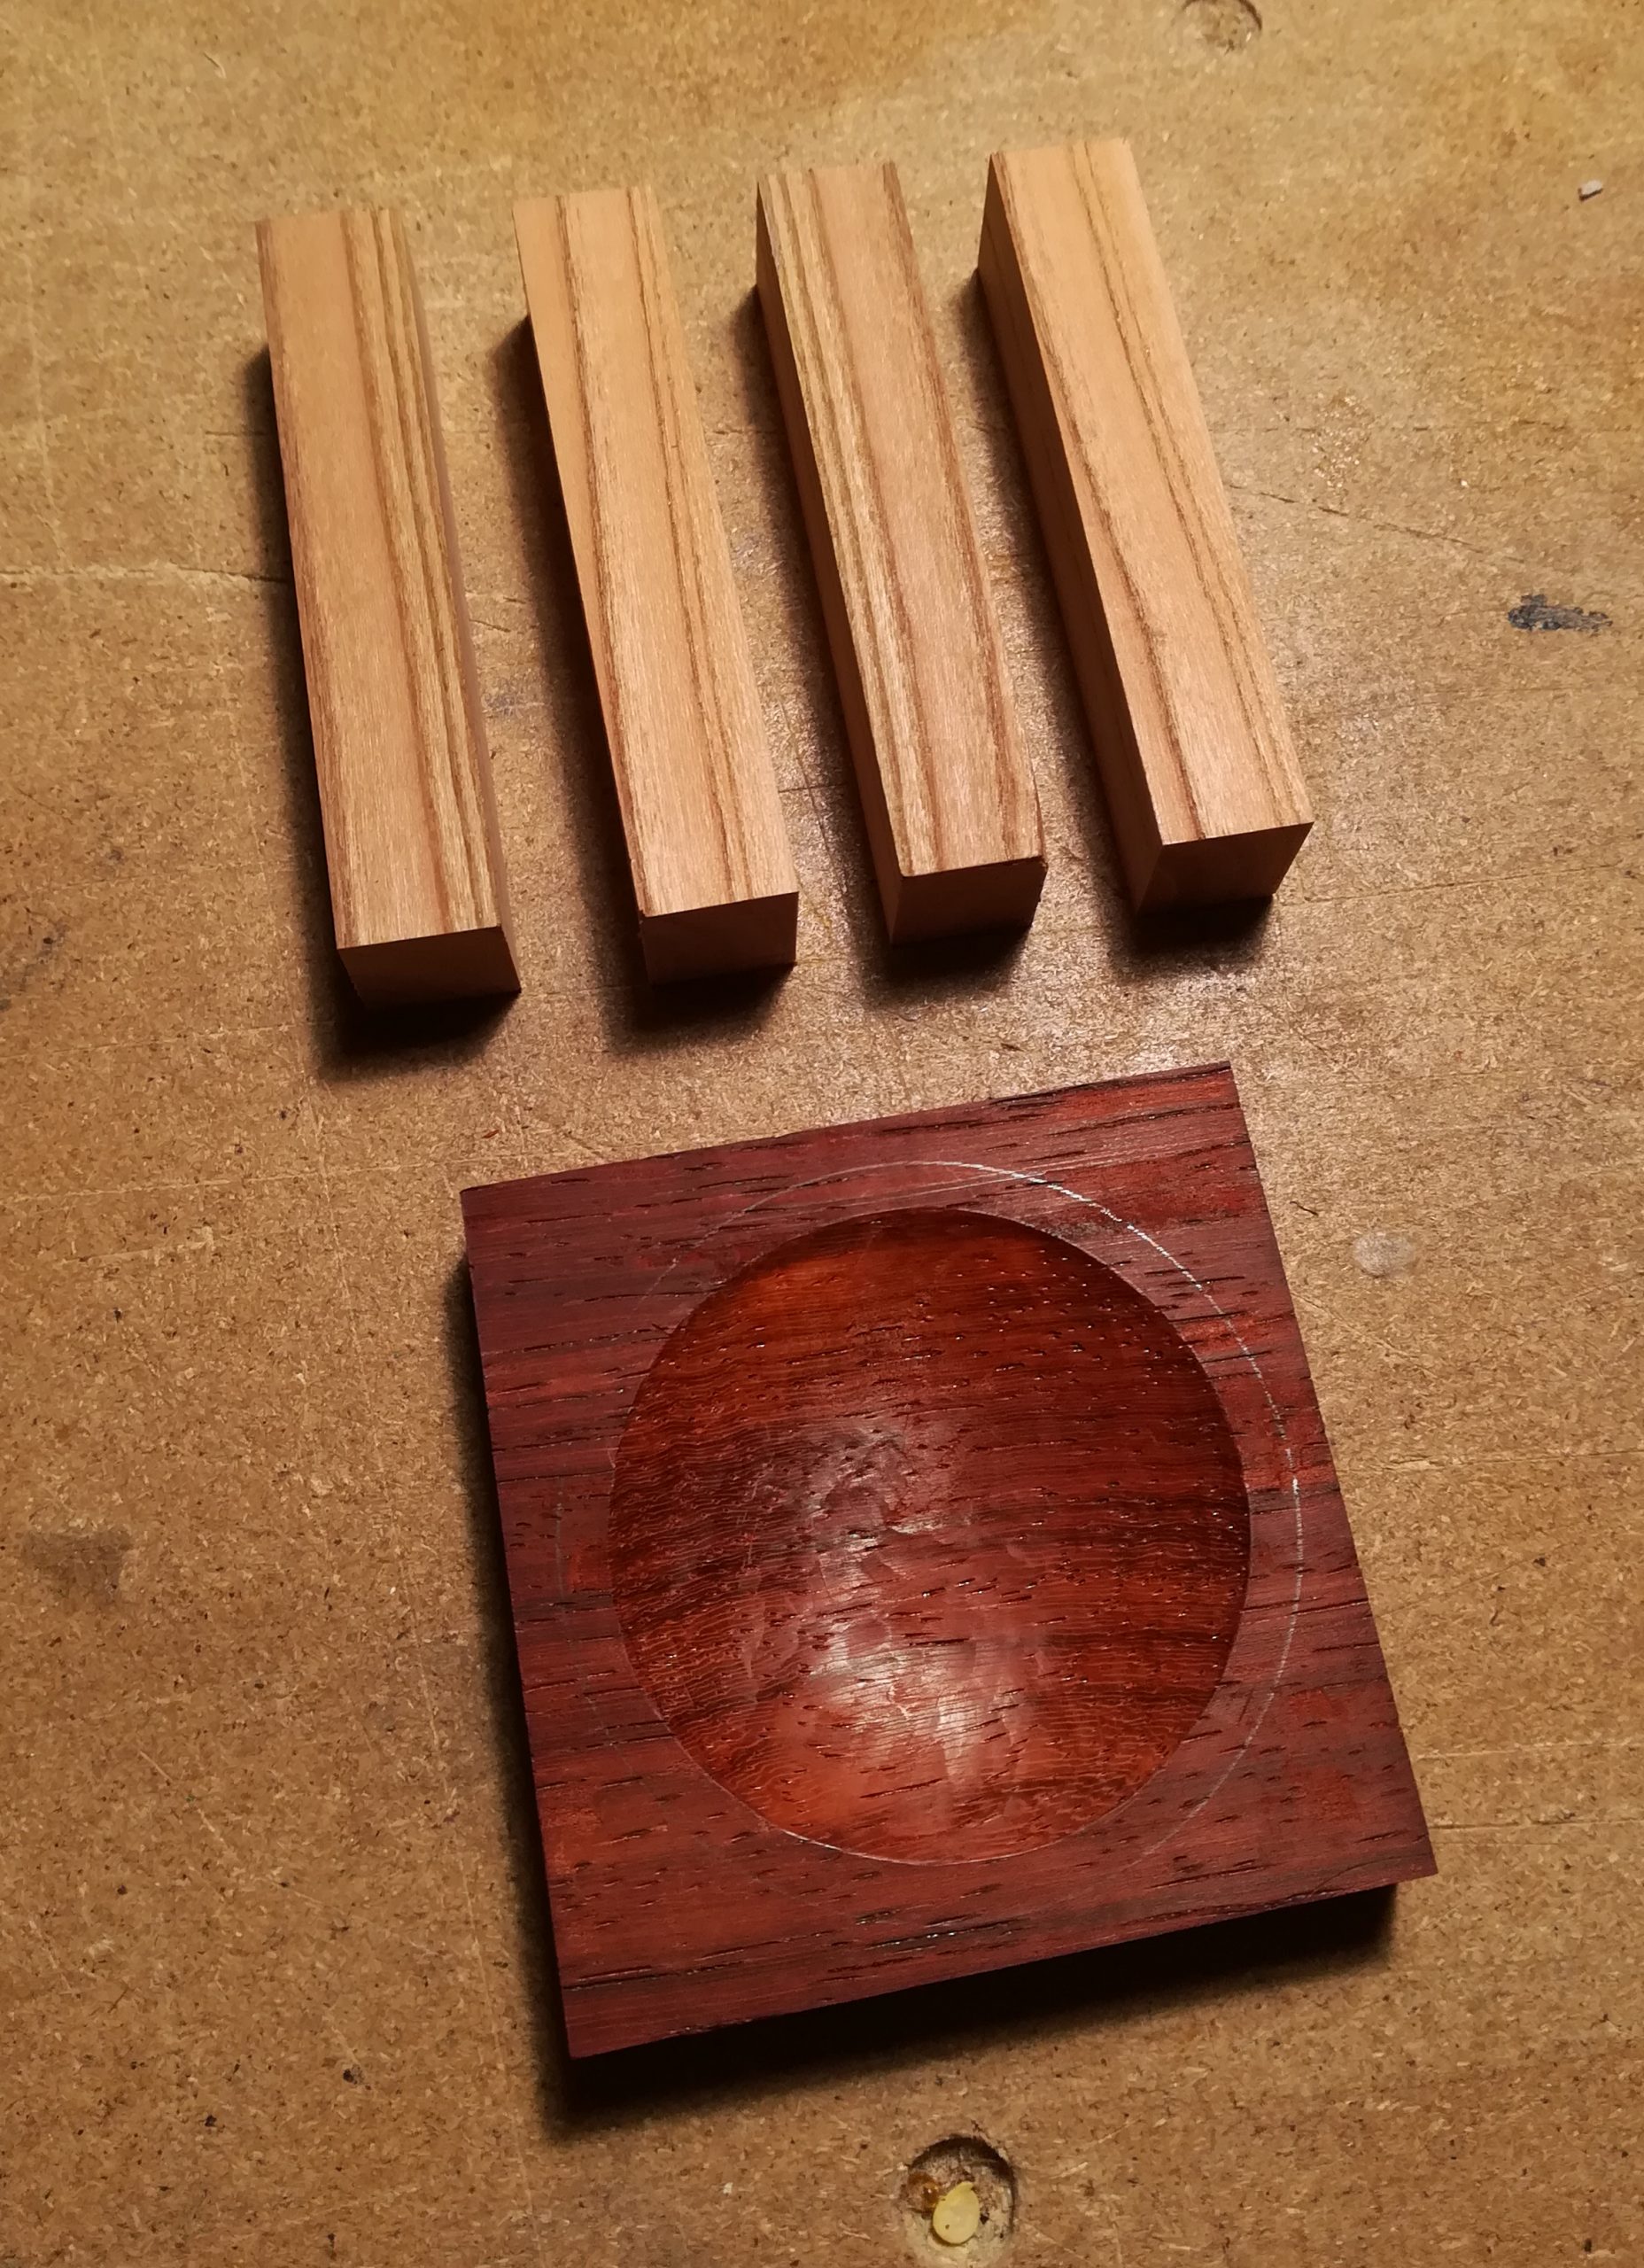
So back to the cut-off pile it was (not actually one pile, or even an actual pile), to pick something that would harmonize with the top. The small block of choice was one of Applewood, warm in colour going well with the Padauk. Furthermore it comes from a tree I cut down in our garden, so the final piece would consist of something intense and exotic from far away, balanced with something soft and personal from right here. Such little things I feel add a certain charm and story that I try to incorporate as much as I can. At the very least it supplies something to talk about when presenting the artwork.
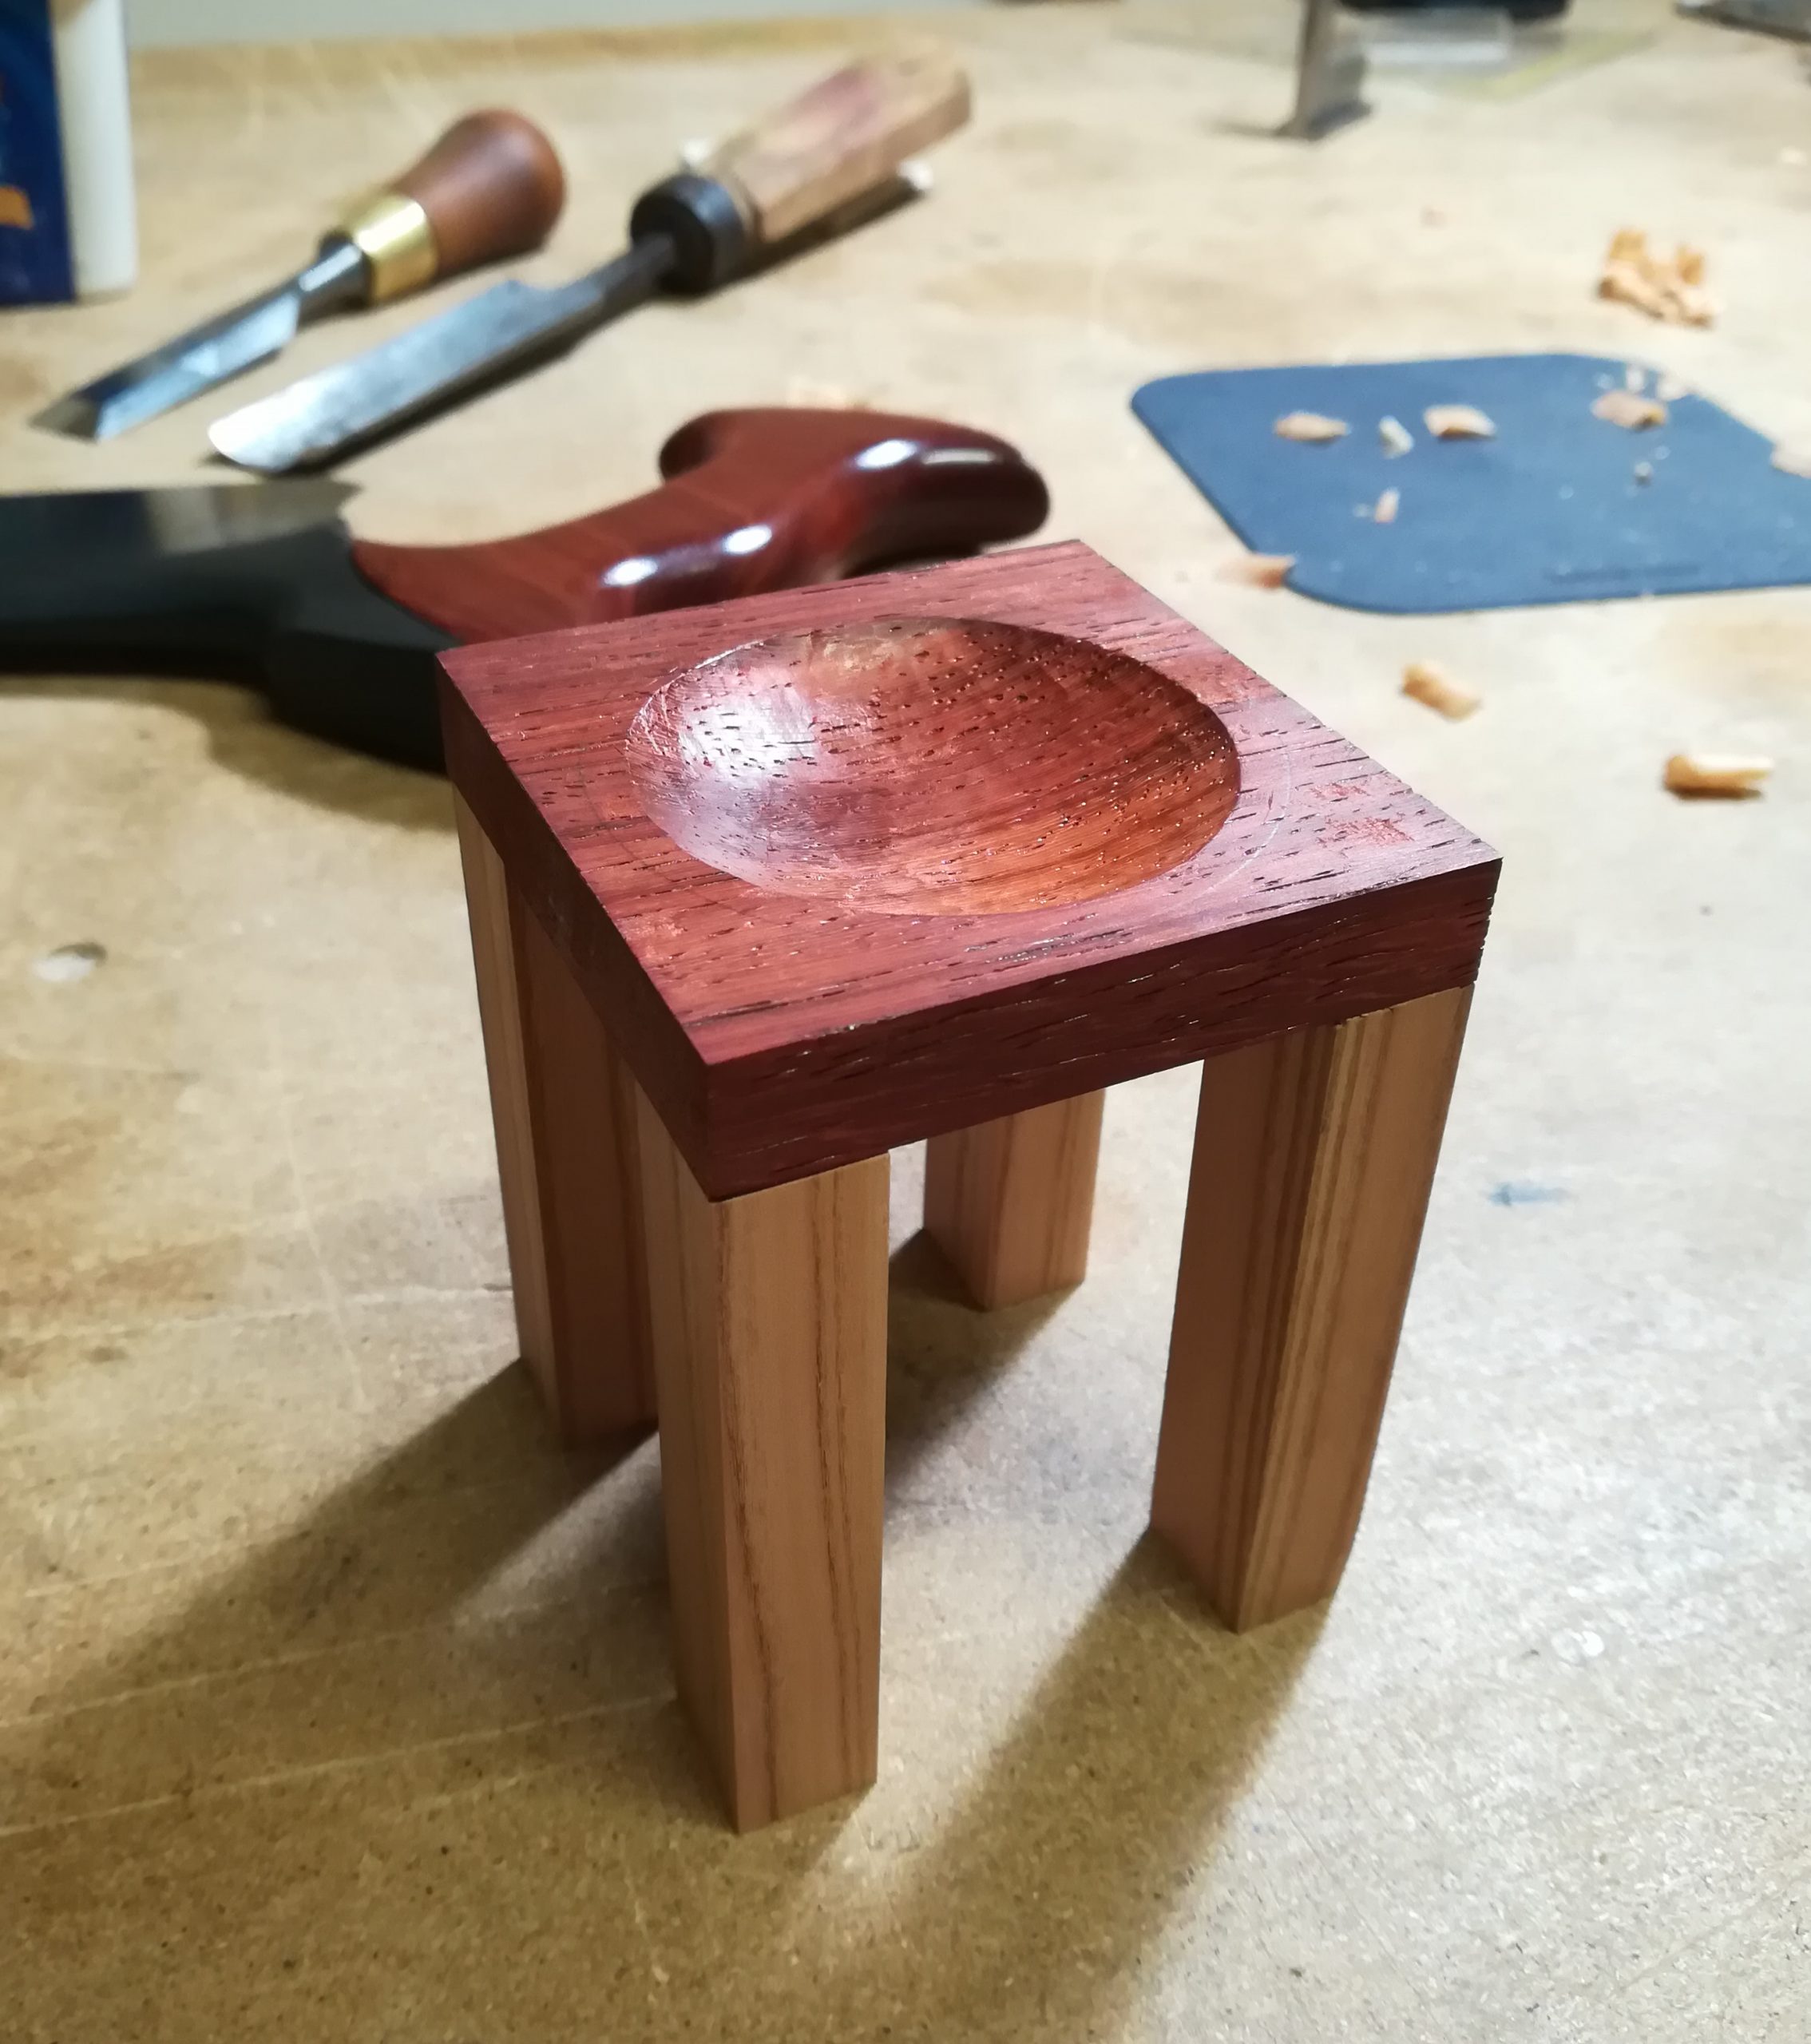
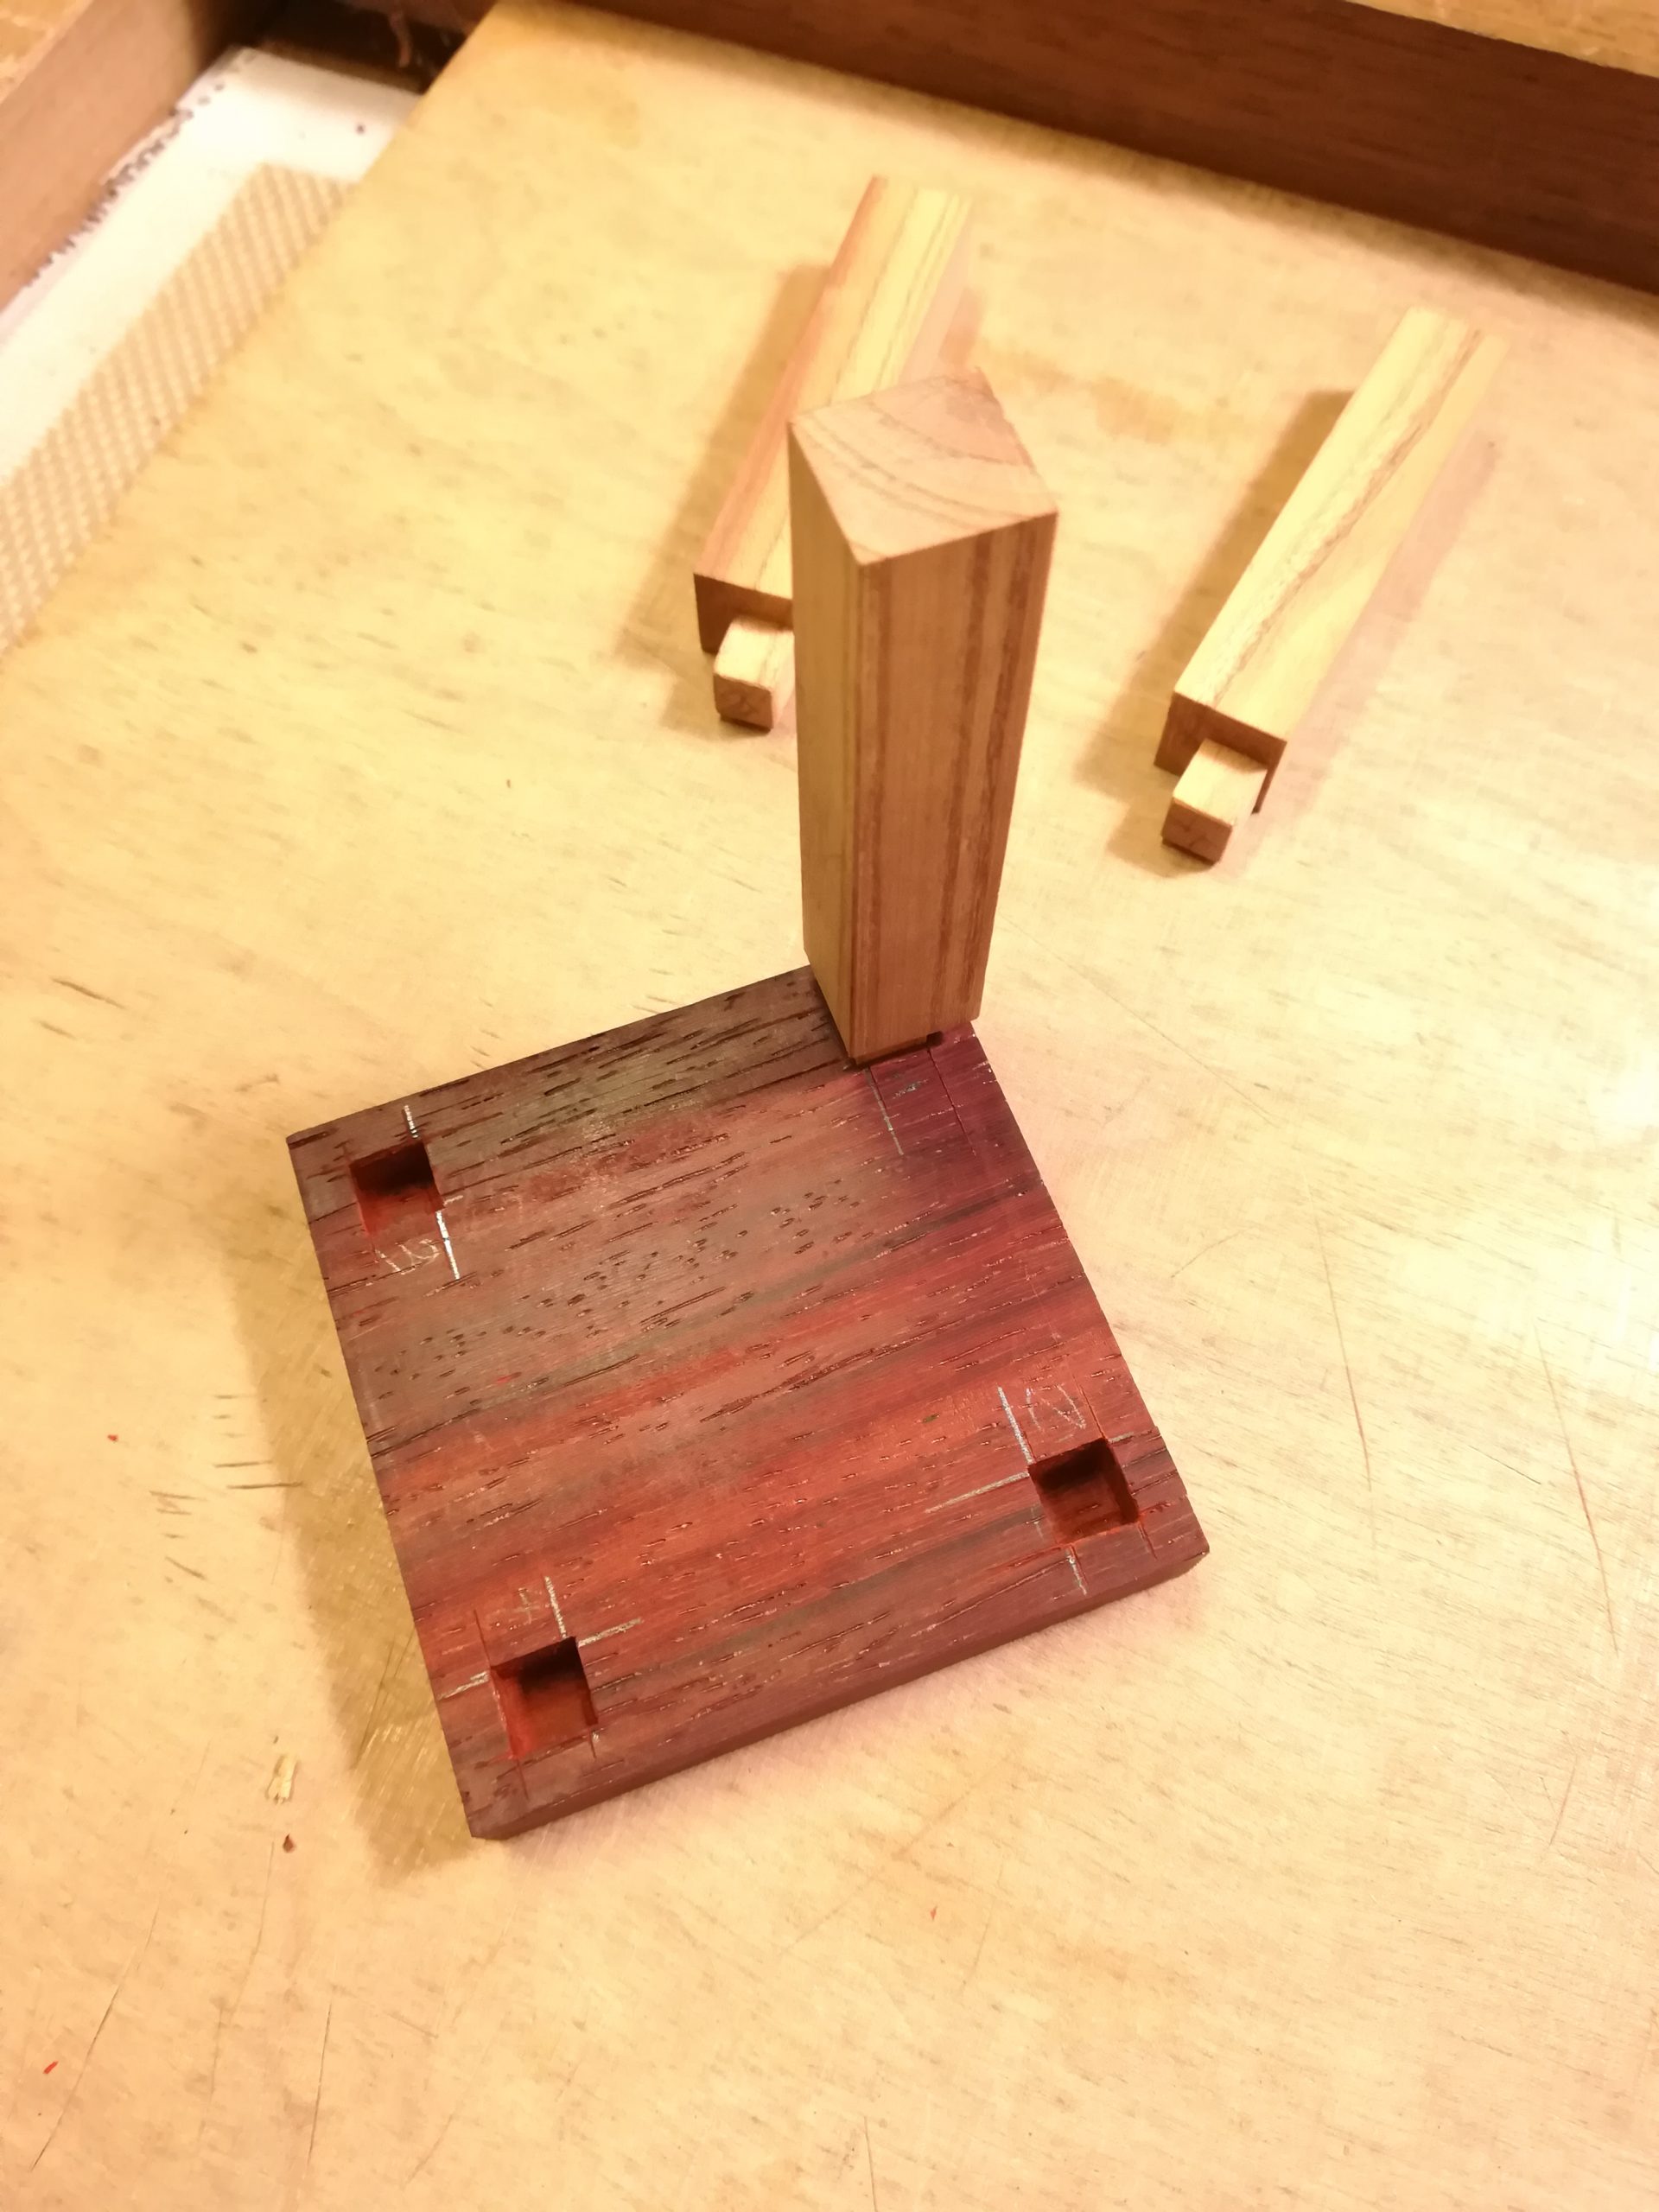
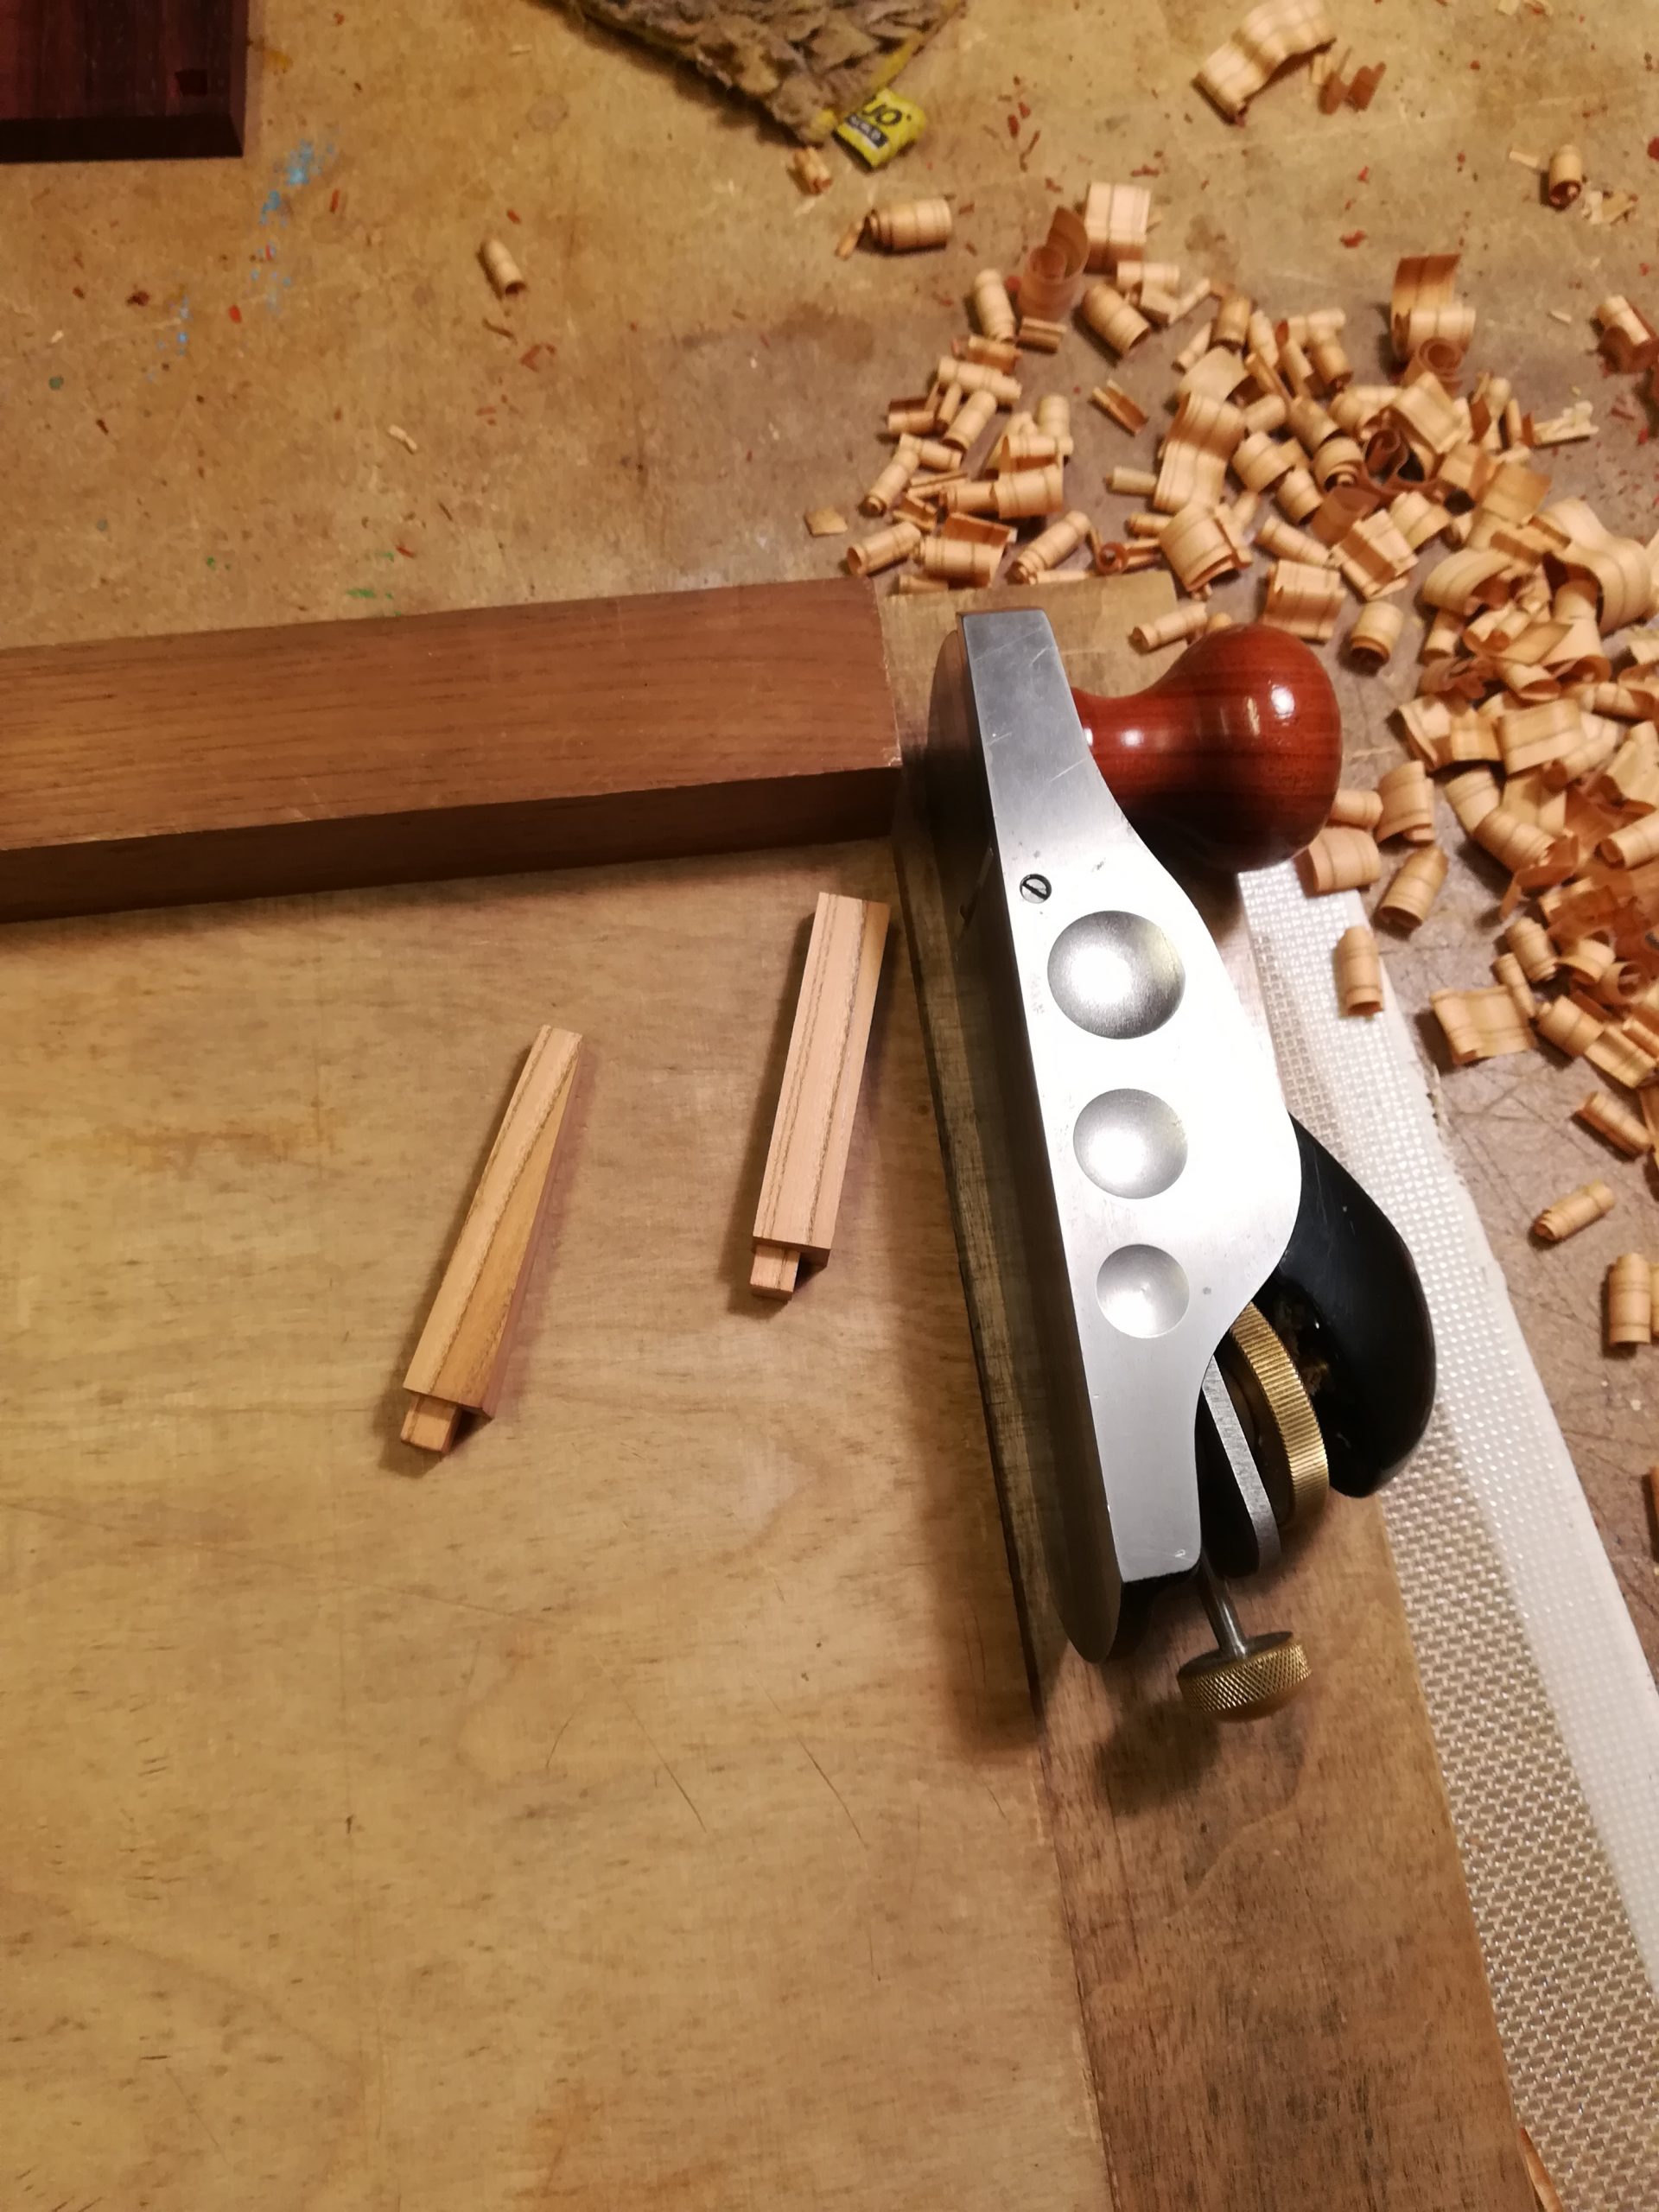
Since those legs won’t just stay in place on their own, it’s time to cut some tenon and mortice joints to make sure they will.
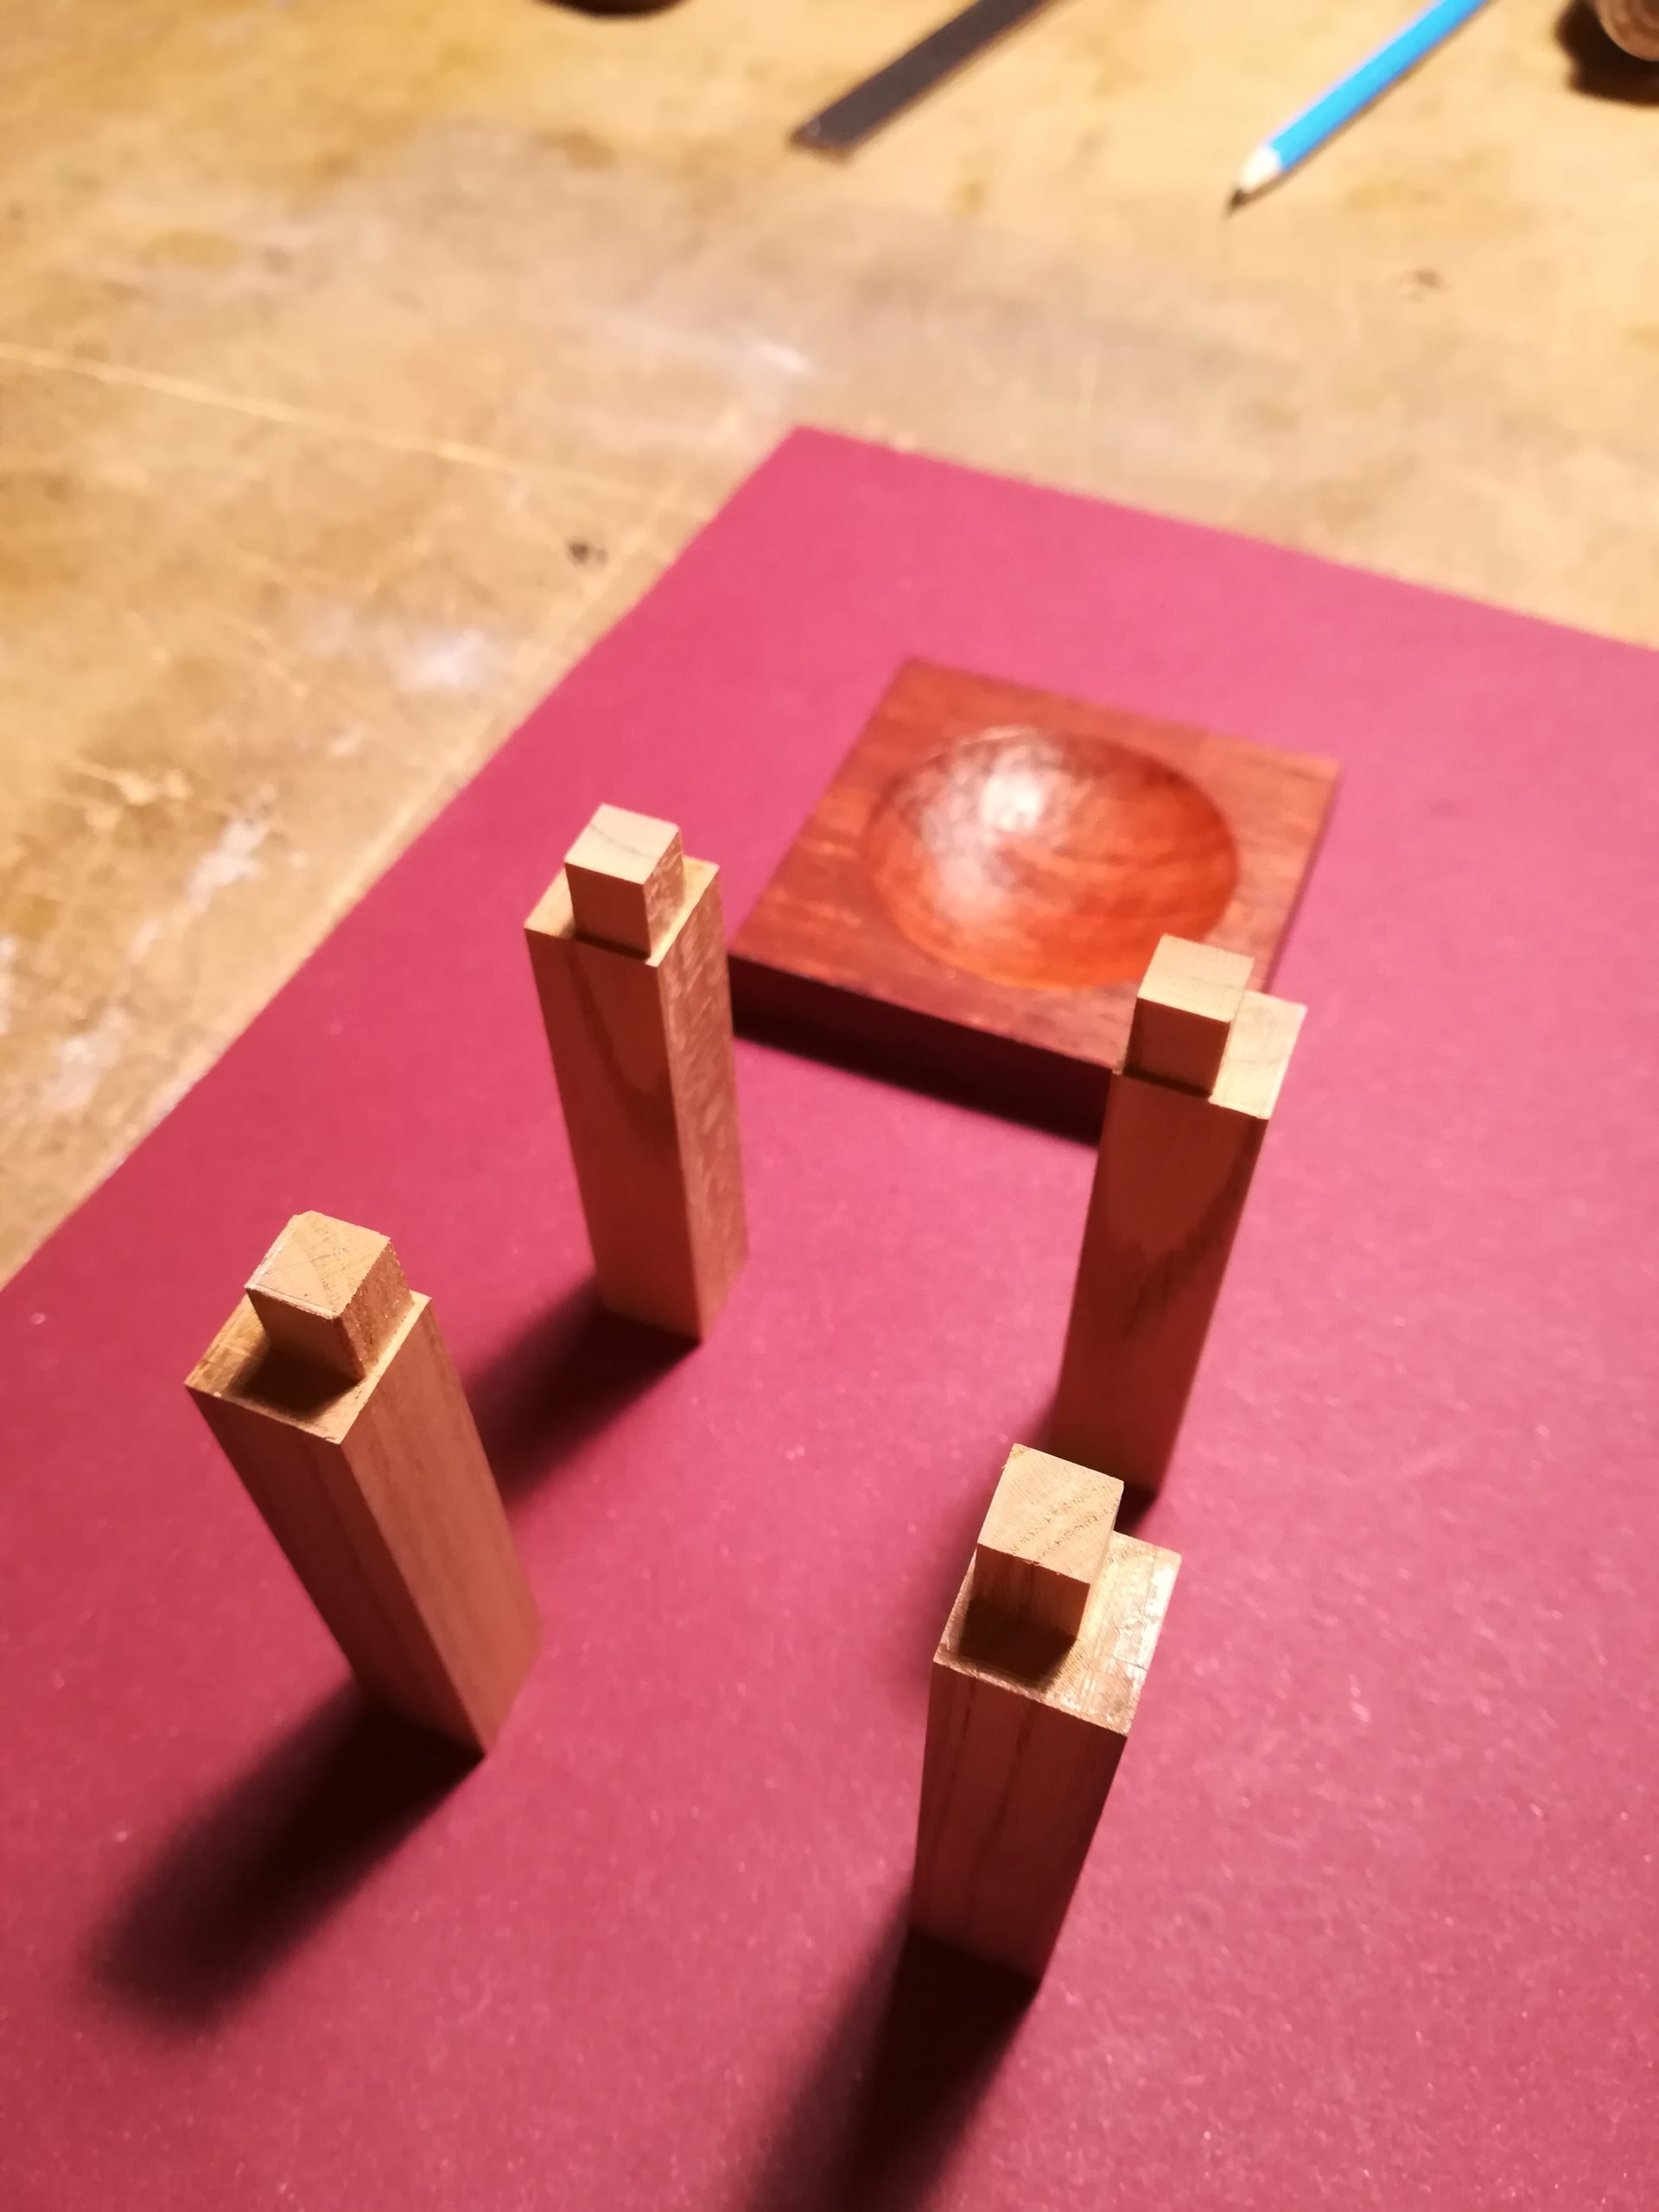
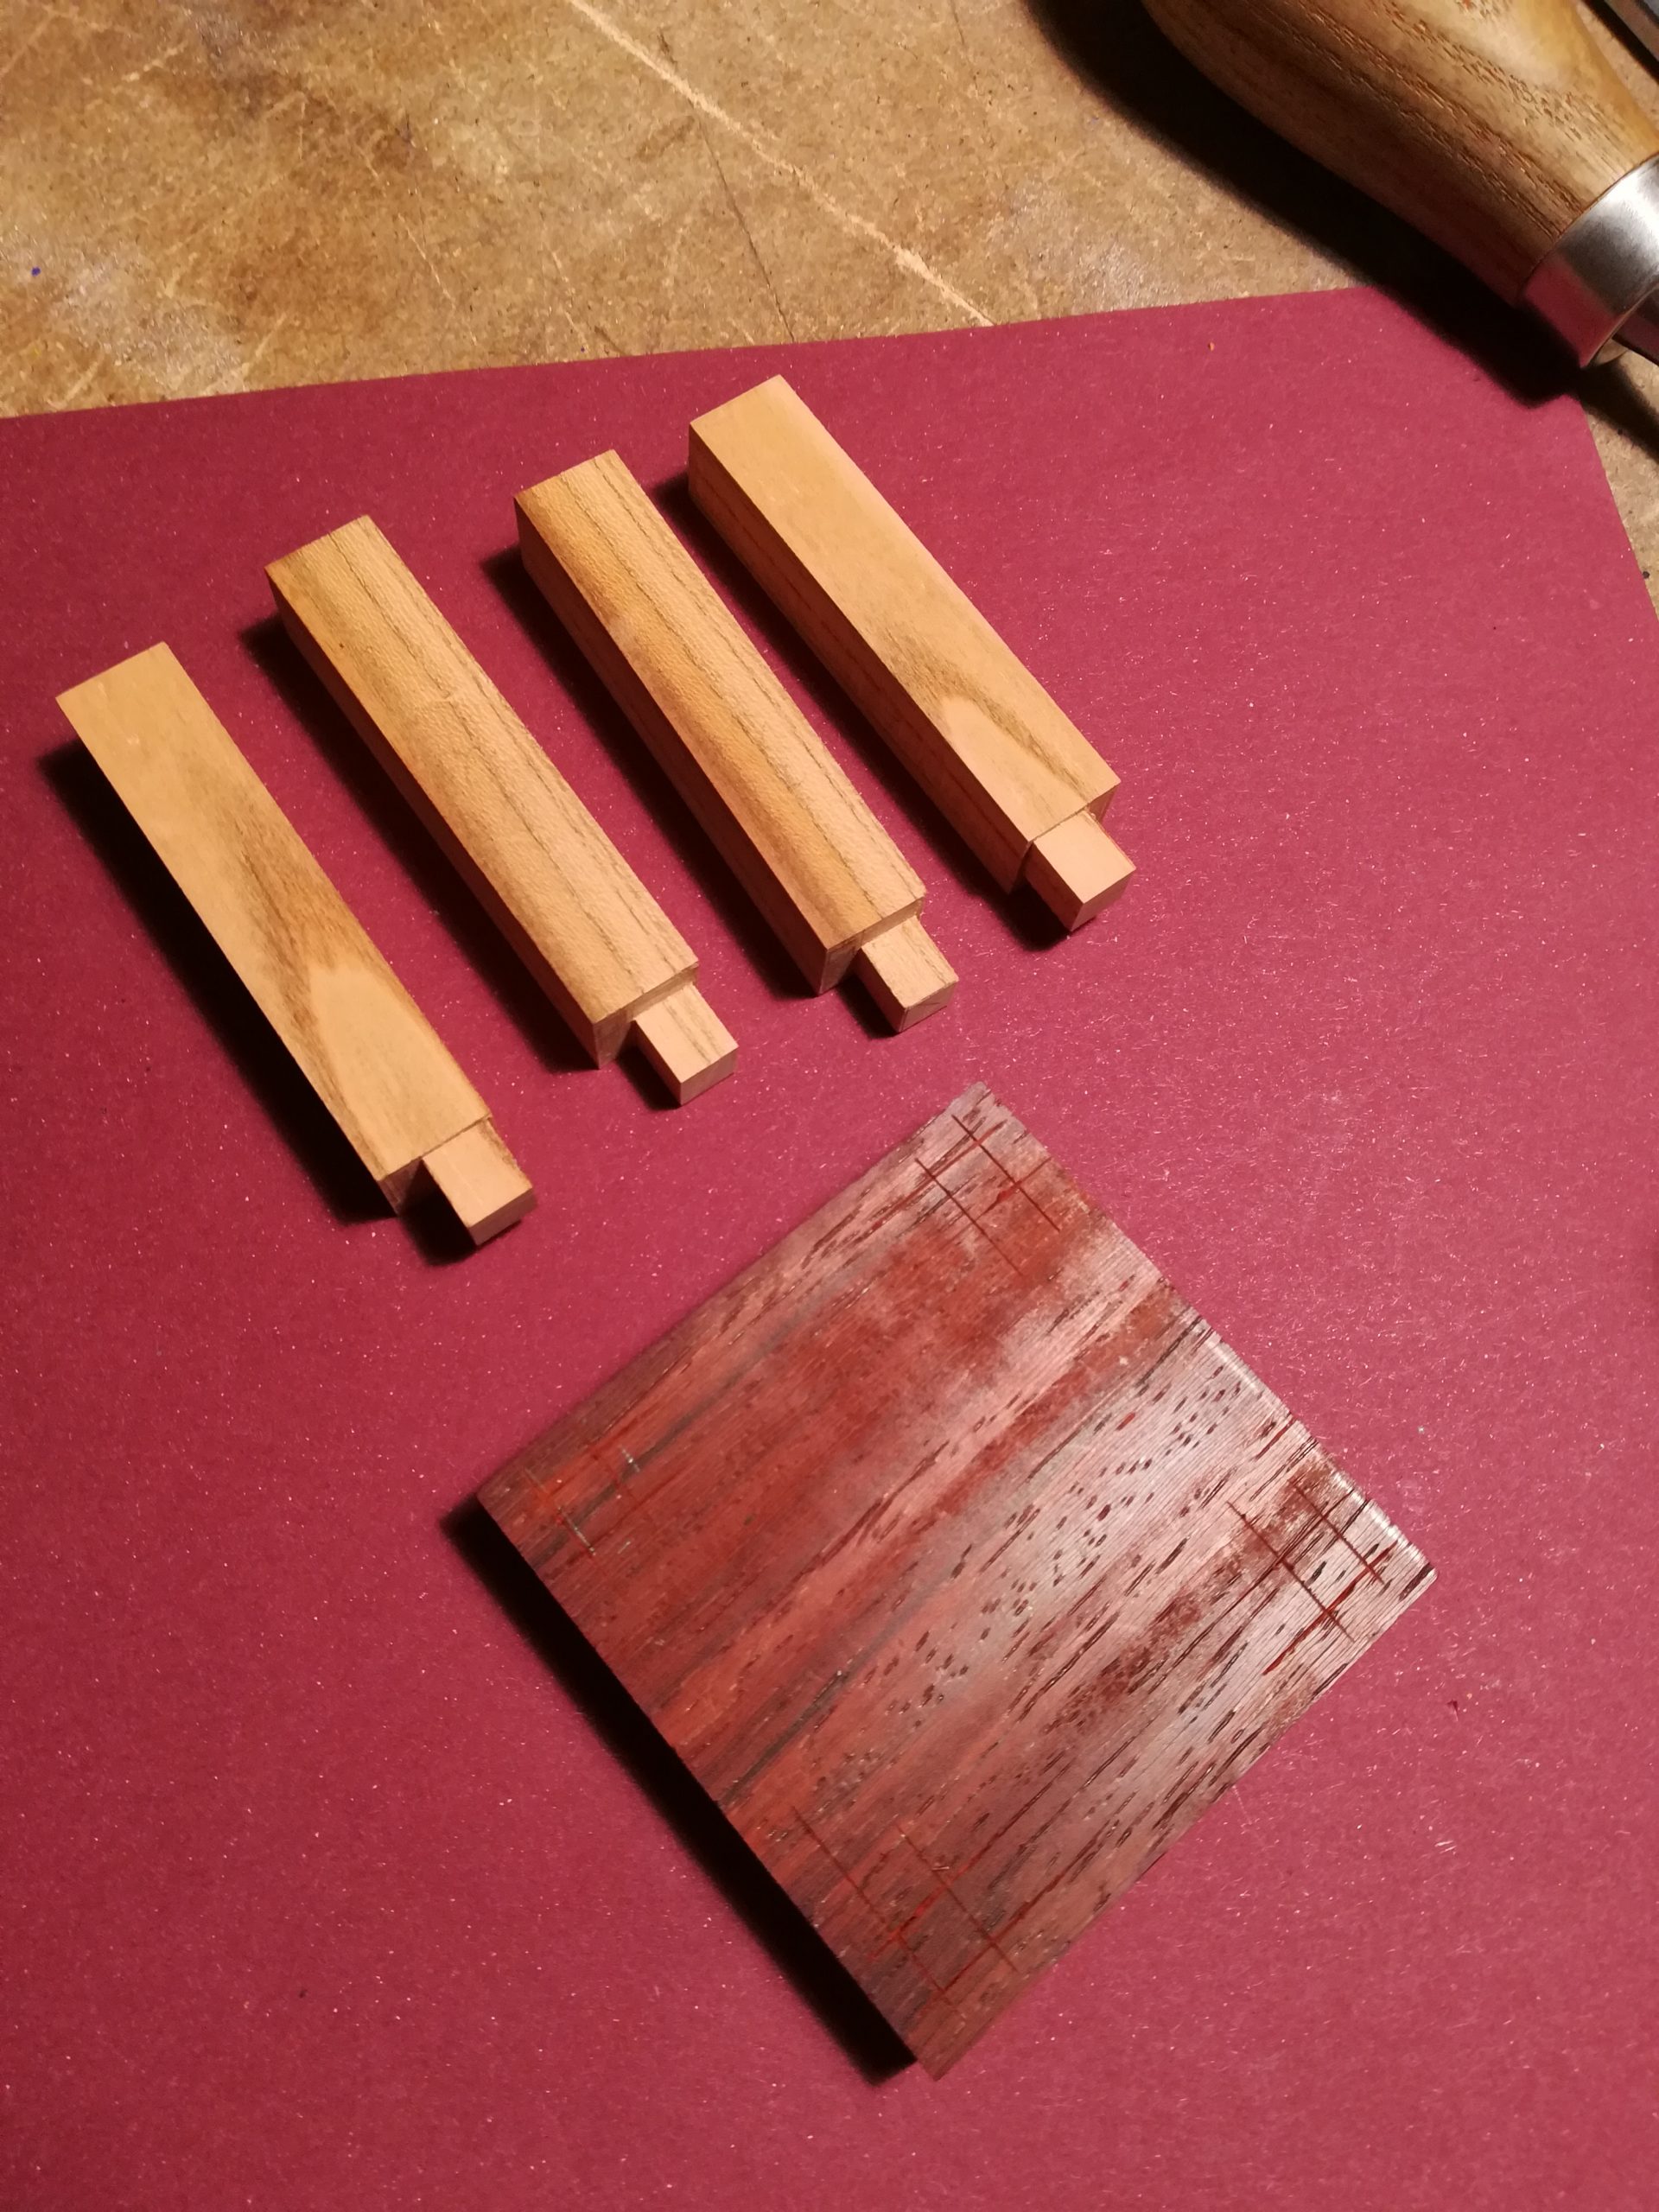
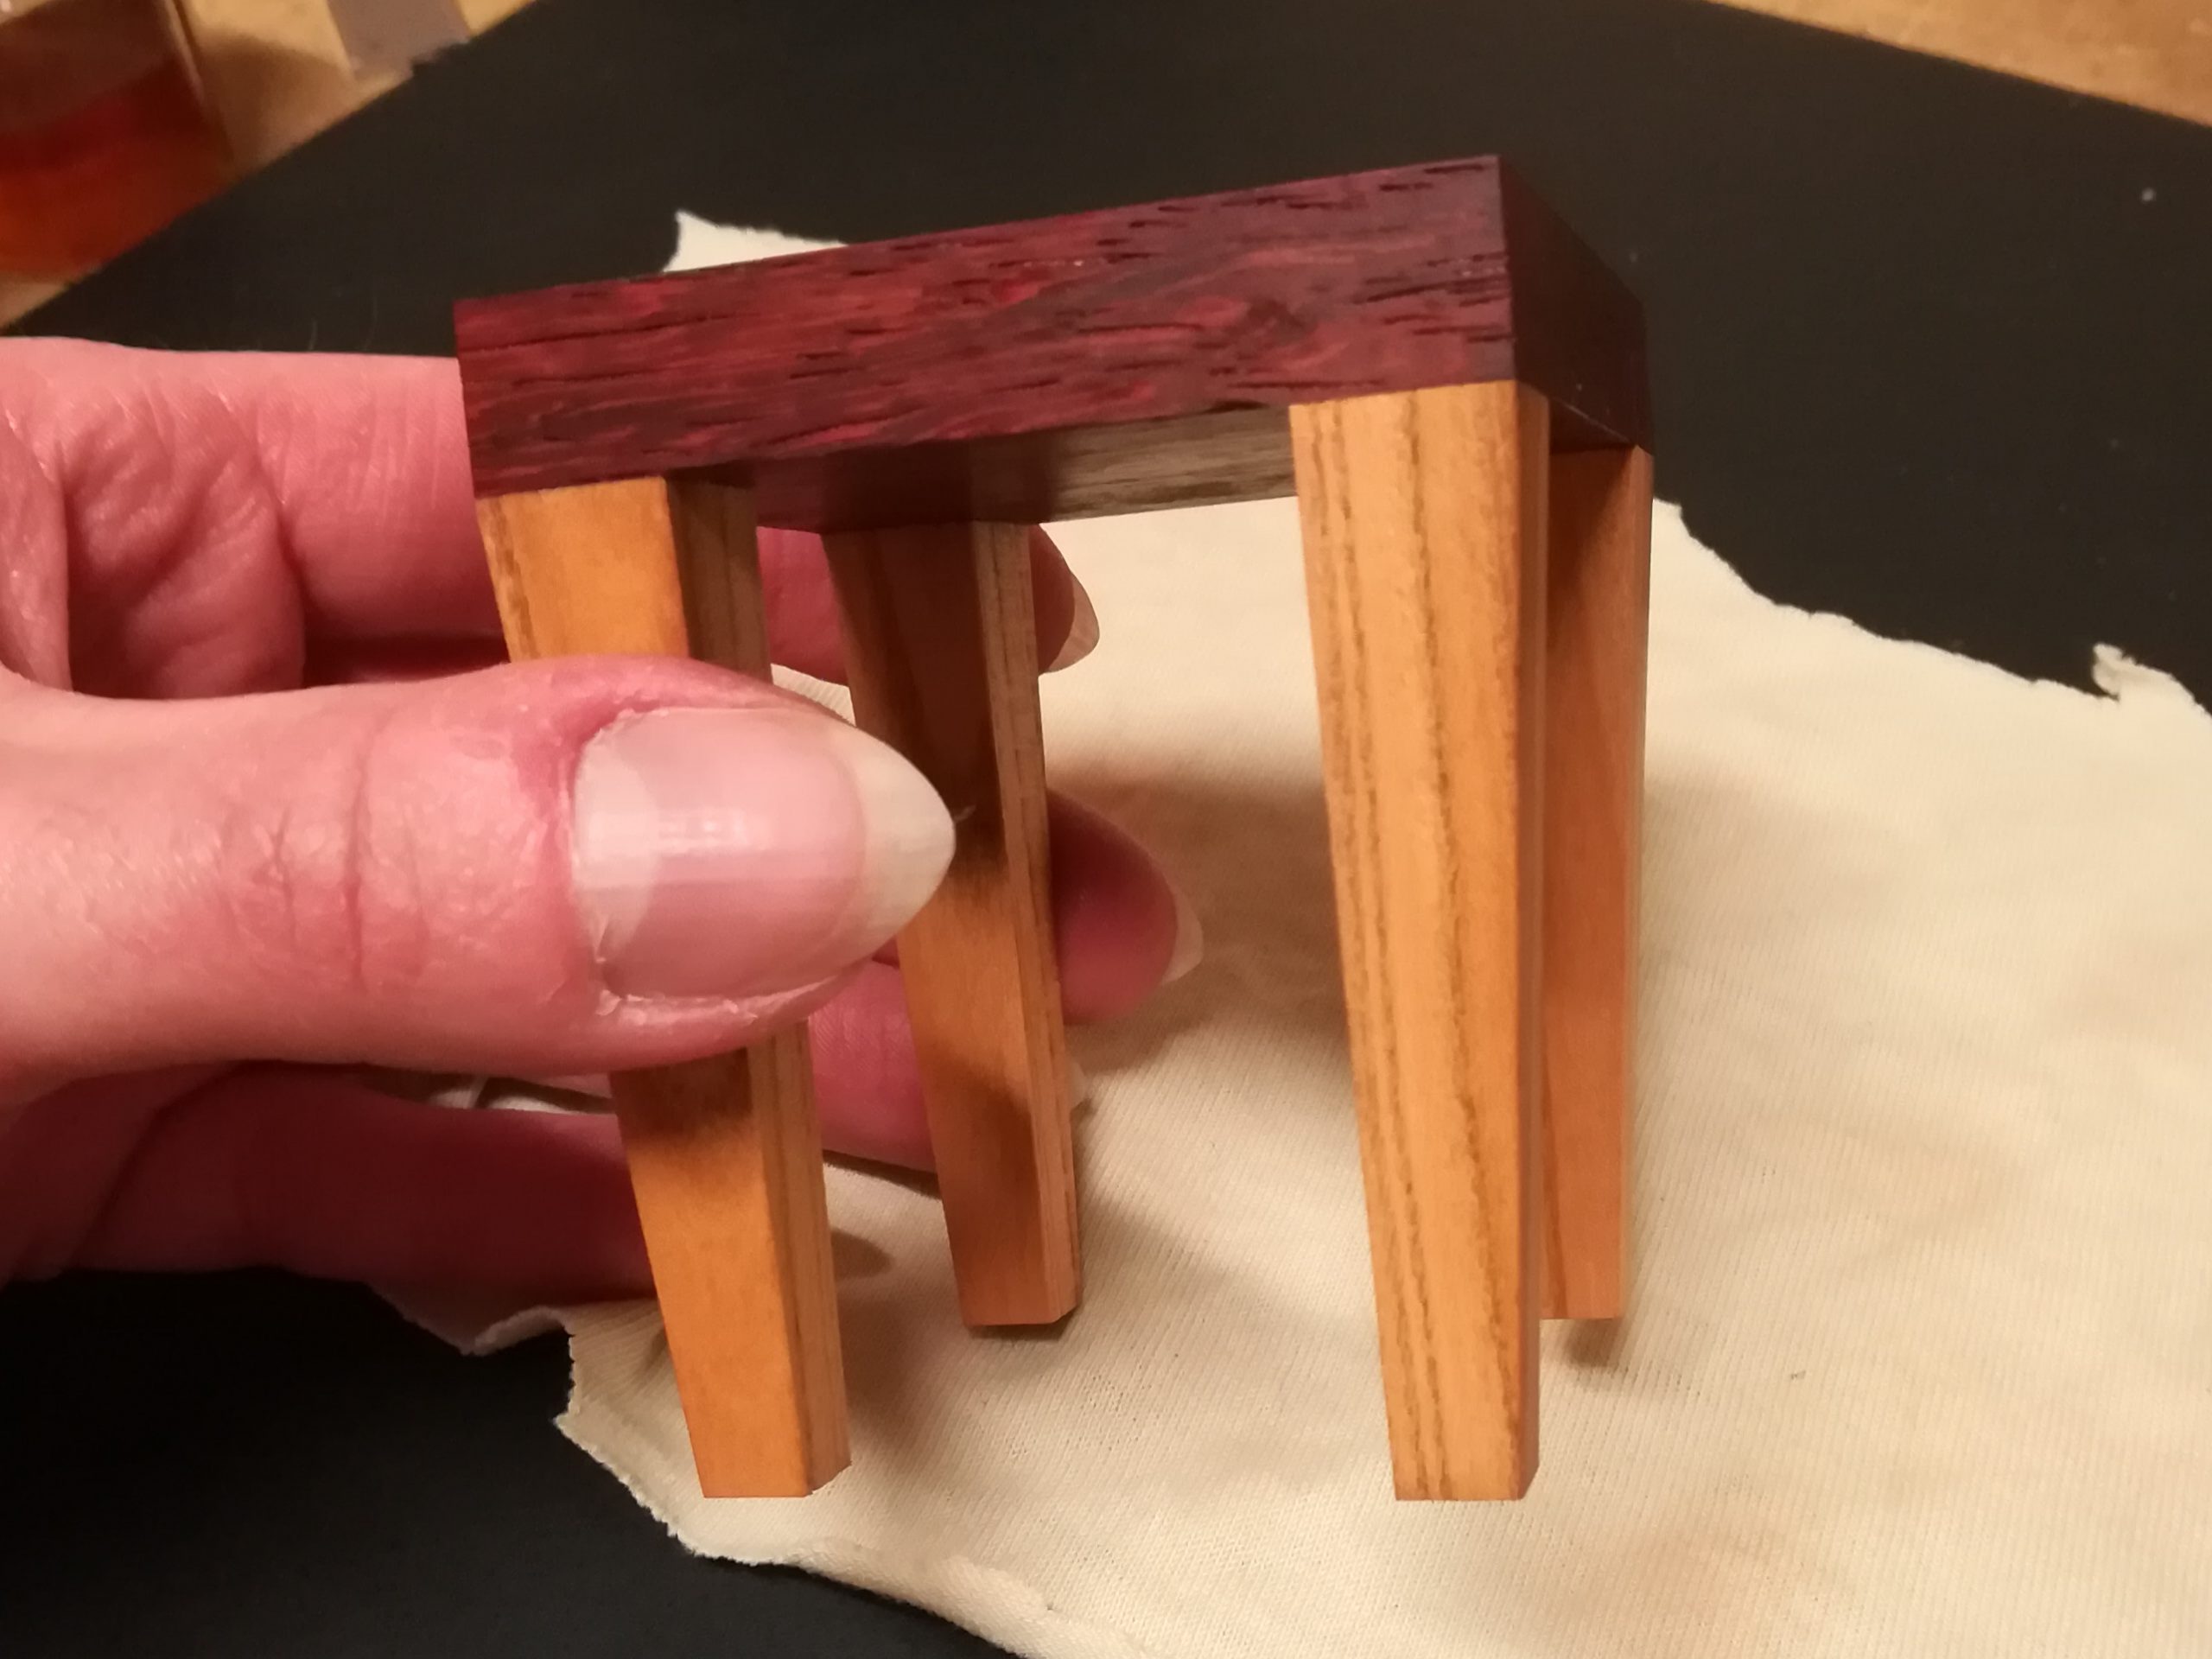
All the joints were good, but looking at the assembled piece was unsatisfying. It looked too blocky, too rustic for what I intended it to be. Those legs needed to lighten up badly. Good thing I had some first class tickets for a plane to taper town.
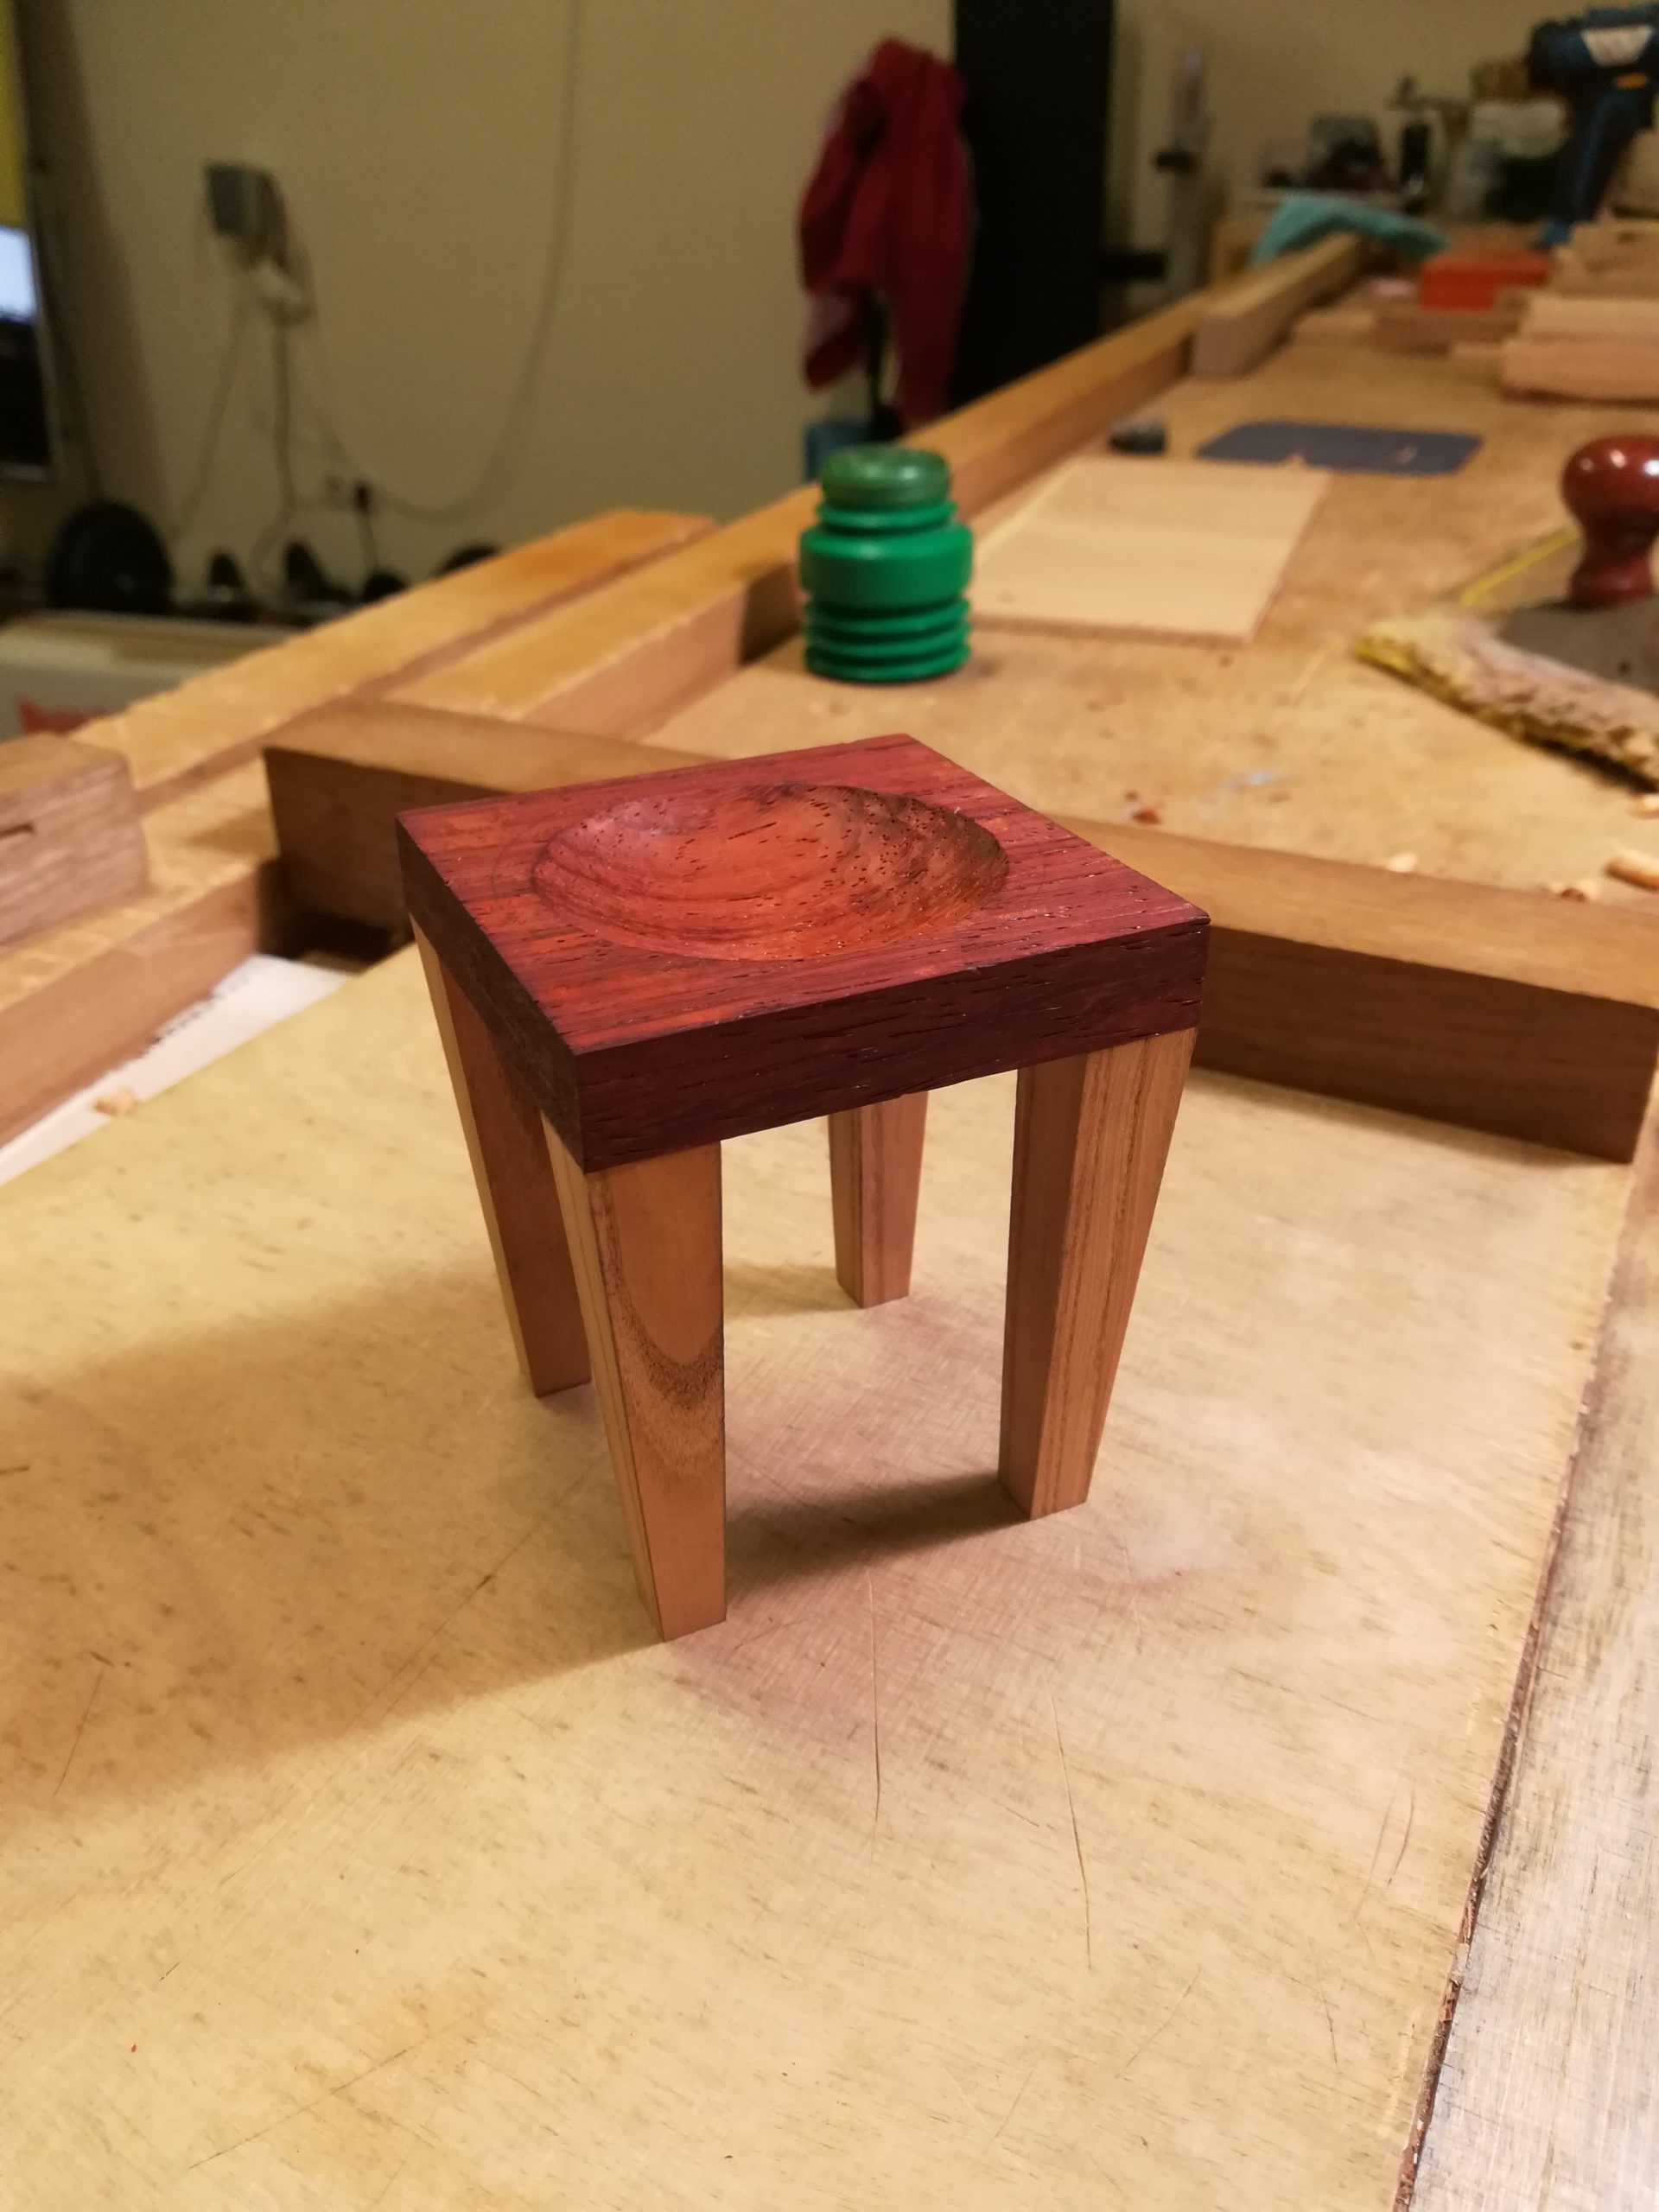
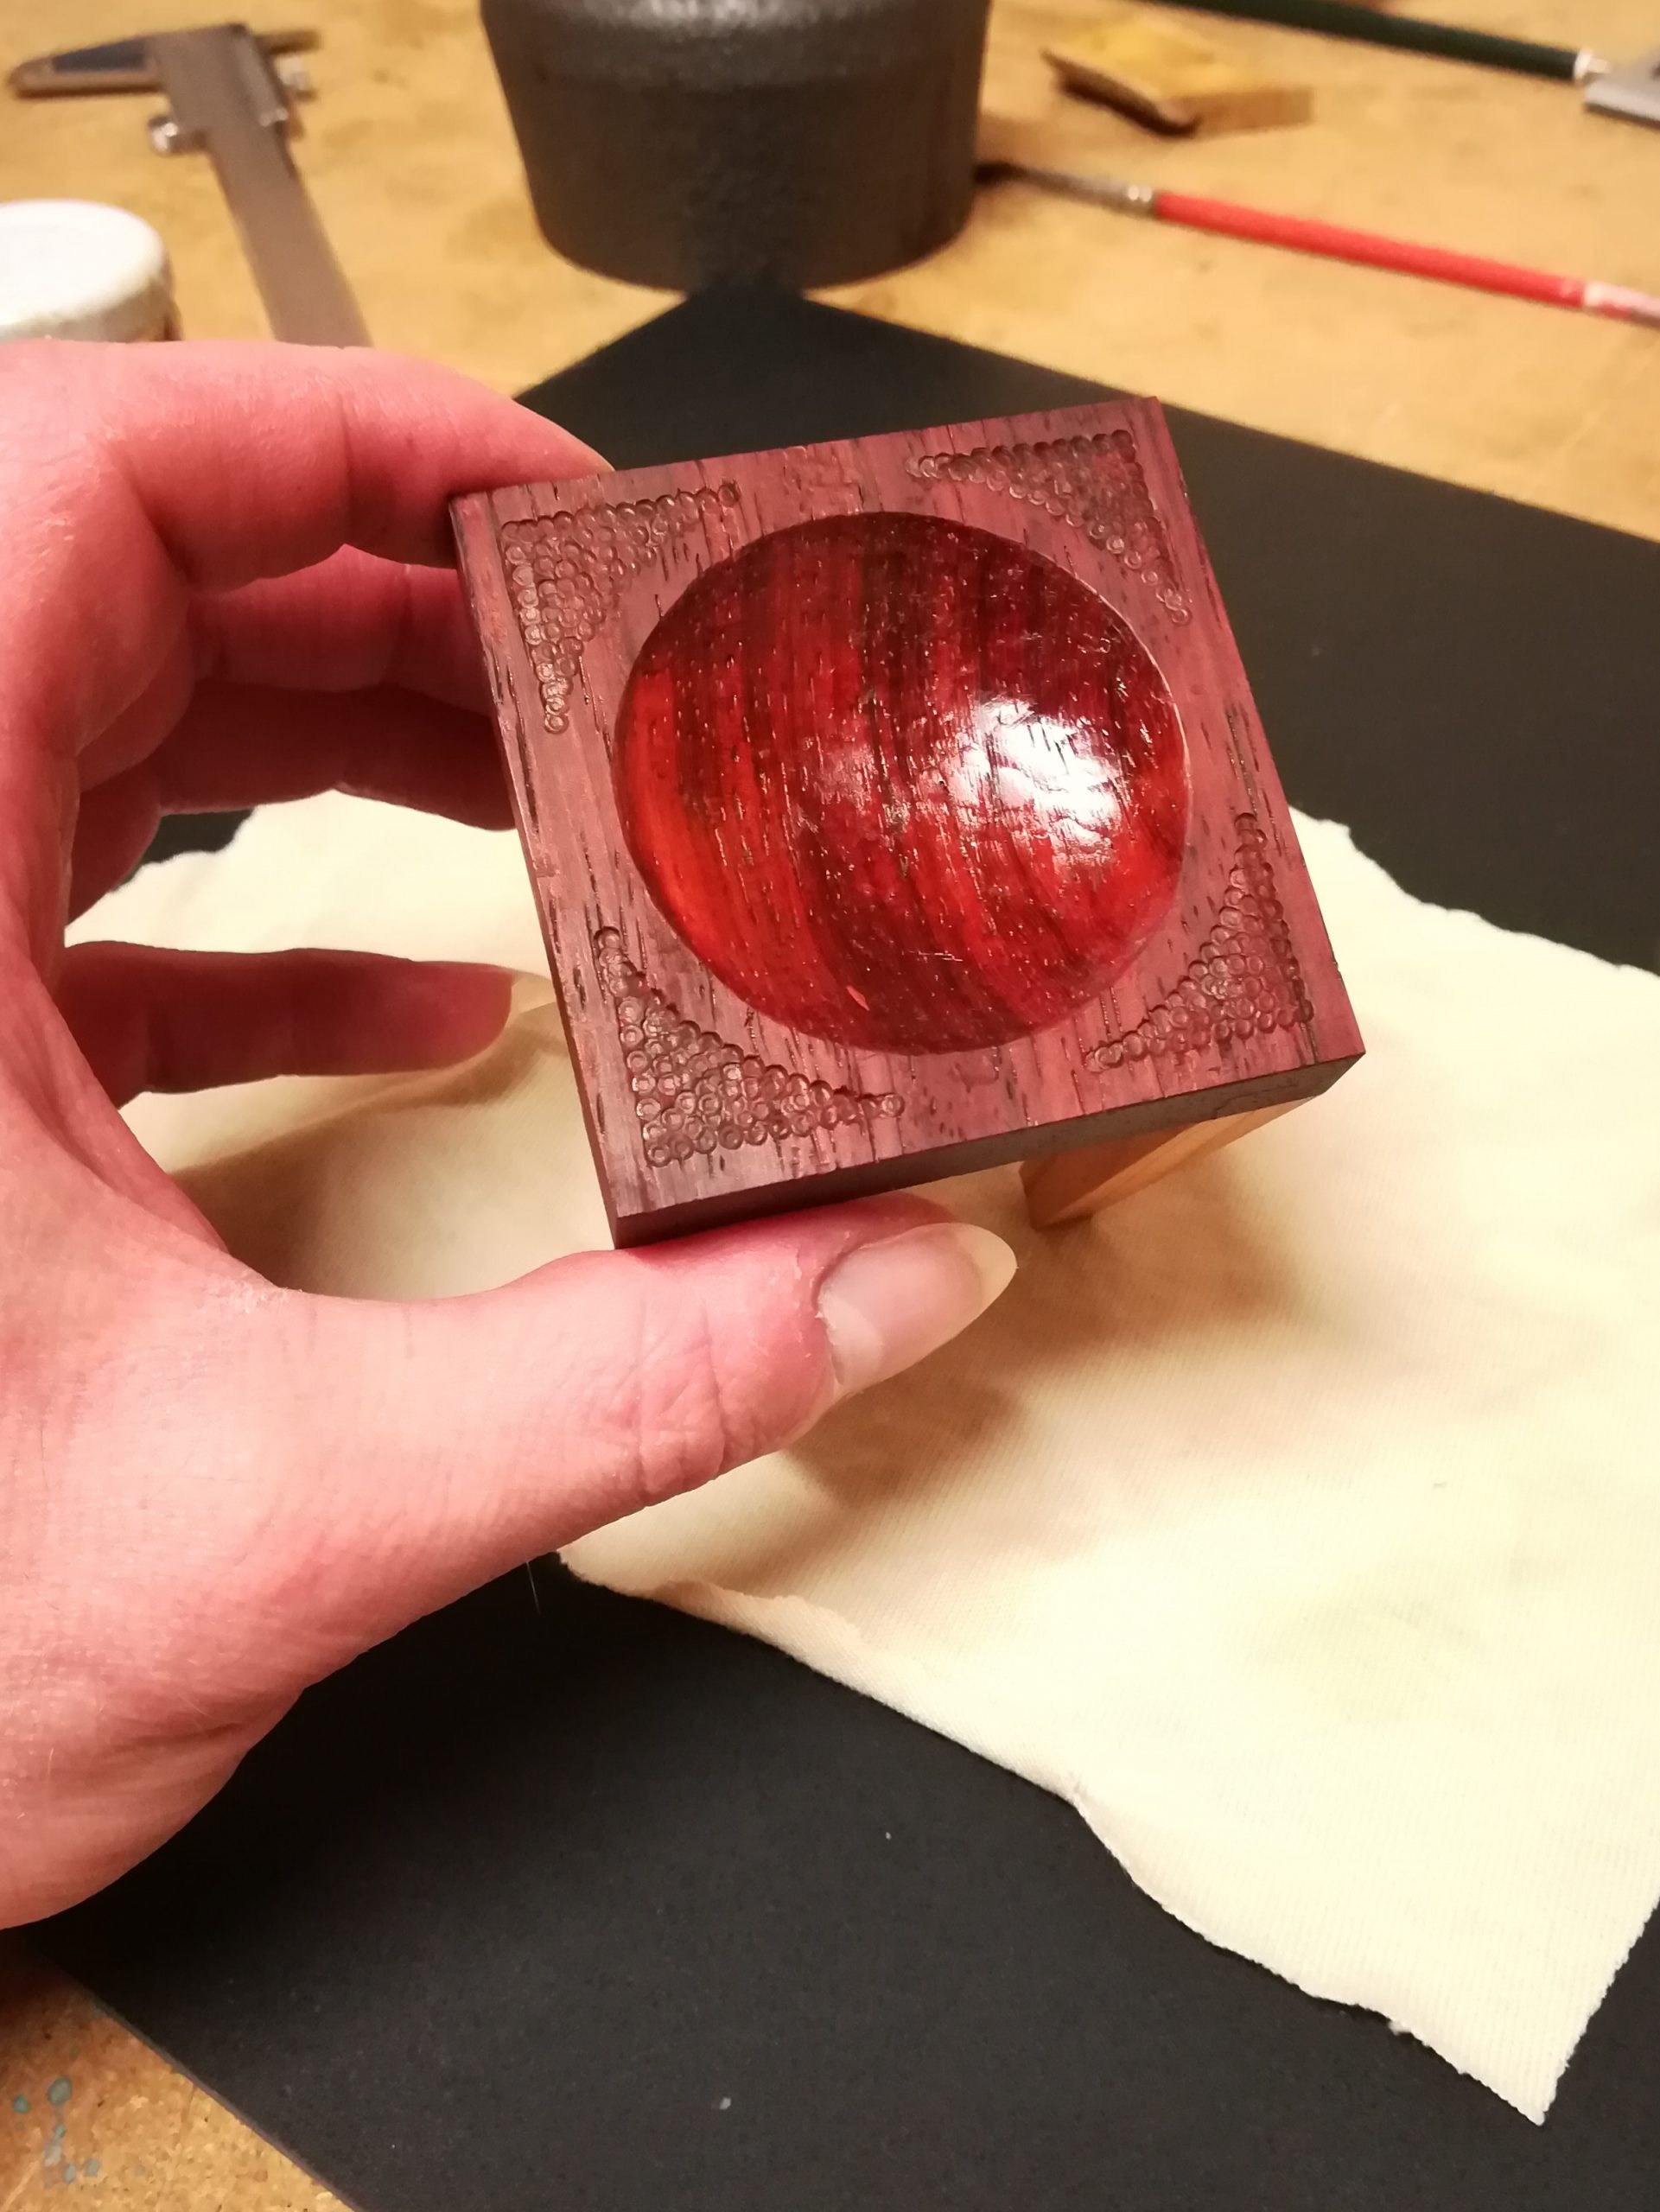
The taper did its part, resulting in a much more elegant look. The top however still looked a bit empty and simple to me. I considered inlays of contrasting colour at the corners, but a quick mock up showed they were much too distracting and stealing all focus. So I went with another favourite element of mine, a punched in texture.
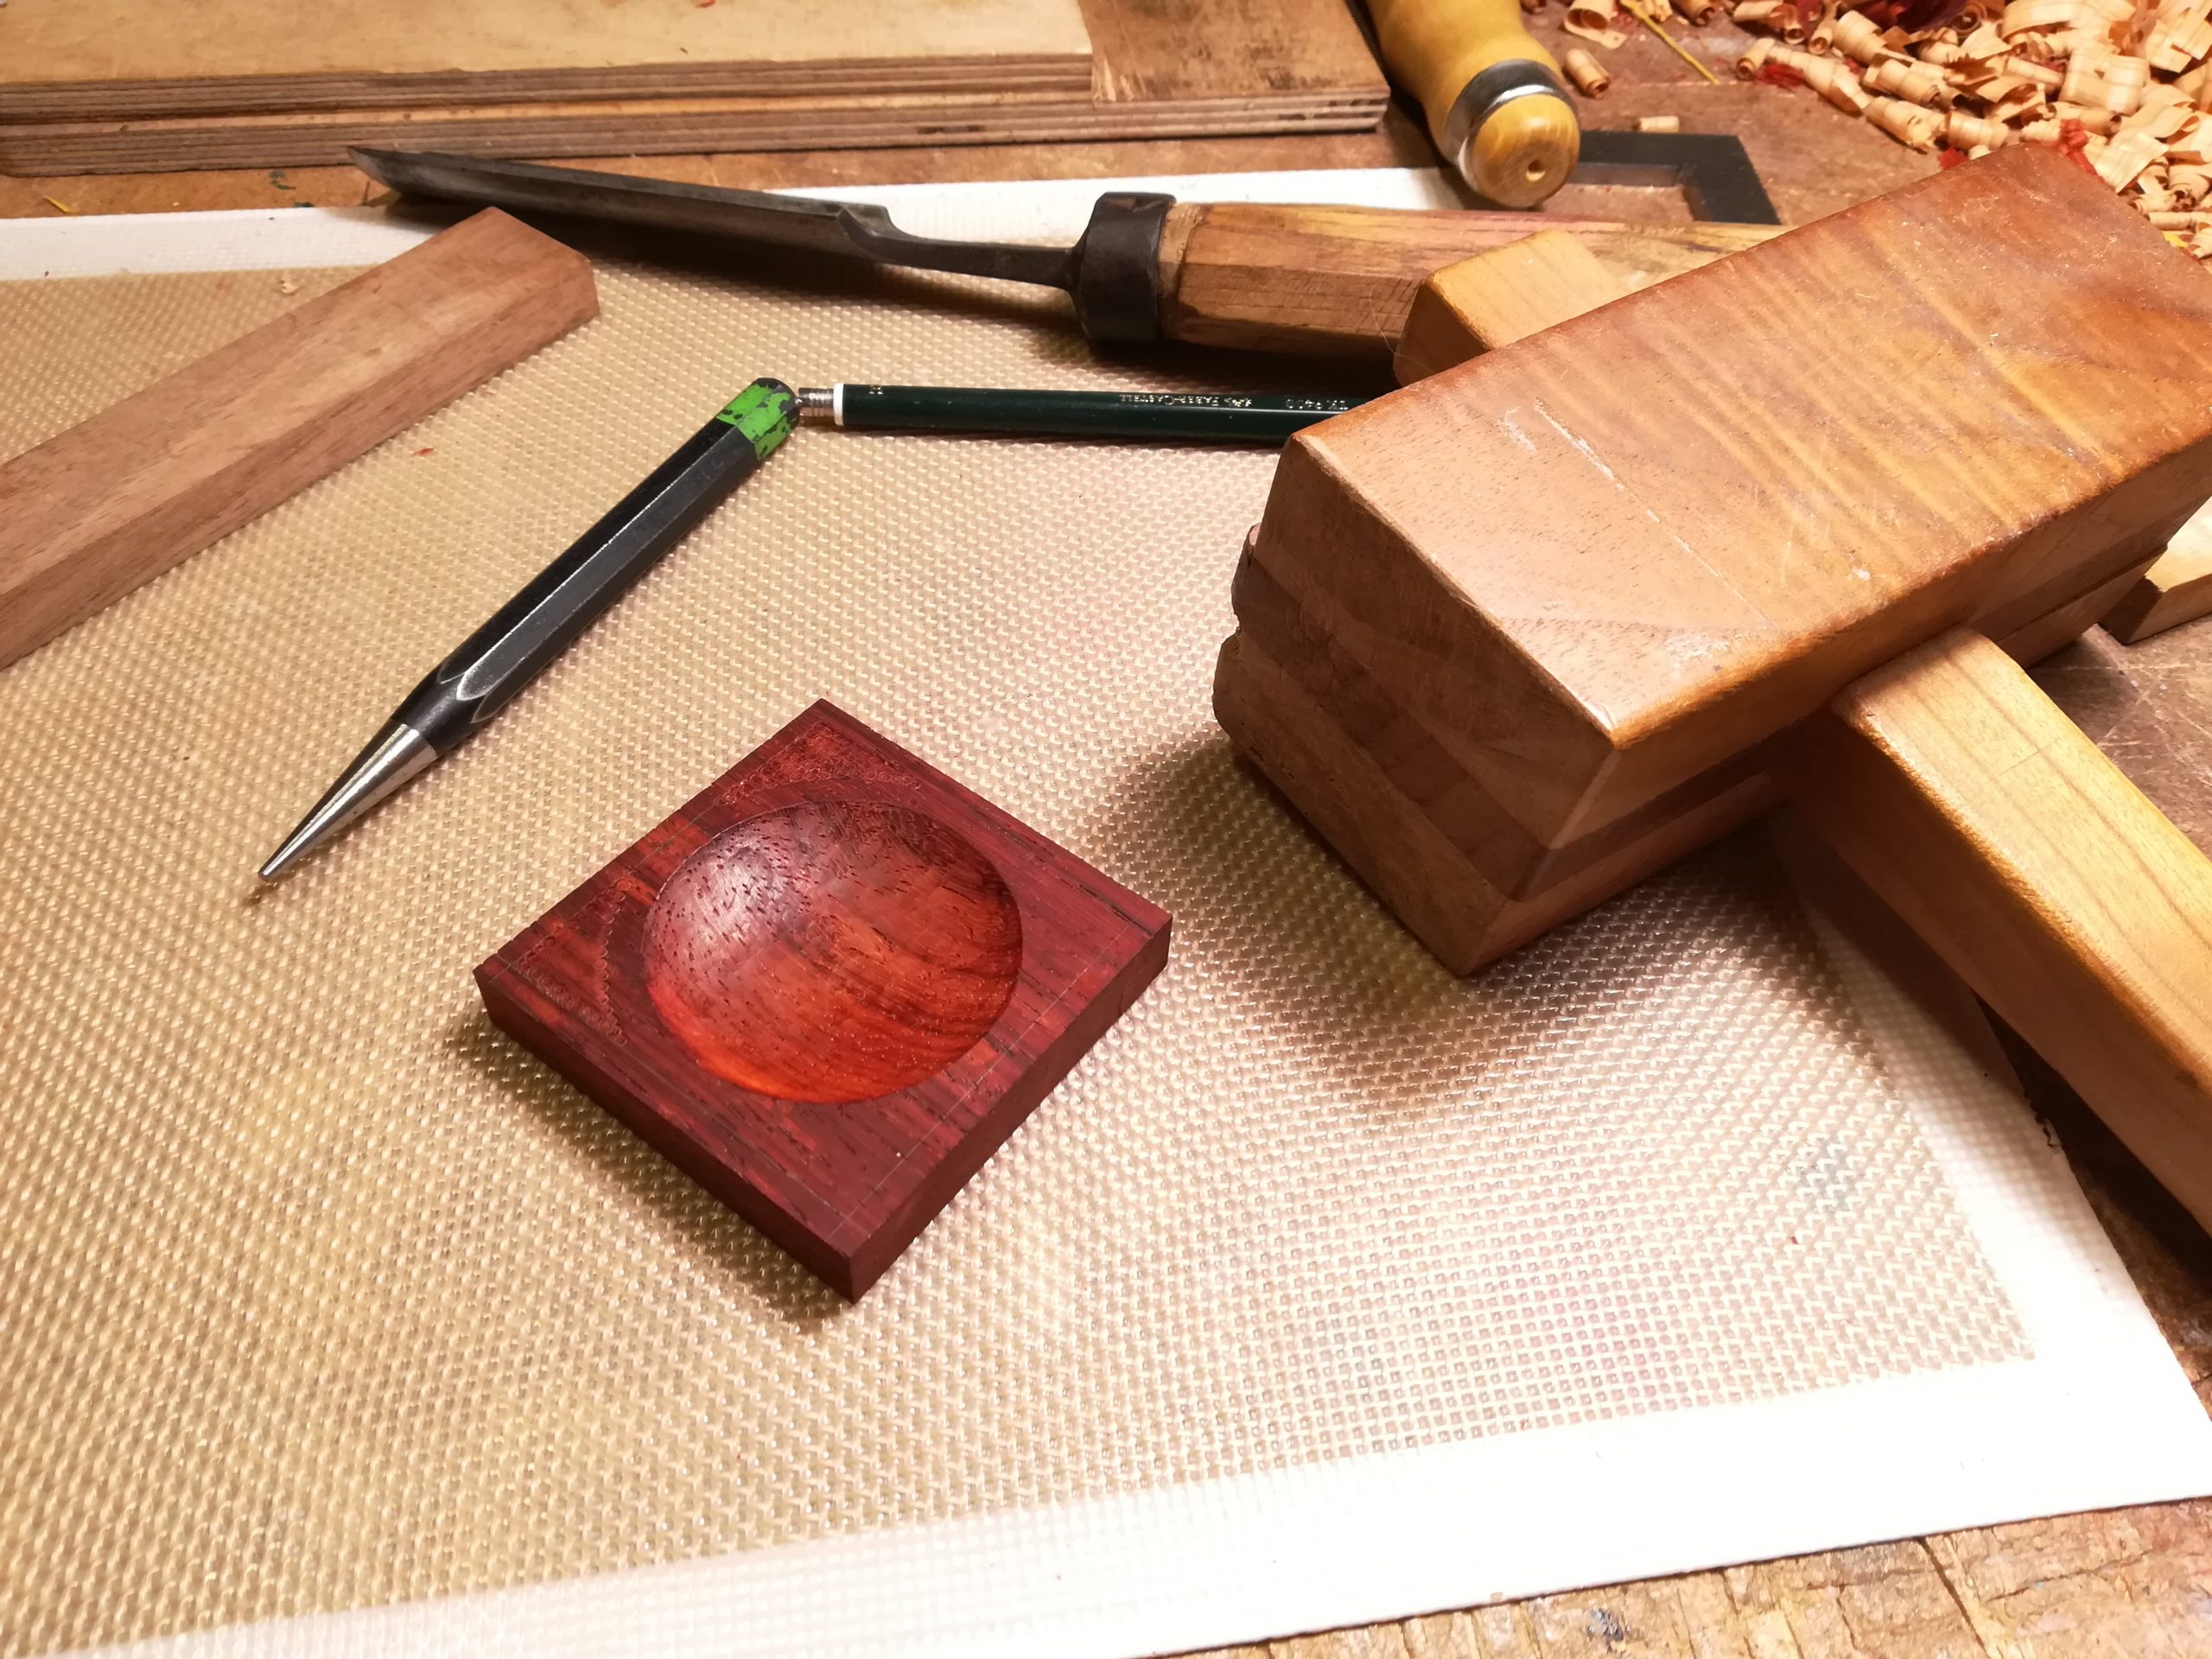
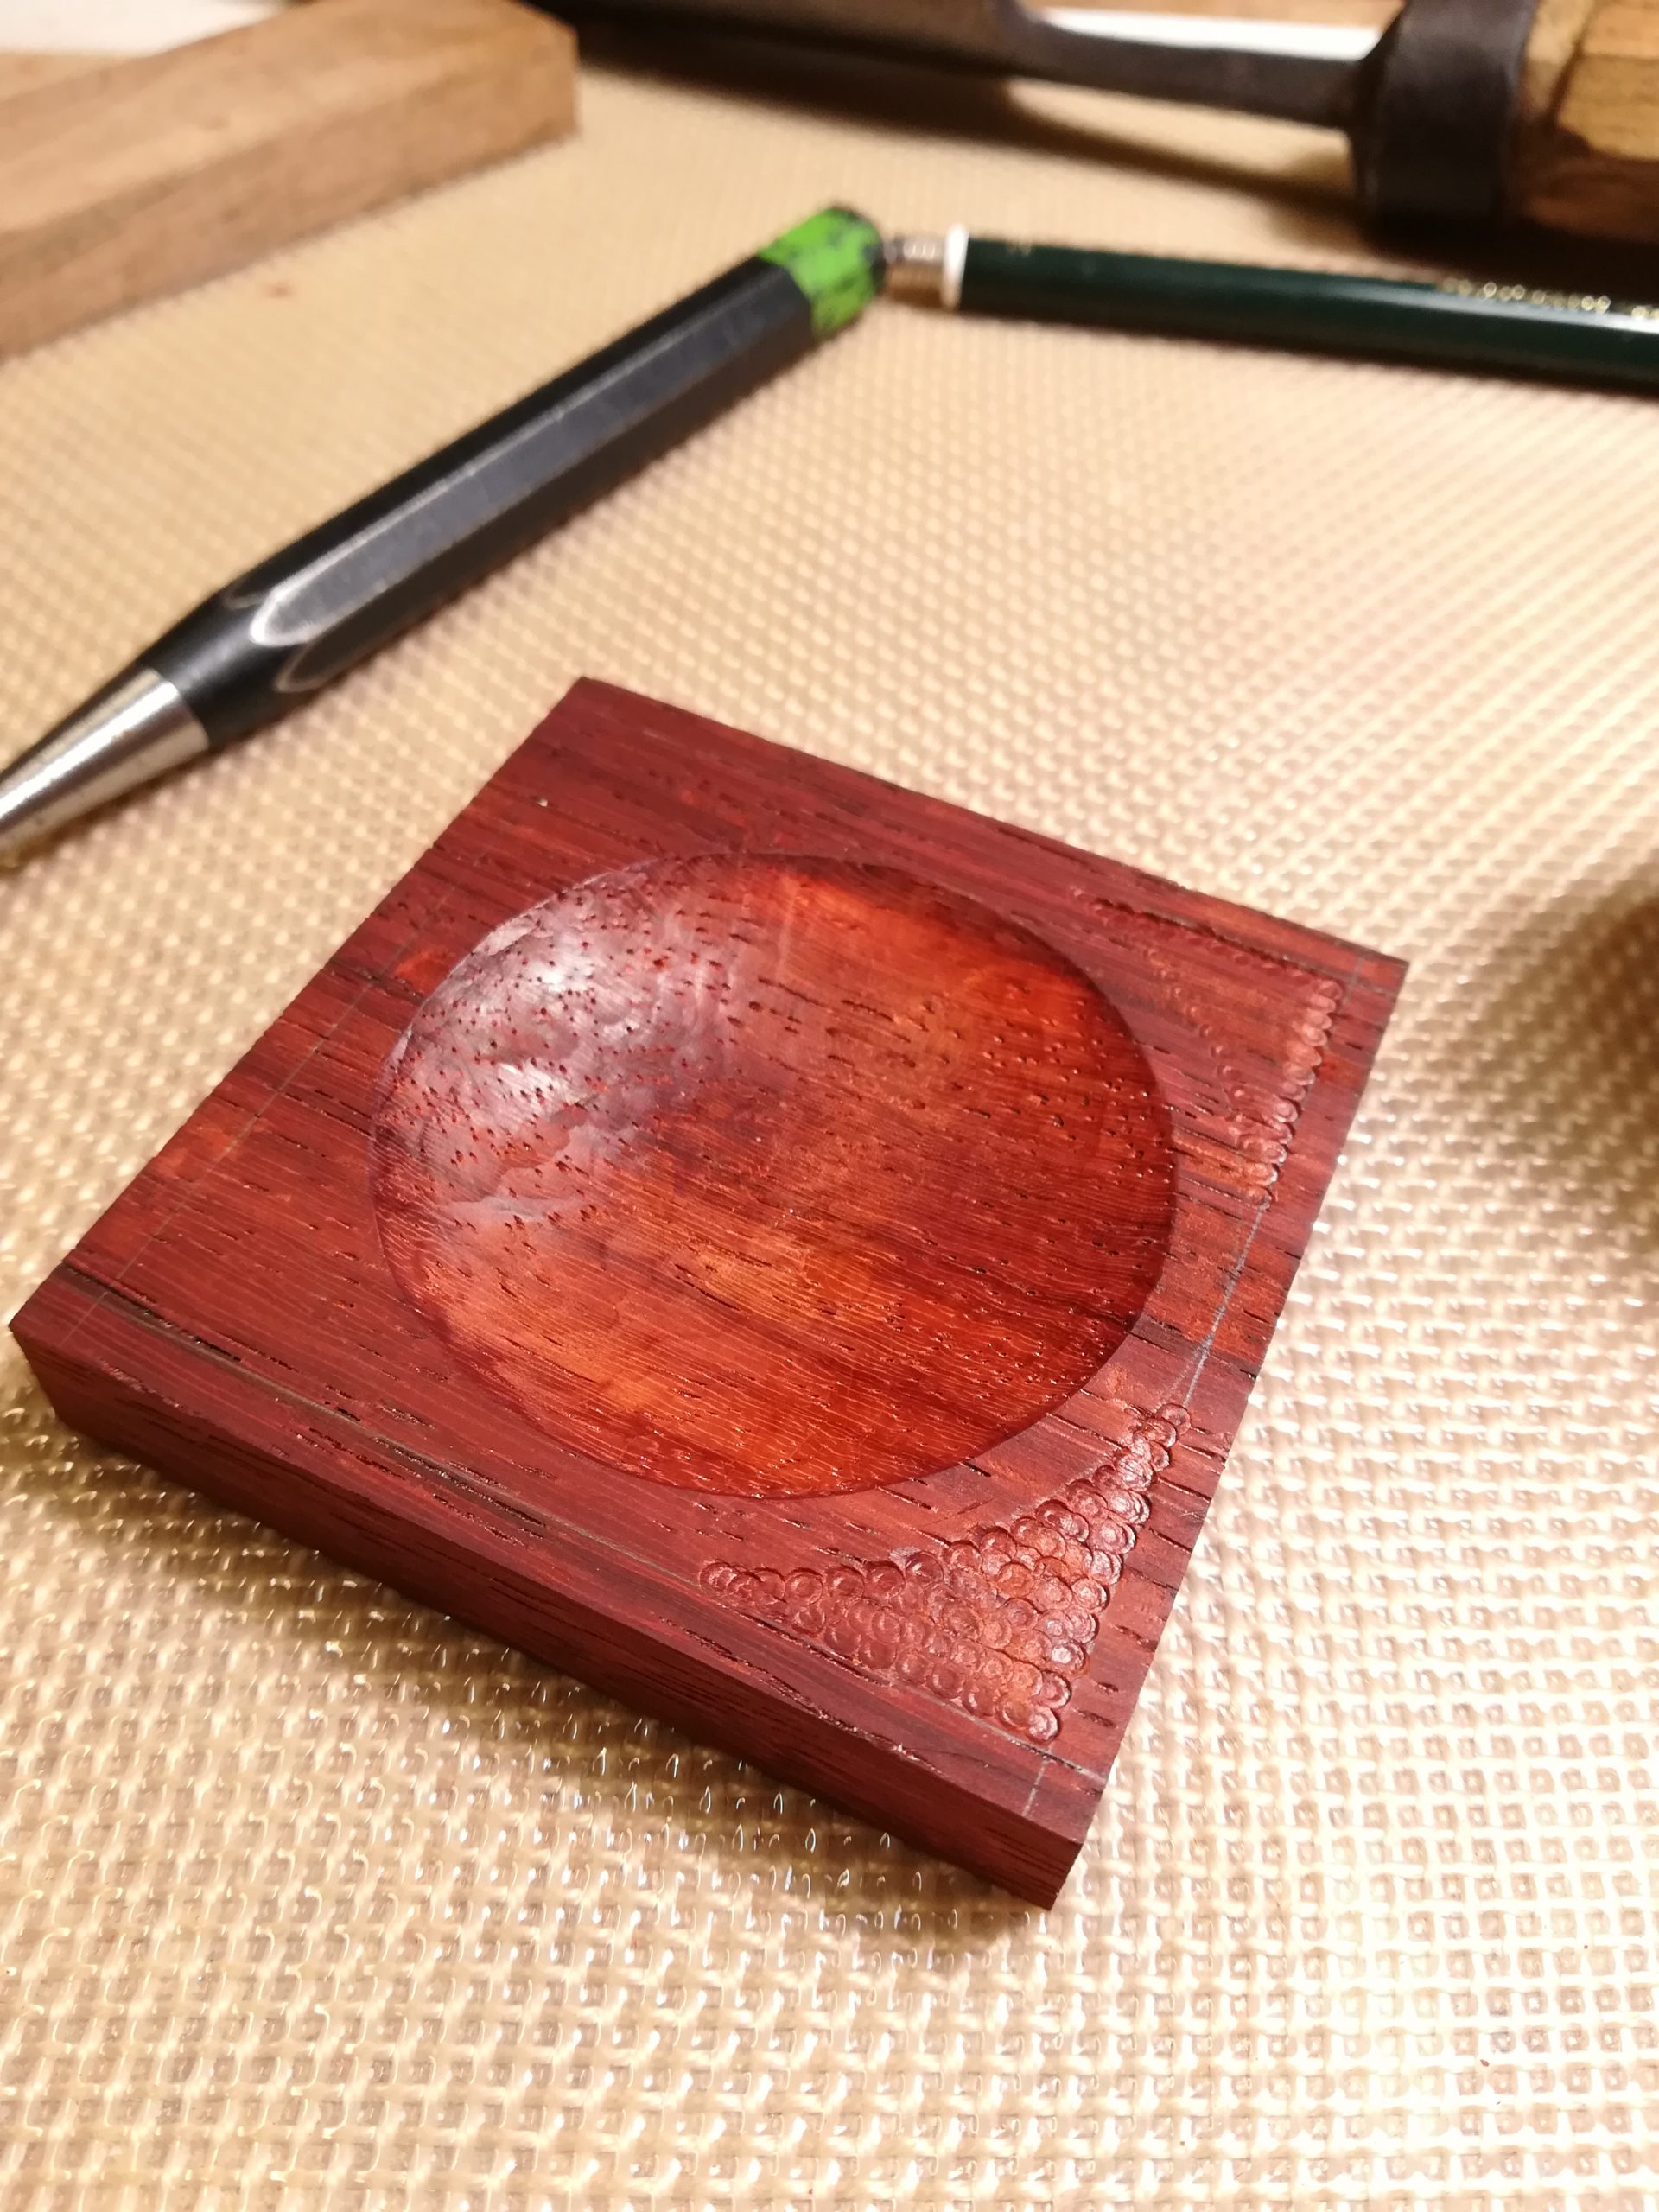
This also worked out just like I hoped, adding interesting detail, without detracting from the whole and hogging focus. One thing I appreciate about textured surfaces of this kind is how the angle of light plays into their prominence and perception.
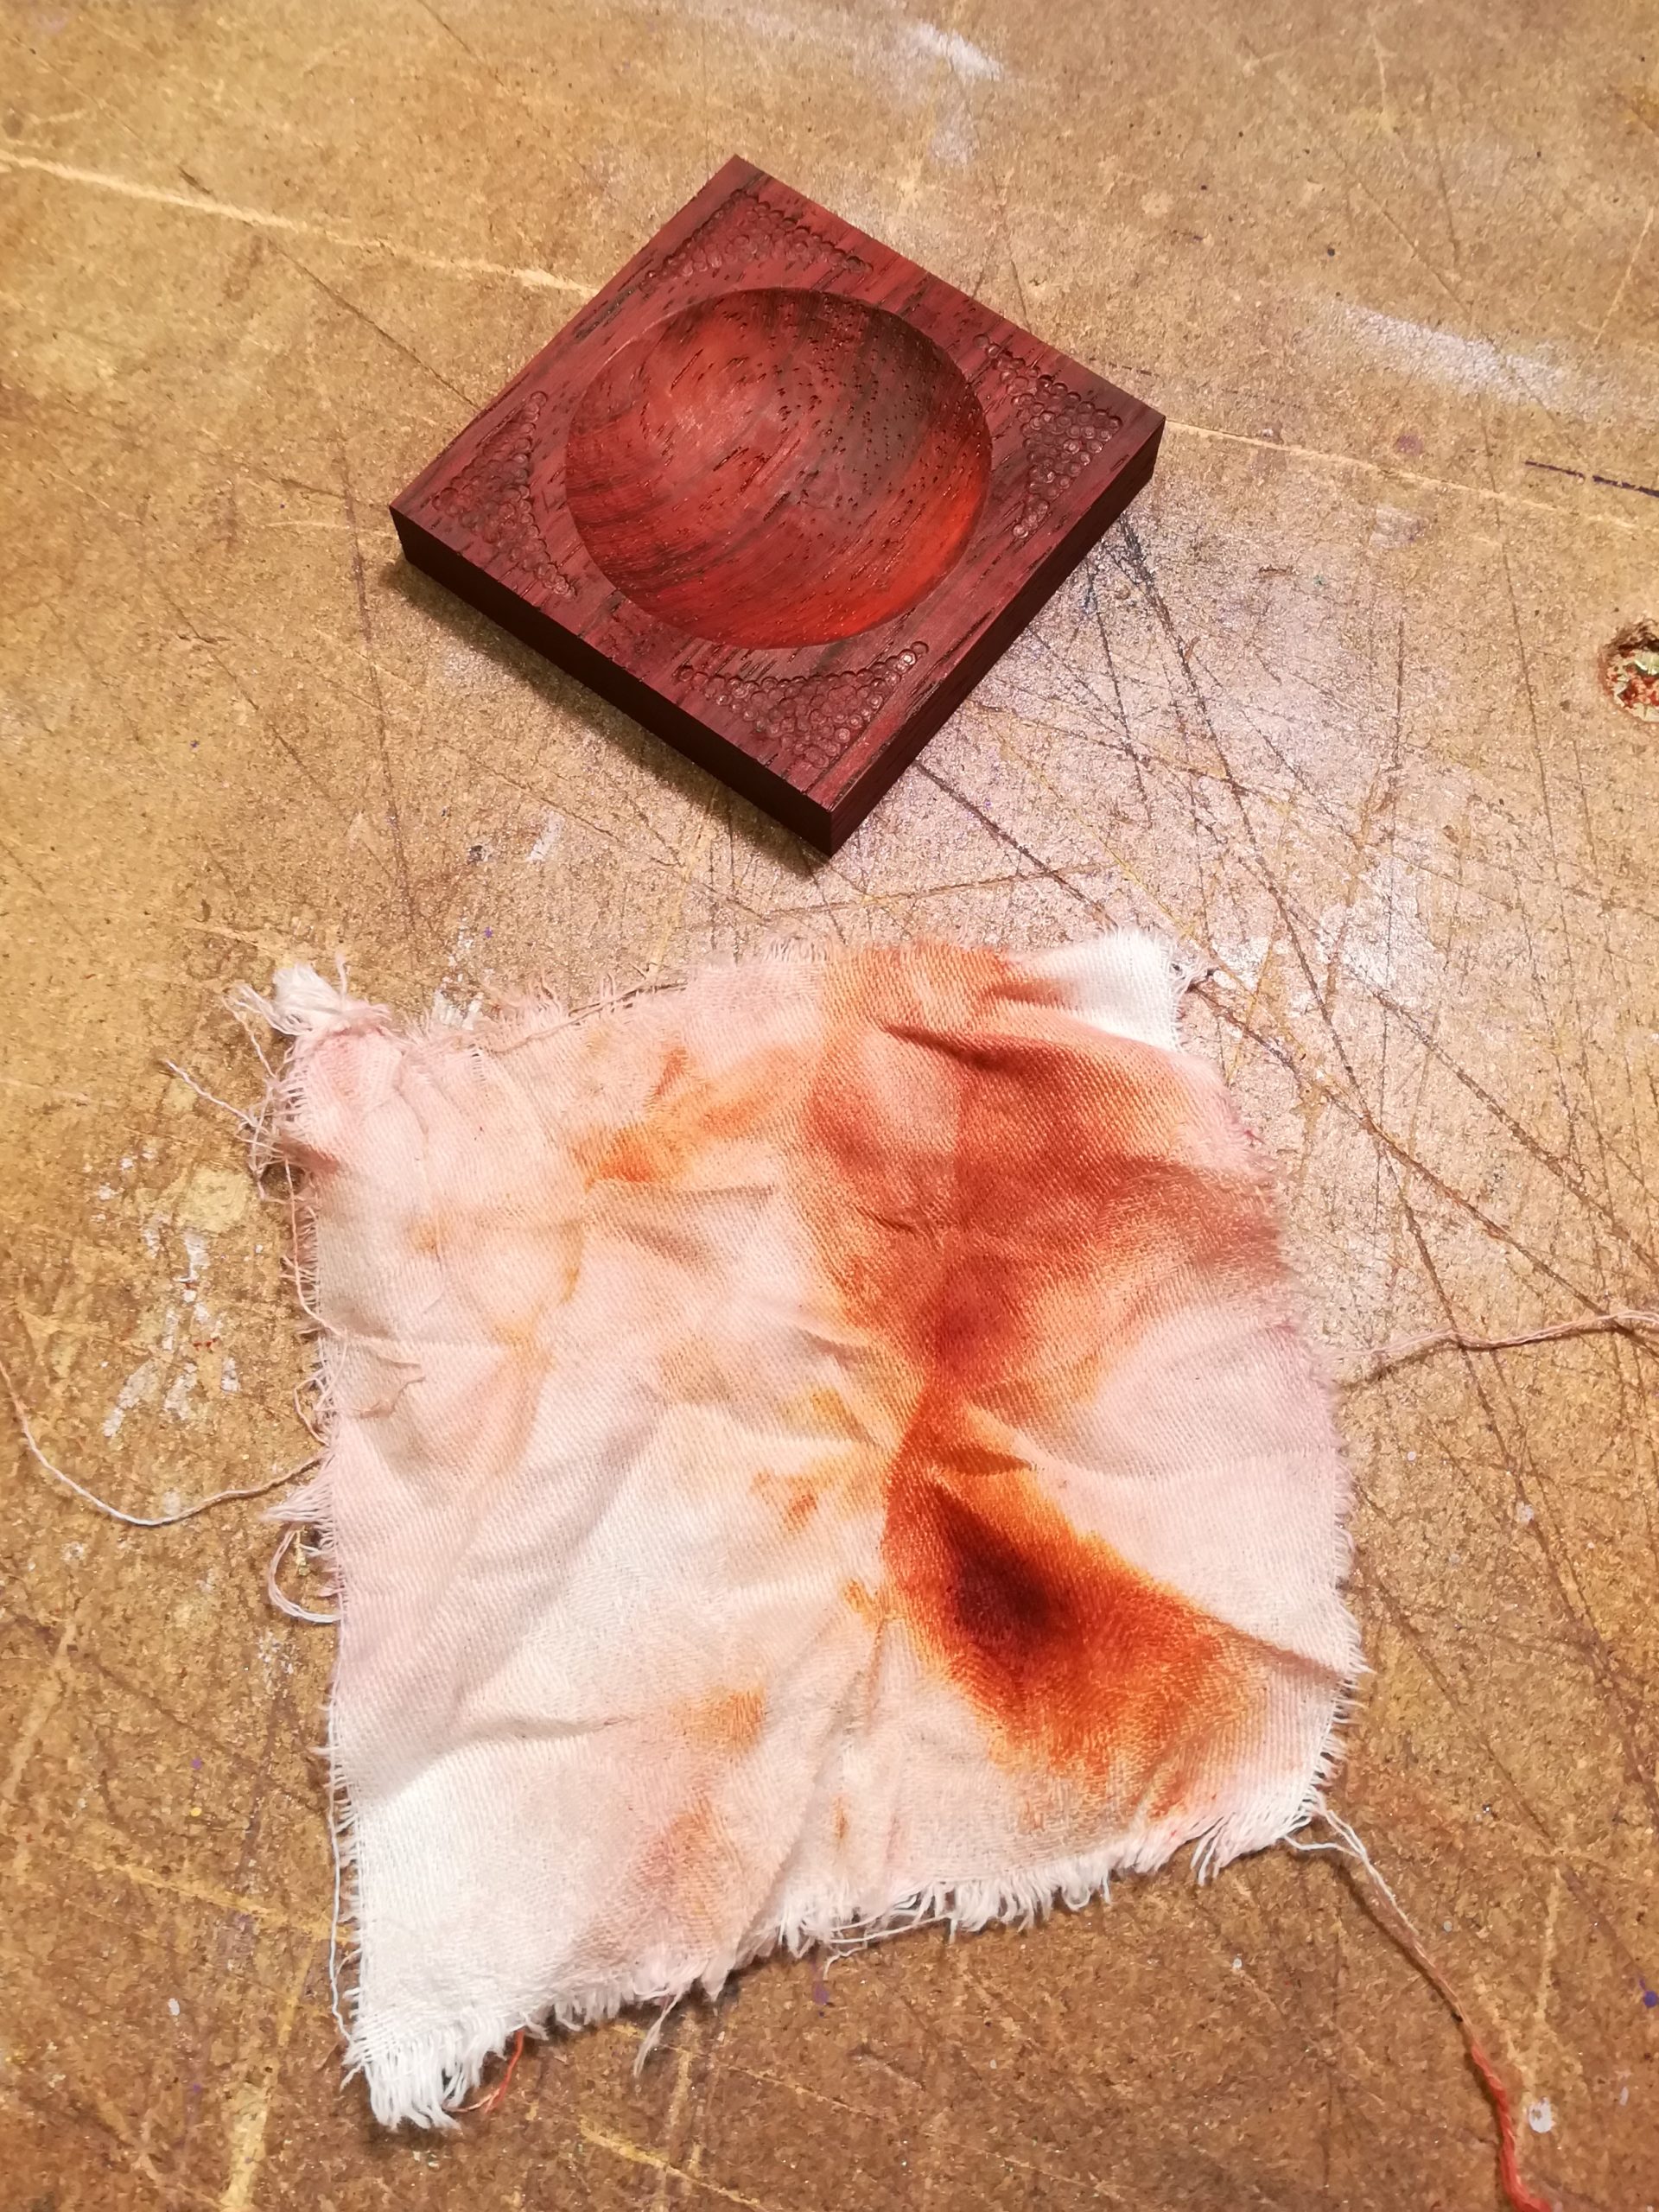
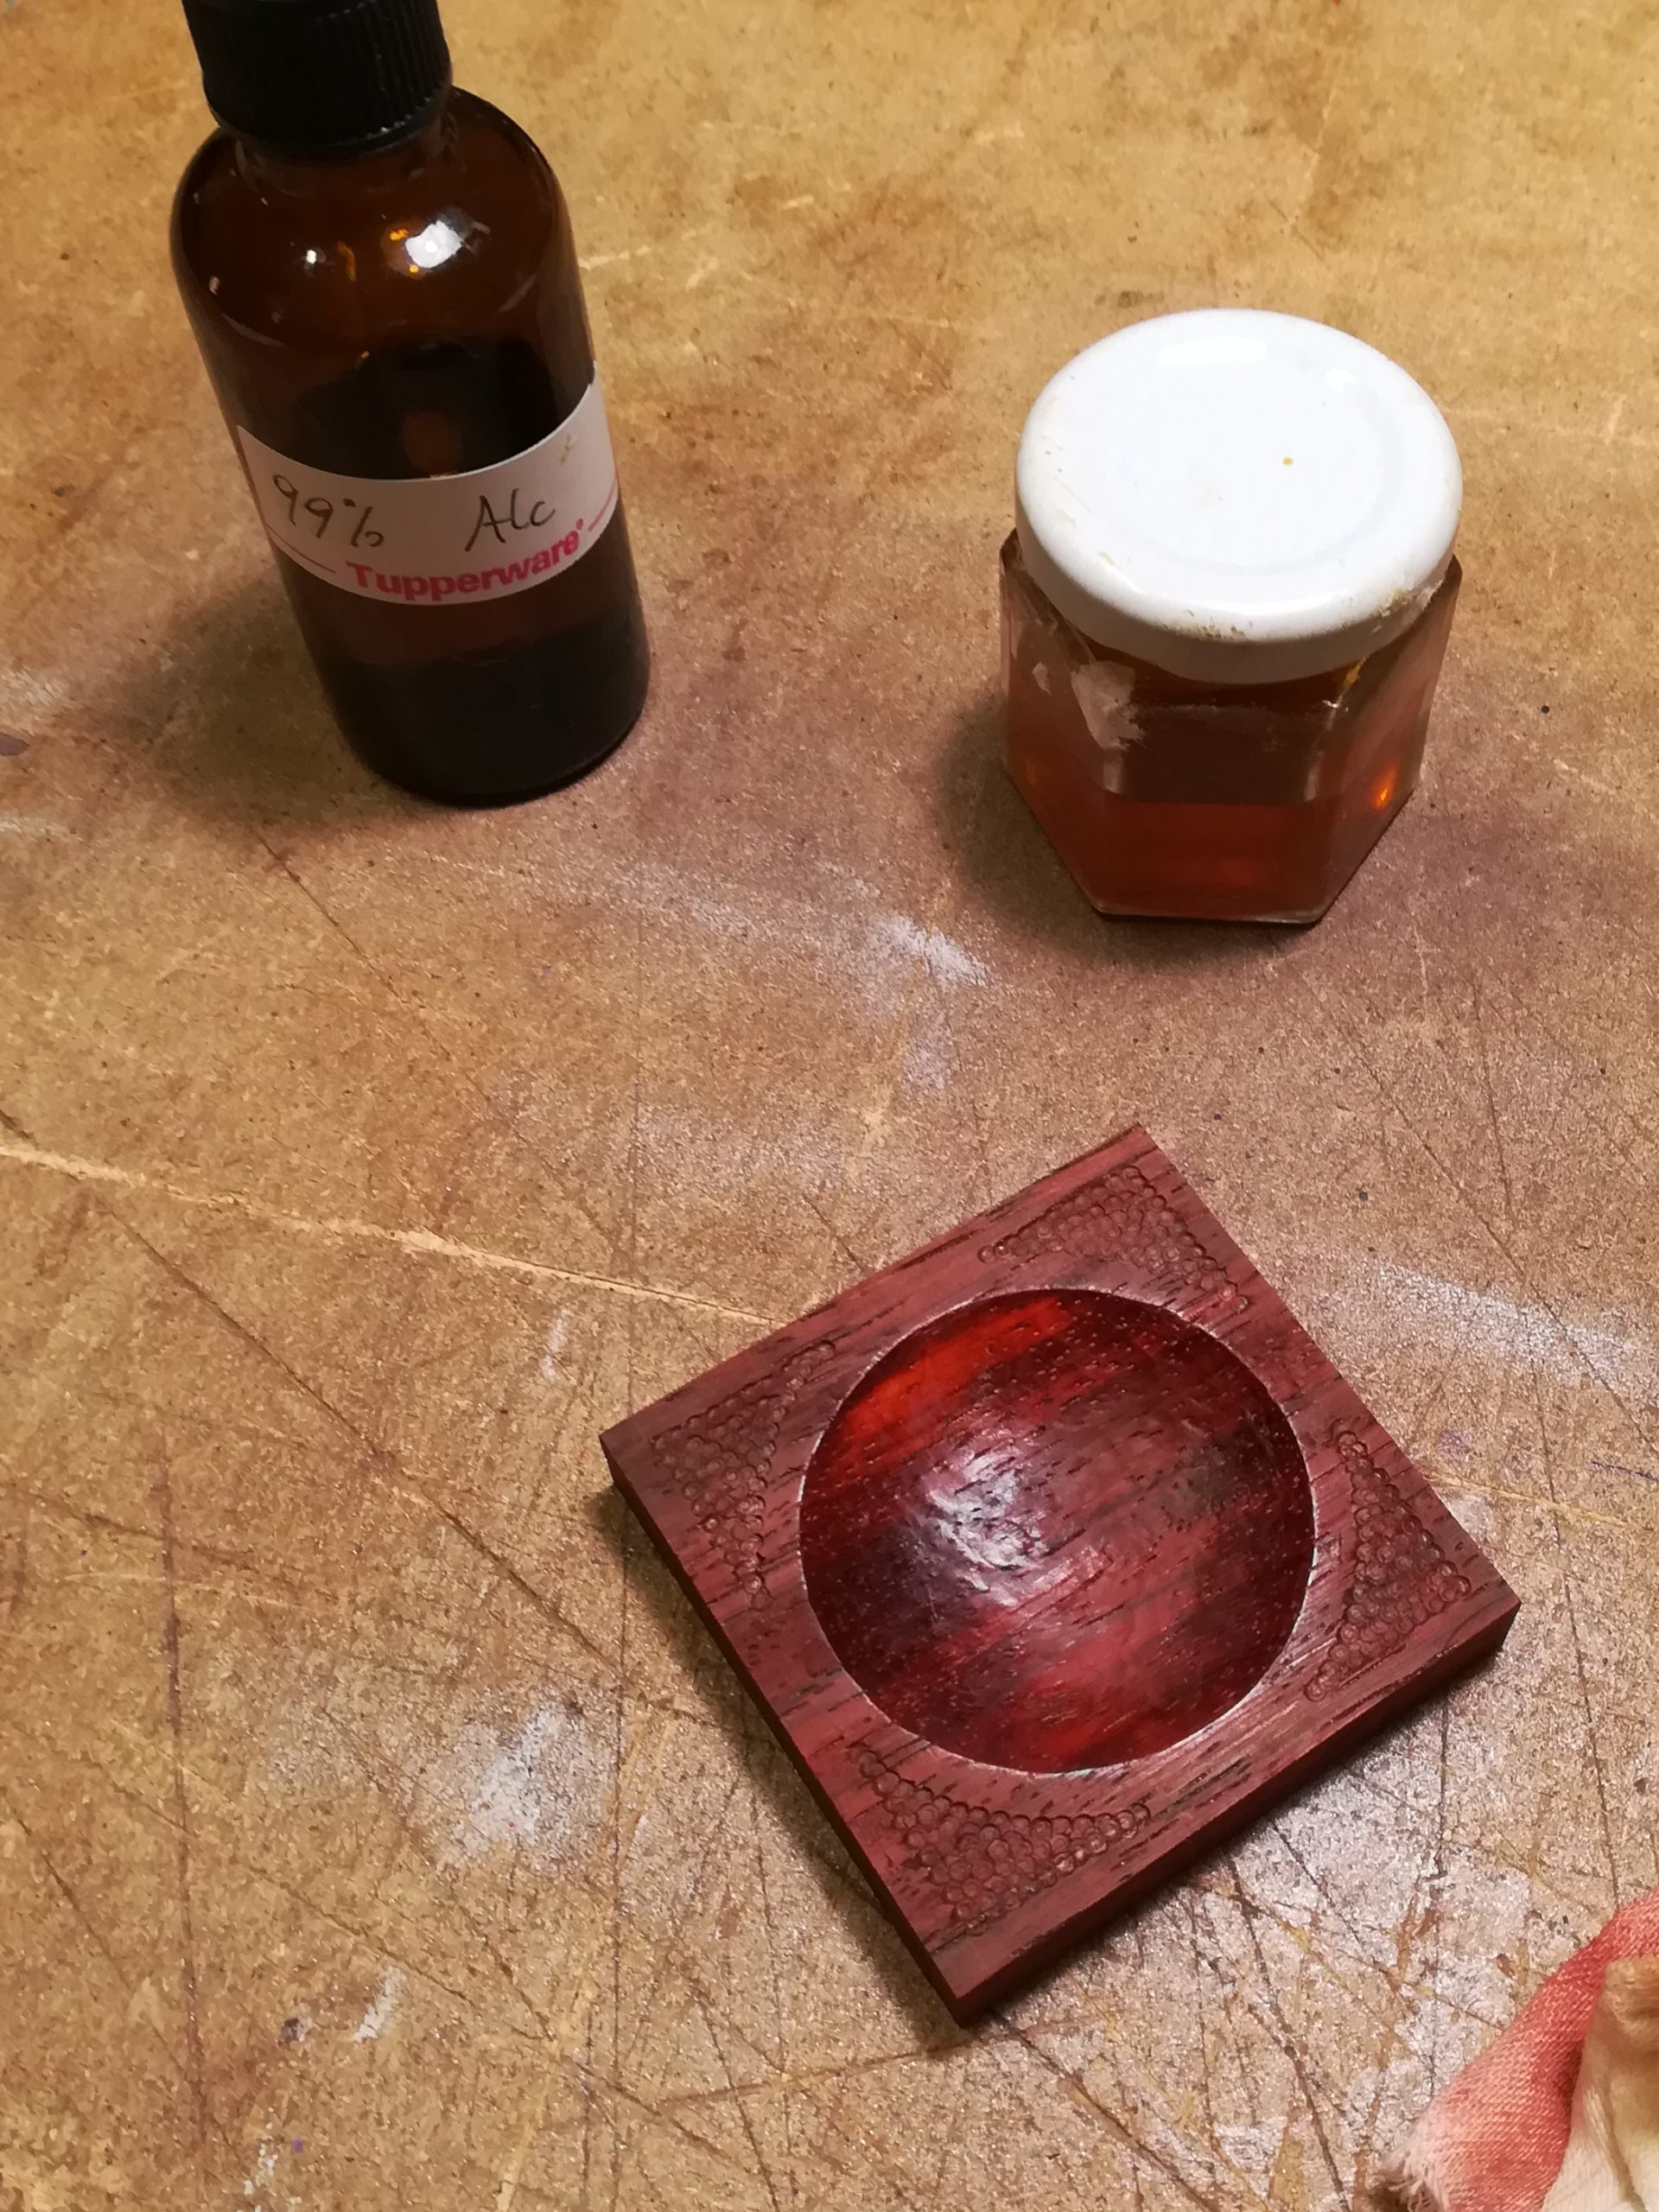
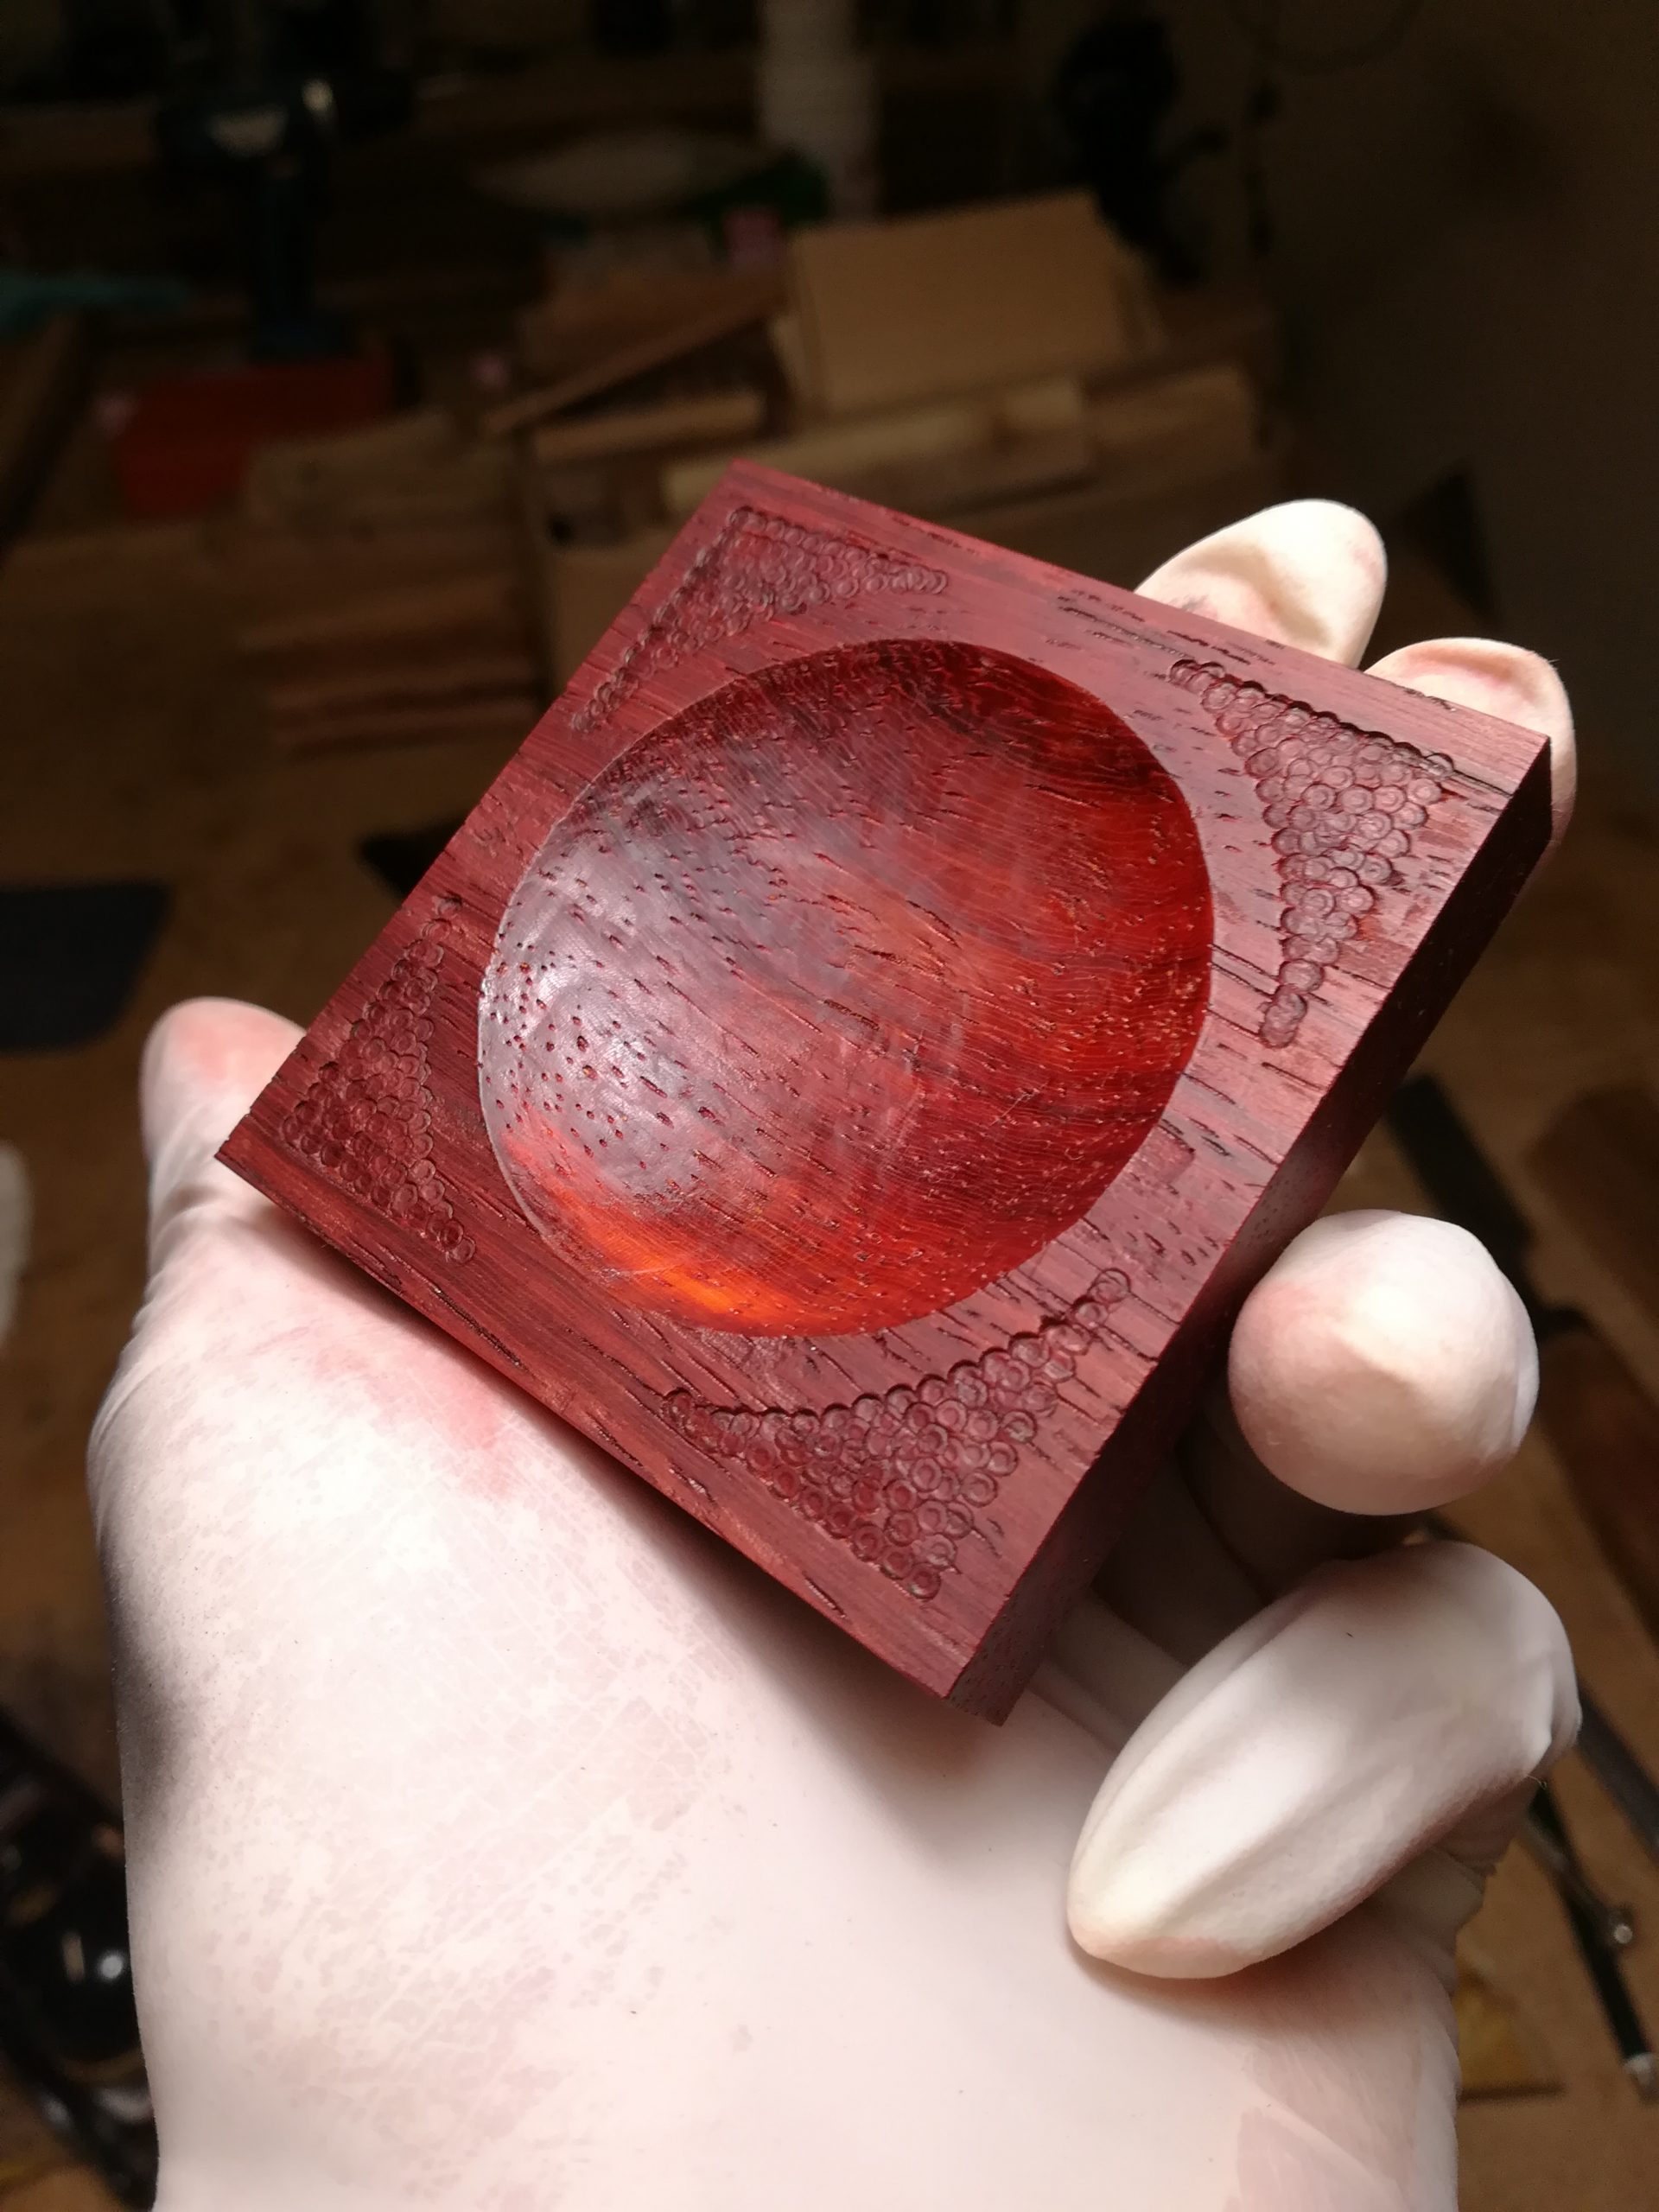
With all the bits done, it was time for finishing. Which in this case meant applying a first coat of finish, rather than completing the project. While glue-up would feel natural as the next step, surface treatment often makes more sense. Usually it’s much easier to handle single, simple parts as opposed to a fully assembled project with lots of nooks and crannies that can become a real hassle to get to. My go-to finishes are some form of oil that will polymerize (eg. walnut, poppy seed) and shellac. The latter is especially excellent at achieving a desired sheen and extra layer of depth to smoothly cut or planed surfaces that already feature a mesmerizing shimmer of their own. In this project I leveraged the combination of those two along with the properties of Padauk to further enhance the contrast between the cut bowl area and the rest. As mentioned earlier, this is a very oily wood, so my first step was to wipe it all down with some 99% alcohol, especially the inside of the bowl.
What I did not mention yet is that all wood usually darkens (and/or discolours) over time, but oiled up even more so, further depending on the oil used, with walnut being high on the scale, poppy very low. This also brings me to a somewhat sad truth. While Padauk sports an intensely bright orange-red after a fresh cut, it will darken considerably as time goes on, along with the red likely desaturating and shifting into more of a purple hue. It makes me wonder if the high natural oil content is part of that, or it’s all just the fleeting stability of the pigments. Either way it is what it is and there’s nothing to truly prevent that change, short of locking away the piece in a dark place.
I tried however, to utilize a difference of finishes. The bowl gets an extra boozy wipe-down to remove as much oil as possible, followed by a generous application of super-blonde shellac, which should at least reduce oxidation a little. The outside received a good wiping of walnut oil instead, to push its descent into darkness.
Next it was time for the step that makes me the most nervous of them all. Glue up. Since I’m using exclusively animal based glues like hide or bone glue, the process is always reversible with some water and heat. So while there is no worry about forever fusing parts in a wrong or incomplete way, there is the potential for annoyance and in worst case damage.
Aiming for joints fitting as tightly as possible to make sure they are strong means there is little tolerance left. Animal glues being water based and wood being hygroscopic leads to the joints swelling at least slightly and along with increased friction of wet wood versus dry, it can result in a lot of pressure being needed to get a tenon all the way into its mortice. Ideally you use as little glue as needed, taking care to not clamp or mallet-hit anything at bad angles or with too much force.
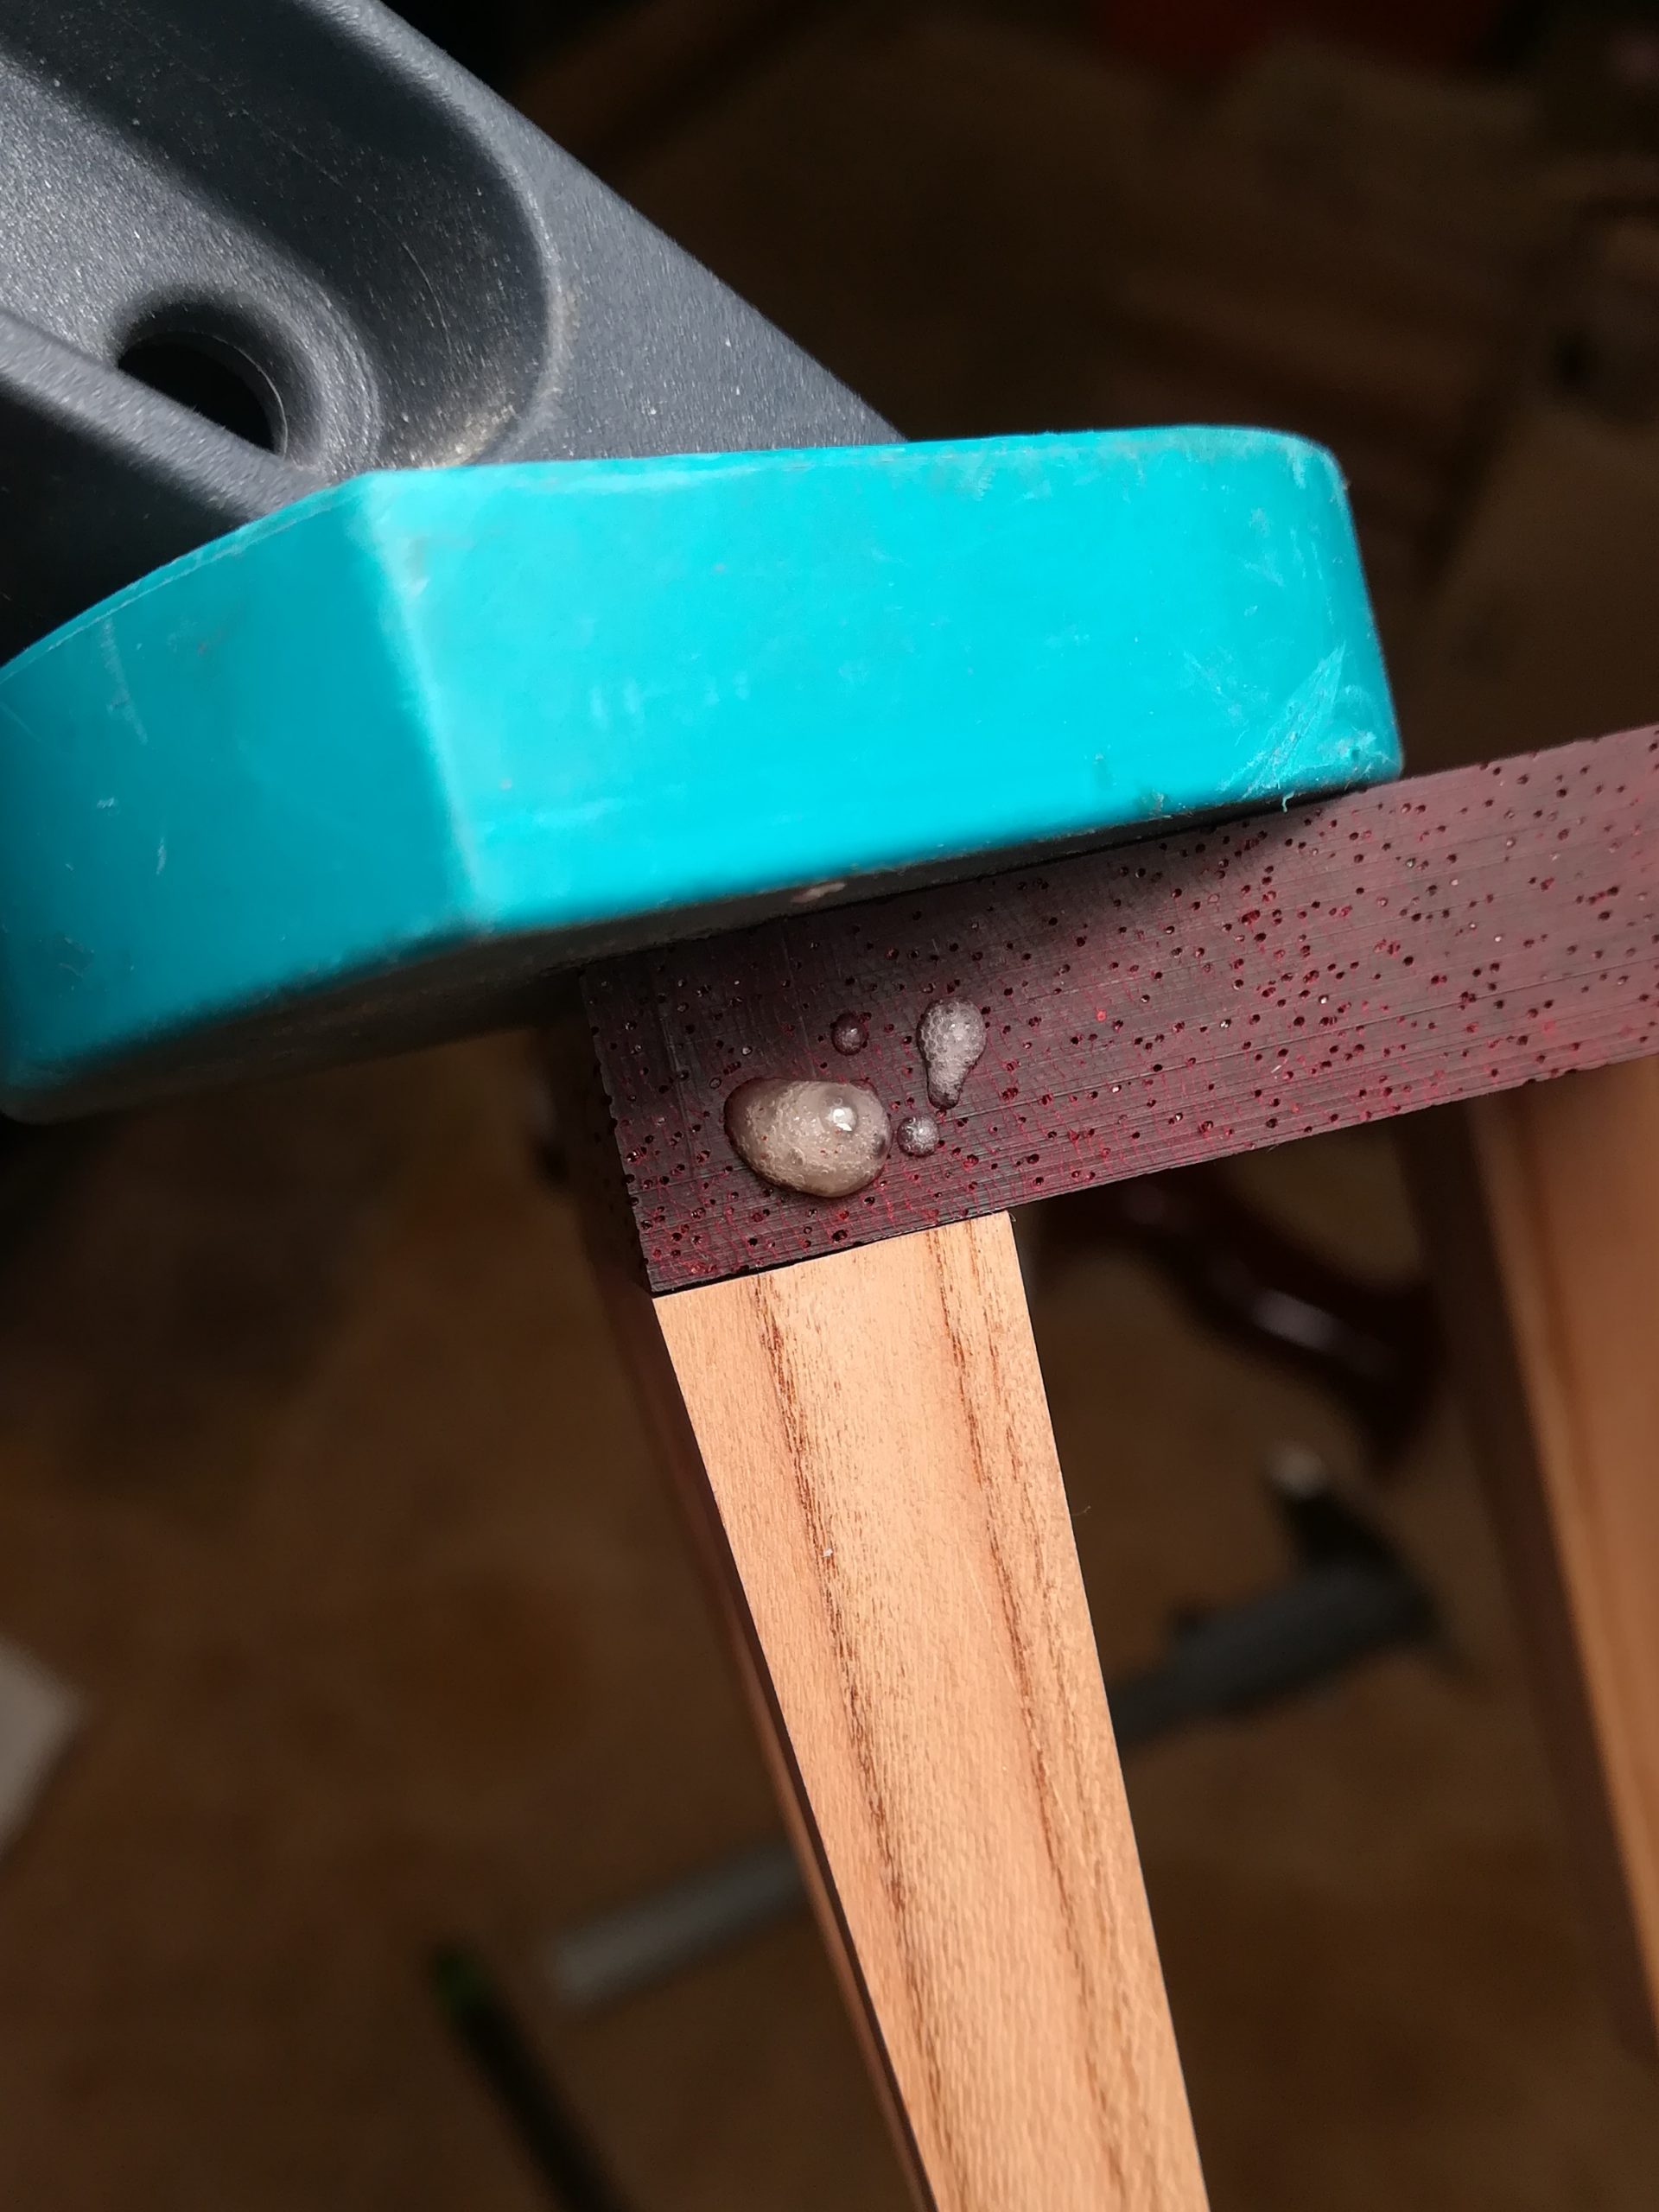
Padauk is actually a great example to show off just how tight these joints are by virtue of glue getting pushed out through its big pores rather than the joints themselves at clamping time.
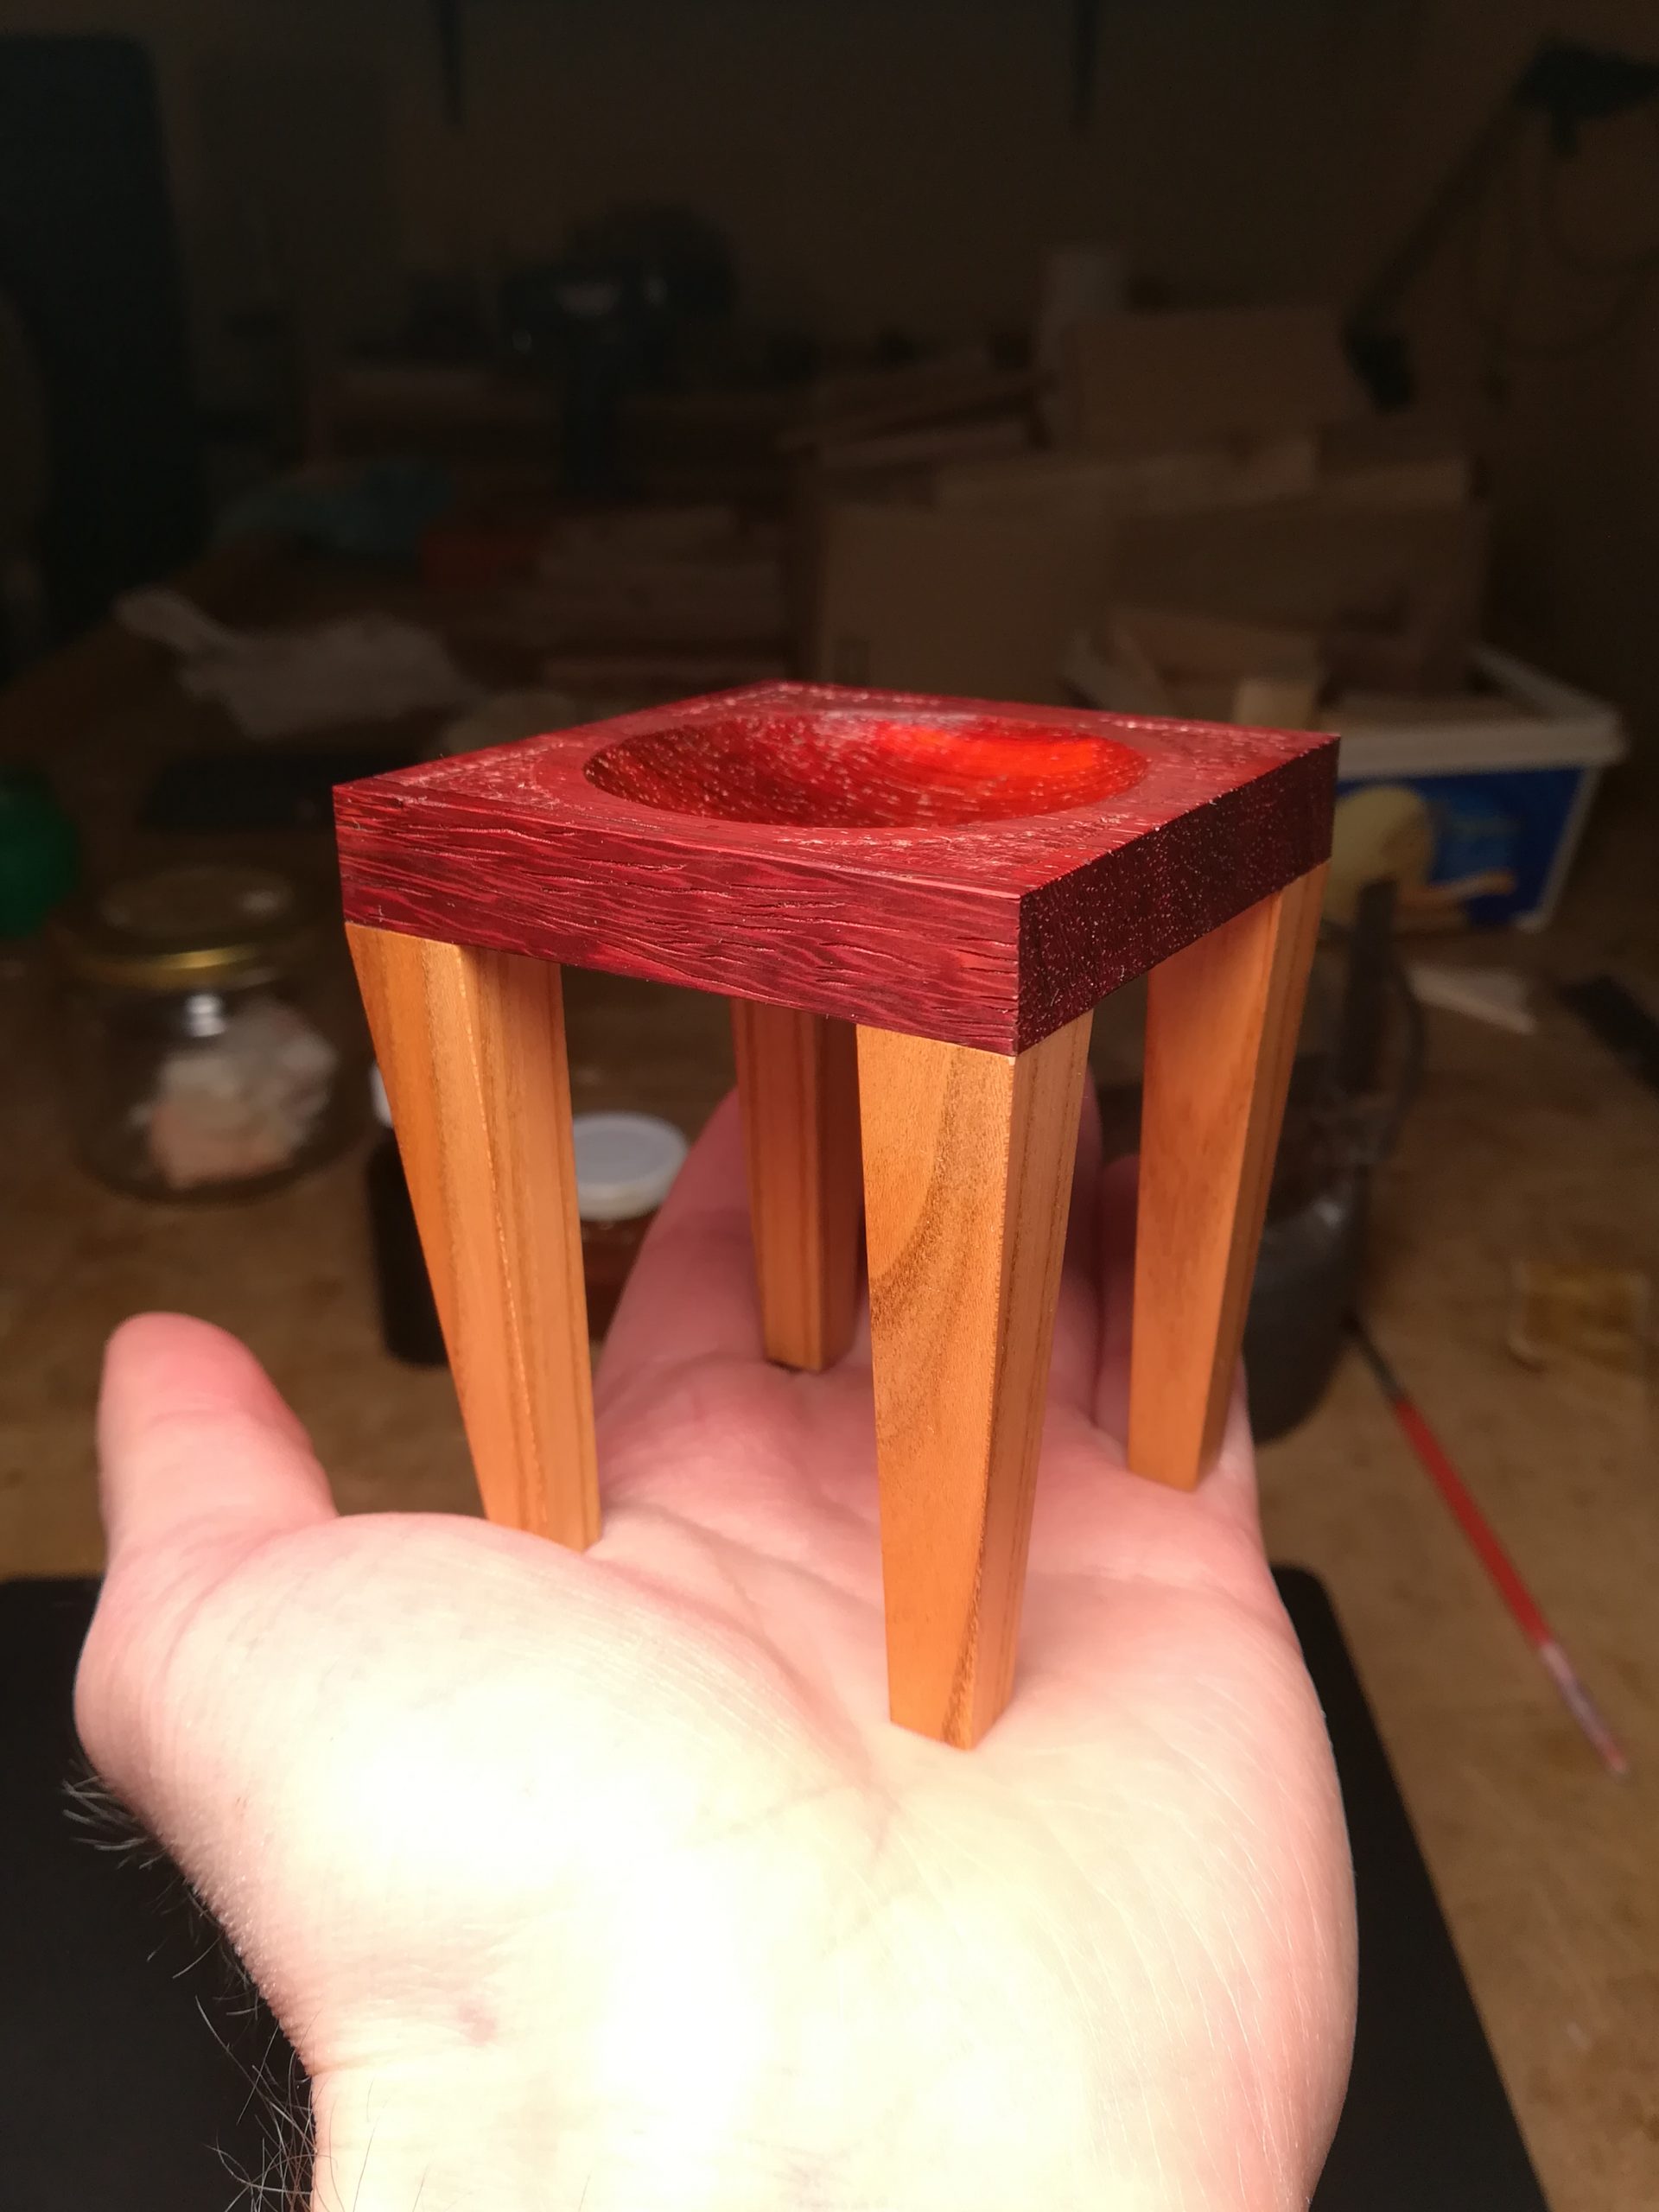
Leg after leg went in without issues, bringing the little bowl-table very near completion. The only things left to do were some more surface treatment and softening the hard edges with either a slight bevel via handplane, or rounding them with a smooth metal rod of sorts (I use a sculpting tool’s edge for this).
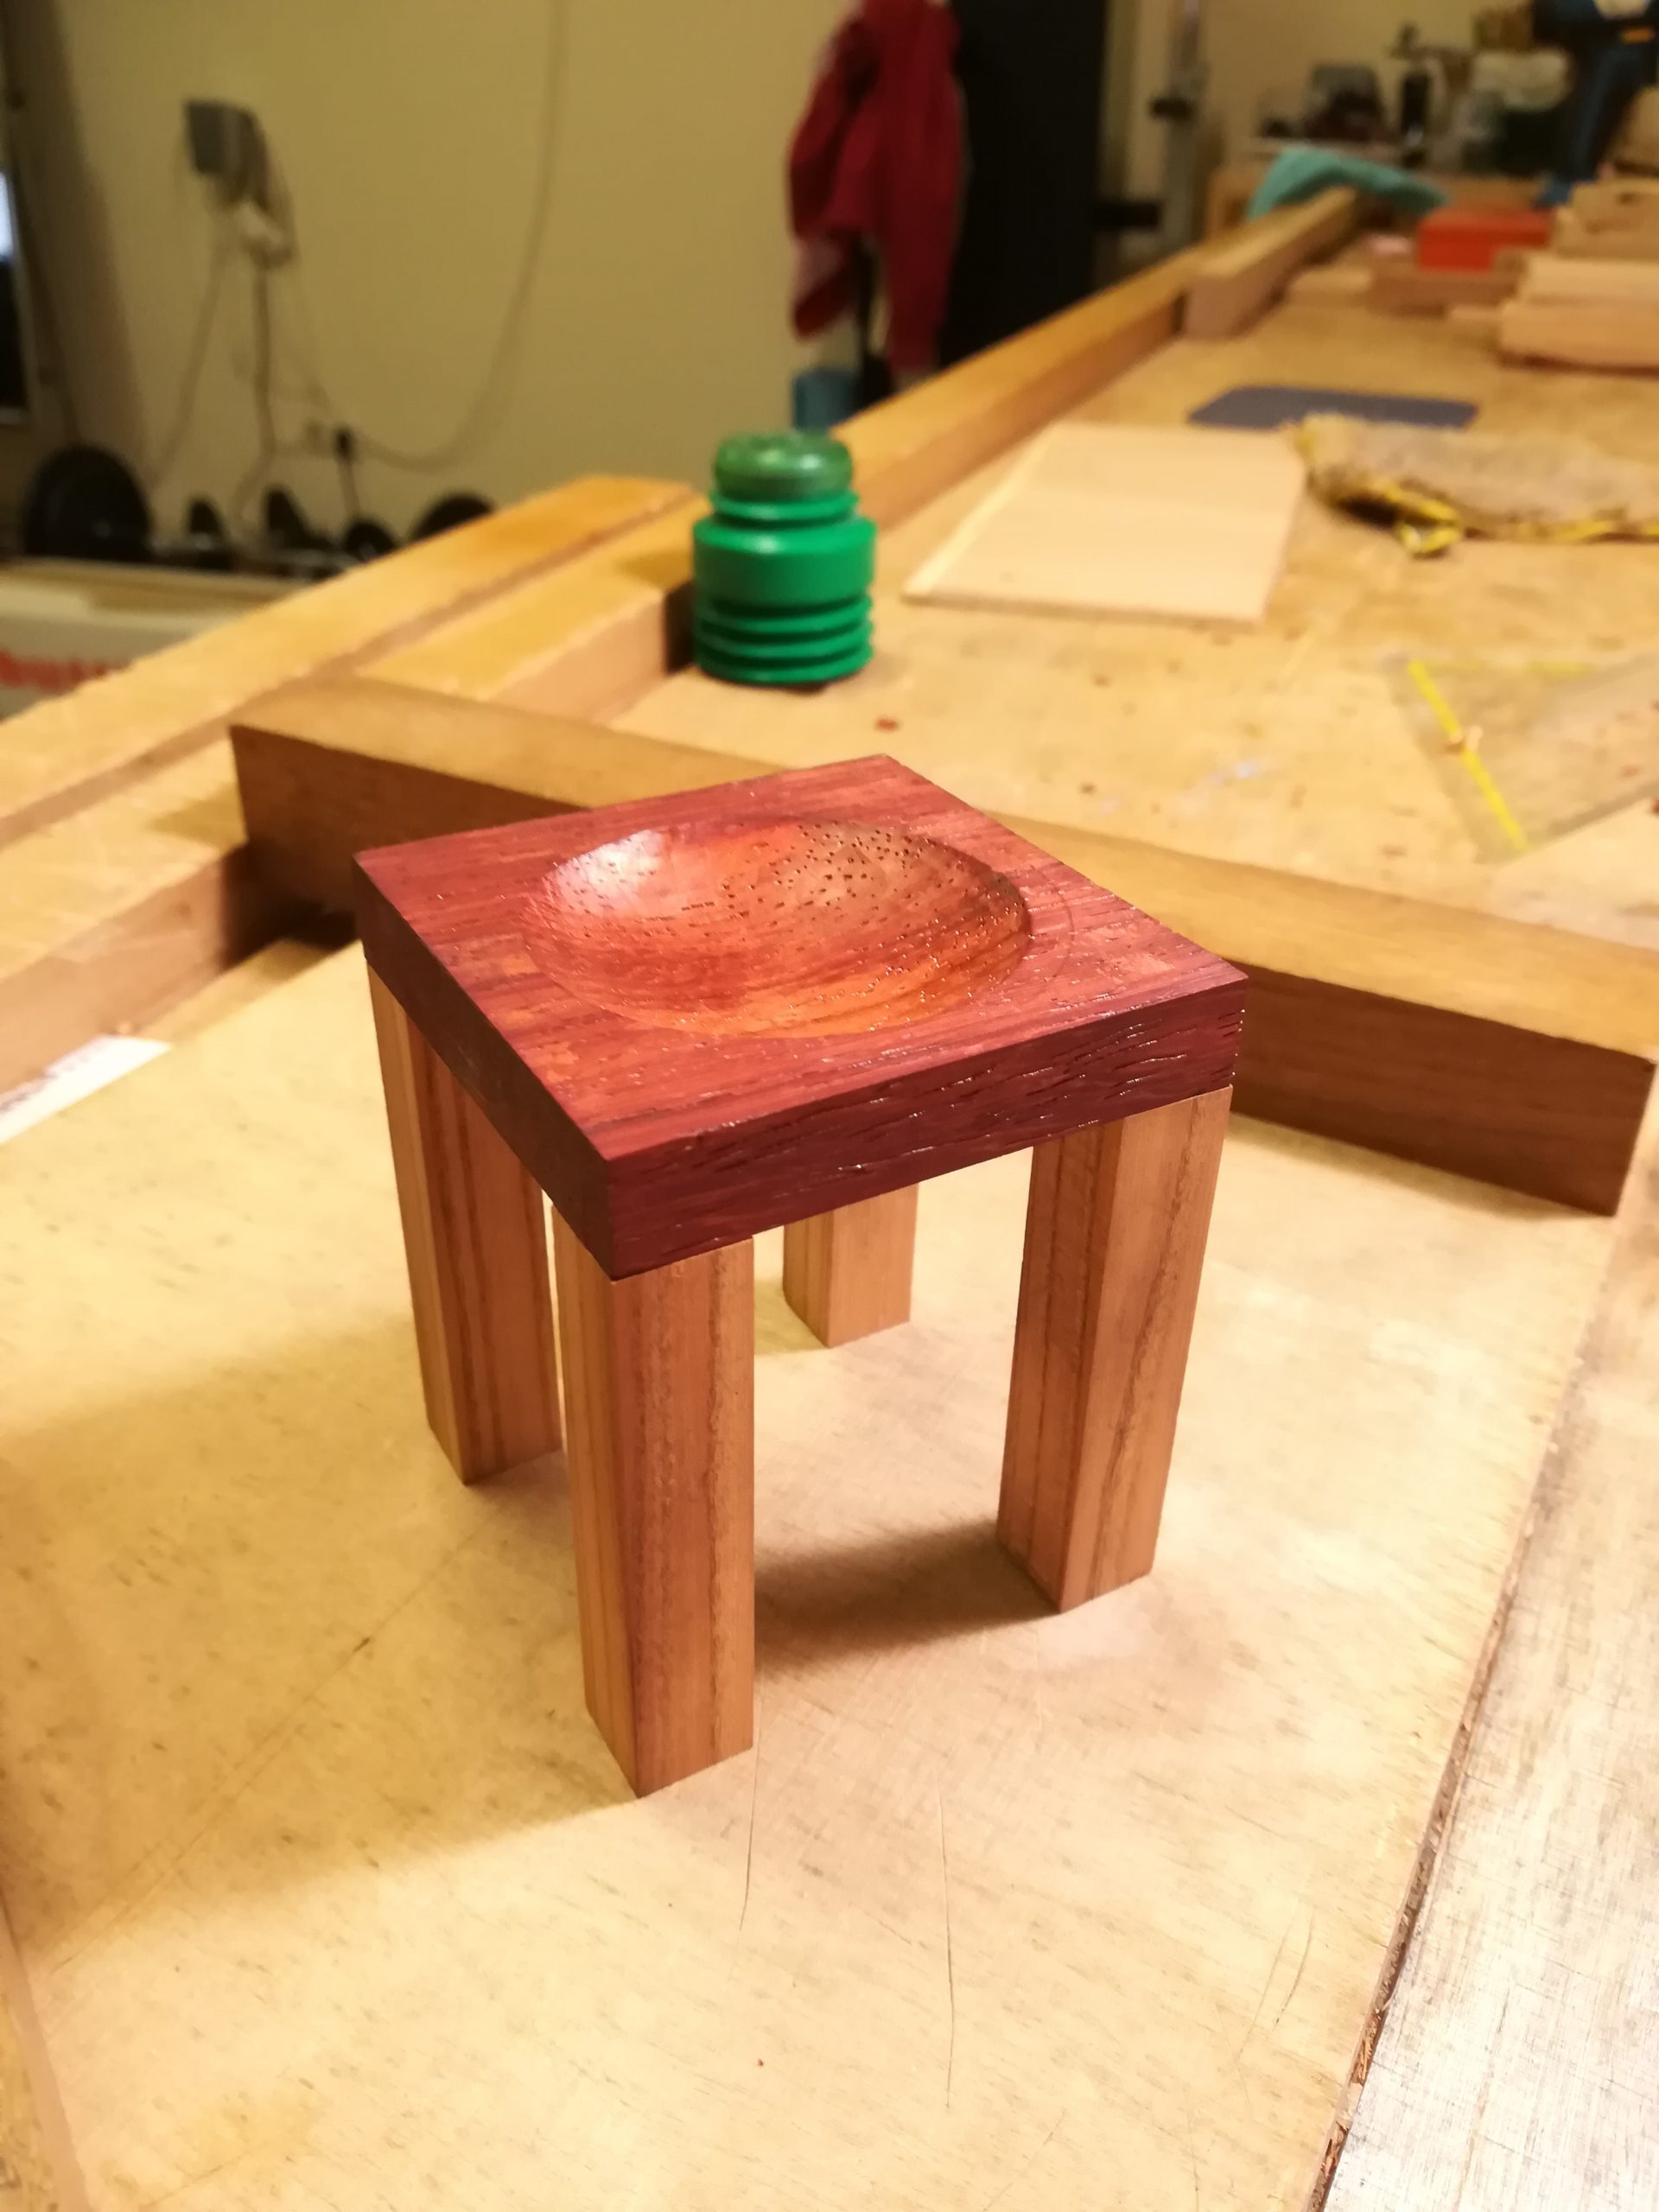
And with that, the little table-bowl was done and ready to be presented. As my niece enjoyed her gift, I hope you enjoyed getting a glimpse into the process of its creation. While not a step-by-step tutorial, my aim was to at least give a good overview of the work and considerations that go into even a small piece like this, while keeping it concise and most of all interesting and entertaining. Thank you for reading and I appreciate any thoughts or feedback, be it on the article or the artwork itself!
If you enjoyed this article and would like me to write more of its kind, you can support and allow me to do just that over on ko-fi via that fancy floating “support me” button on the left.
Thank you,
Horst-Peter